Introduction
Use this guide to replace the battery in your Nexus 6P smartphone. When reassembling apply new adhesive where it is necessary.
If your battery is swollen, take appropriate precautions.
Ce dont vous avez besoin
-
-
Use a SIM card eject tool, to pop out and remove the SIM card tray.
-
Use an iOpener to loosen the adhesive underneath the small plastic cover at the bottom of the phone.
-
-
-
Use an iOpener to loosen the adhesive underneath the glass cover at the top of the phone.
-
Insert a knife between the phone and the glass cover. Pry up the glass cover until you can insert an opening pick.
-
-
-
-
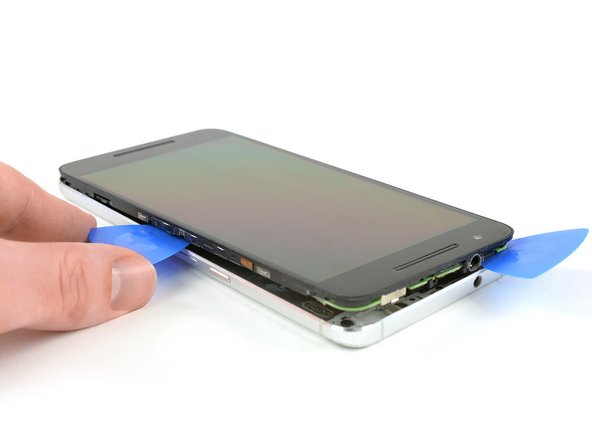
Insert a razor knife between the metal back cover and the front glass to create a gap. Insert an opening pick into the gap and slide it to the top right corner.
-
Insert a second opening pick and slide it to the top left corner.
-
Slide the opening picks along the edges to seperate the plastic clips, holding back cover and midframe together.
-
Remove the rear cover.
-
-
-
Unscrew the Phillips #00 screw.
-
Use tweezers to remove the metal plate.
-
-
-
Use the flat end of a spudger to disconnect the interconnect cable from the daughterboard.
-
Use an iOpener to loosen the adhesive under the battery.
-
-
-
Insert the flat end of a spudger as deep as the notch and carefully slide along the edge to cut the adhesive…
-
Use a plastic card to cut the remaining adhesive on the left side underneath the battery.
-


To reassemble your device, follow these instructions in reverse order. When reassembling your phone apply new adhesive where it is necessary.
After completing this guide, calibrate your newly-installed battery.
To reassemble your device, follow these instructions in reverse order. When reassembling your phone apply new adhesive where it is necessary.
After completing this guide, calibrate your newly-installed battery.
Annulation : je n'ai pas terminé ce tutoriel.
138 autres ont terminé cette réparation.


37 commentaires
In case anyone is wondering, I was able to get the two small back covers to reassemble without using new adhesive. I didn’t have any on hand so I just used a heat gun to warm the adhesive that was left over and firmly held them in place. So far it seems to be holding well.
Adhesive? I’m wondering what kind of adhesive to use for reassembly?
Didn’t need any additional adhesive and the iopener worked fine for both loosening adhesive for disassembly and getting it sticky again for reassembly.. Managed not to break the glass camera cover!
any tips on using the iOpener for the top glass? It dosen’t seem to be helping me at all. :(
These were great instructions, but have to admit this was quite a hair-raising process because of the amount of heat that was required to soften the adhesive and the amount of force needed to pry things apart. Luckily, I have a digital hot air source (Sparkfun 303D) used for surface mount electronics. The safe temperature ended up being about 200 F. If I did it again would be much easier because I know the glass piece at the top is not as fragile as I thought. So, heat gun, definitely. iOpener would be next to useless, especially to loosen under battery. But be careful not to concentrate the heat and melt plastic or make glass crack. Adhesive under battery definitely reusable, easy to peel off old battery. Go slow with the whole process and it will be successful!