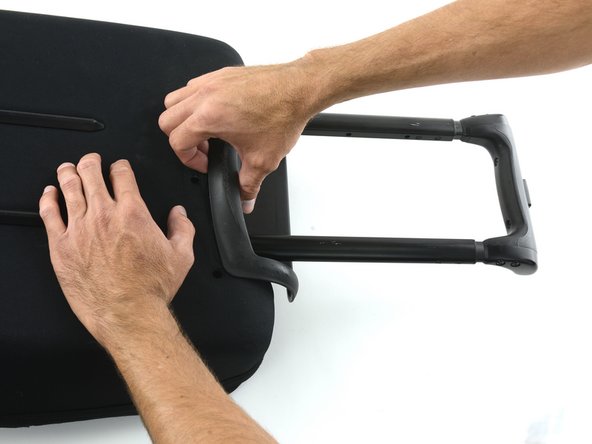
Aller au contenu principal

Patagonia Transport Roller Telescoping Handle Replacement

Ce dont vous avez besoin

  1. Patagonia Transport Roller Telescoping Handle Replacement, Telescoping Handle: étape 1, image 1 de 3 Patagonia Transport Roller Telescoping Handle Replacement, Telescoping Handle: étape 1, image 2 de 3 Patagonia Transport Roller Telescoping Handle Replacement, Telescoping Handle: étape 1, image 3 de 3
    • Lay your Transport Roller on its back on a table.

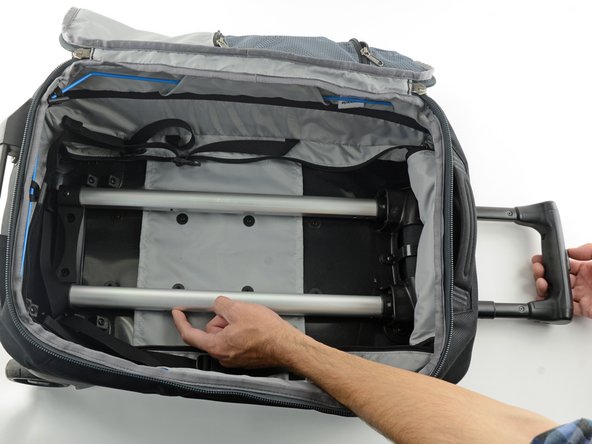
    • Unzip the main compartment.

  2. Patagonia Transport Roller Telescoping Handle Replacement: étape 2, image 1 de 3 Patagonia Transport Roller Telescoping Handle Replacement: étape 2, image 2 de 3 Patagonia Transport Roller Telescoping Handle Replacement: étape 2, image 3 de 3
    • Flip open the main compartment of your bag.

  3. Patagonia Transport Roller Telescoping Handle Replacement: étape 3, image 1 de 2 Patagonia Transport Roller Telescoping Handle Replacement: étape 3, image 2 de 2
    • Unbuckle the internal compression straps.

  4. Patagonia Transport Roller Telescoping Handle Replacement: étape 4, image 1 de 3 Patagonia Transport Roller Telescoping Handle Replacement: étape 4, image 2 de 3 Patagonia Transport Roller Telescoping Handle Replacement: étape 4, image 3 de 3
    • Unzip the the zipper in the gray inner lining of the bag, opening the lining as you go.

  5. Patagonia Transport Roller Telescoping Handle Replacement: étape 5, image 1 de 2 Patagonia Transport Roller Telescoping Handle Replacement: étape 5, image 2 de 2
    • Remove the two Phillips #1 screws from the retaining bracket at the bottom of the bag.

    • These screws are approximately 2 cm in length.

  6. Patagonia Transport Roller Telescoping Handle Replacement: étape 6, image 1 de 2 Patagonia Transport Roller Telescoping Handle Replacement: étape 6, image 2 de 2
    • Remove the five Phillips #1 screws from the retaining bracket at the top of the bag.

    • These five screws are 1.5 cm in length, visibly shorter than the screws removed from the bottom retaining bracket.

  7. Patagonia Transport Roller Telescoping Handle Replacement: étape 7, image 1 de 1
    • Remove the black plastic retaining bracket from the top of the frame.

  8. Patagonia Transport Roller Telescoping Handle Replacement: étape 8, image 1 de 3 Patagonia Transport Roller Telescoping Handle Replacement: étape 8, image 2 de 3 Patagonia Transport Roller Telescoping Handle Replacement: étape 8, image 3 de 3
    • Using your thumb, depress the button on the telescoping handle.

    • With the button depressed, extend the handle by pulling away from the bag.

  9. Patagonia Transport Roller Telescoping Handle Replacement: étape 9, image 1 de 3 Patagonia Transport Roller Telescoping Handle Replacement: étape 9, image 2 de 3 Patagonia Transport Roller Telescoping Handle Replacement: étape 9, image 3 de 3
    • Turn the bag over so that the back is facing up.

    • Remove the telescoping handle assembly by pulling it out of the top of the bag.

    • This step may take some force. It may help to push down on the back of the bag while pulling up on the outer edge of the plastic handle guard so the screw anchors can move up and out of the holes in the hard backing.

  10. Patagonia Transport Roller Telescoping Handle Replacement: étape 10, image 1 de 3 Patagonia Transport Roller Telescoping Handle Replacement: étape 10, image 2 de 3 Patagonia Transport Roller Telescoping Handle Replacement: étape 10, image 3 de 3
    • If you are having trouble with your handle, check the pins inside the bag.

    • When you depress the button on the handle, the two pins on the sides of the handle should retract, freeing the handle to slide.

    • If either pin is not retracting when the button on the handle is depressed, push the pin into the hole using your finger or another thin object such as a pencil or screwdriver.

  11. Patagonia Transport Roller Telescoping Handle Replacement: étape 11, image 1 de 3 Patagonia Transport Roller Telescoping Handle Replacement: étape 11, image 2 de 3 Patagonia Transport Roller Telescoping Handle Replacement: étape 11, image 3 de 3
    • With the pin depressed, pull the handle to extend it from the bag.

Conclusion

To reassemble your luggage, follow these instructions starting with Step 9. You’ll be working backwards now from that point in the guide, following the steps in reverse order.

Marty Rippens

Membre depuis le 09/18/15

15 922 Réputation

2 tutoriels rédigés

Équipe

iFixit Membre de l'équipe iFixit

Staff

135 membres

16 817 tutoriels rédigés

0 commentaires

Ajouter un commentaire

Nombre de vues :

Dernières 24 heures : 1

7 derniers jours : 9

30 derniers jours : 24

Total : 1,473