Aller au contenu principal

Philips Satinelle Disassembly

Ce dont vous avez besoin

  1. Philips Satinelle Disassembly, Philips Satinelle Disassembly: étape 1, image 1 de 2 Philips Satinelle Disassembly, Philips Satinelle Disassembly: étape 1, image 2 de 2
    • Unplug the device and remove the purple guard.

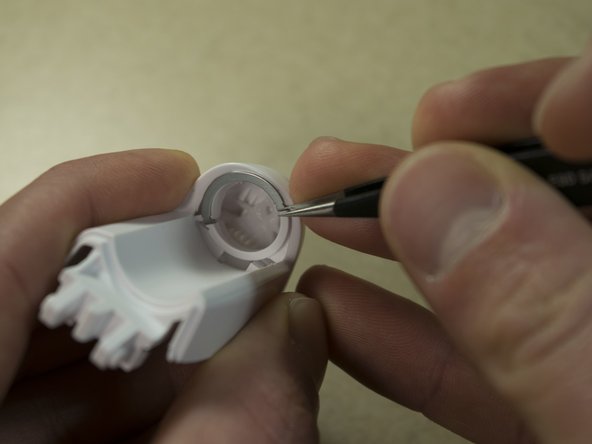
    • Remove the head by pressing the right side of the head (with the device facing away from you).

    • You will hear a 'click' and the head will become dislodged from the body of the device.

  2. Philips Satinelle Disassembly: étape 2, image 1 de 3 Philips Satinelle Disassembly: étape 2, image 2 de 3 Philips Satinelle Disassembly: étape 2, image 3 de 3
    • While wearing safety glasses, use a plastic opening tool to pry from right to left to pry out the tensor clip.

    • Be careful not to lose the clip. It will likely fly off when it releases.

  3. Philips Satinelle Disassembly: étape 3, image 1 de 1
    • The left side will swing down.

    • Remove the Tweezers.

  4. Philips Satinelle Disassembly: étape 4, image 1 de 3 Philips Satinelle Disassembly: étape 4, image 2 de 3 Philips Satinelle Disassembly: étape 4, image 3 de 3
    • Remove the plastic component that swings down.

    • Use fingernails to lift clips from stubs.

  5. Philips Satinelle Disassembly: étape 5, image 1 de 3 Philips Satinelle Disassembly: étape 5, image 2 de 3 Philips Satinelle Disassembly: étape 5, image 3 de 3
    • Using Needle Nose pliers remove metal roller track on both sides of the Tweezers Head.

  6. Philips Satinelle Disassembly: étape 6, image 1 de 3 Philips Satinelle Disassembly: étape 6, image 2 de 3 Philips Satinelle Disassembly: étape 6, image 3 de 3
    • Use a spudger to pry the gear housing unit from the base.

  7. Philips Satinelle Disassembly: étape 7, image 1 de 3 Philips Satinelle Disassembly: étape 7, image 2 de 3 Philips Satinelle Disassembly: étape 7, image 3 de 3
    • Use your thumbnail and a pair of needle nose pliers to push out the gear housing retention pin.

Conclusion

To reassemble your device, follow these instructions in reverse order.

6 autres ont terminé cette réparation.

Nathan Christian

Membre depuis le 11/11/17

505 Réputation

3 tutoriels rédigés

Équipe

IUPUI, Team S5-G5, Wilson Fall 2017 Membre de l'équipe IUPUI, Team S5-G5, Wilson Fall 2017

IUPUI-WILSON-F17S5G5

3 membres

4 tutoriels rédigés

6 commentaires

can we open the lower part which holds the motor and gear..

actualy the gear which holds the motor is gone bad i think.. so i want to replace it ..

can this be fixed..??

Md Wasim Anwar - Réponse

Same here .. wanted to open the bottom part which holds a longish gear .. the top gear fits in a very small portion of the bottom long gear so the long gear has worn out in just that area

S Ahooja - Réponse

similar here, wanted to open the lower part where the cable goes in. the cable is broken at the entry.

frankgerling - Réponse

Thank you for this great tutorial. It really helps!

Can you please give us the dimensions for the gear’s teeth in step 7 and the corresponding gear in step 2 in the Philips Satinelle Motor Replacement tutorial? I can 3D print the gears, but I can’t find the dimensions online and the gears are simply to eroded to be able to measure them.

Albert Westhoff - Réponse

Ajouter un commentaire

Nombre de vues :

Dernières 24 heures : 2

7 derniers jours : 17

30 derniers jours : 73

Total : 8,117