Il est possible que cette traduction ne reflète pas les dernières mises à jour du tutoriel source. Aidez à mettre à jour la traduction ou bien consultez le tutoriel source.
Introduction
Le remplacement de l'ensemble carte mère vous offre une nouvelle mémoire flash ainsi qu'une nouvelle batterie.
Ce dont vous avez besoin
-
-
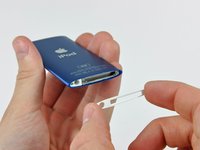
Insérez le bord d'un outil d'ouverture pour iPod dans l'espace entre la coque extérieure et le cache supérieur.
-
Faites levier sur le cache supérieur pour le décoller de l'adhésif le fixant au dispositif de retenue de l'écran.
-
-
-
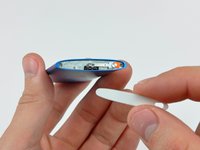
Lorsque l'écran est sorti du boîtier autant que possible, appuyez doucement sur le bord inférieur de la vitre jusqu'à ce qu'elle se soulève légèrement (~ 1 mm).
-
Appuyez vos pouces sur le bord inférieur de la vitre pour la faire glisser vers le bas et dans le boîtier jusqu'à ce que le bord supérieur sorte du boîtier.
-
-
-
-
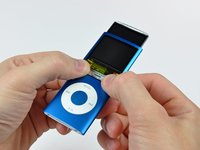
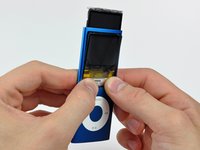
Utilisez le bord d'un outil d'ouverture pour iPod pour décoller le bouton Arrêt de l'adhésif le fixant au bord supérieur de l'écran.
-
-
-
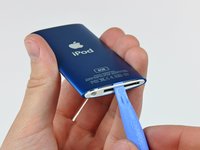
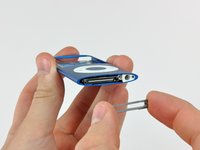
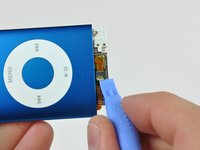
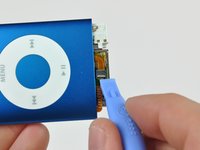
Insérez un outil d'ouverture pour iPod entre le joint inférieur et le connecteur de dock.
-
Décollez le joint inférieur de l'adhésif le fixant au Nano et mettez-le de côté.
-
-
-
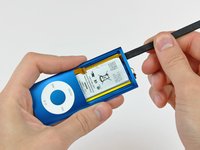
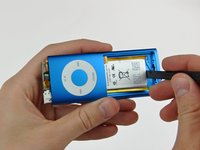
Utilisez l'extrémité plate d'un spudger pour décoller la batterie de l'adhésif qui l'attache à la coque extérieure.
-
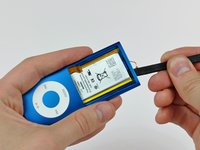
Utilisez l'extrémité plate d'un spudger pour pousser l'ensemble formé par la carte mère et la batterie légèrement hors du fond du Nano. Arrêtez-vous une fois qu'elle se soulève un peu.
-


Pour réassembler votre appareil, suivez ces instructions dans l'ordre inverse.
Pour réassembler votre appareil, suivez ces instructions dans l'ordre inverse.
Annulation : je n'ai pas terminé ce tutoriel.
37 autres ont terminé cette réparation.
Merci à ces traducteurs :
91%

Ces traducteurs nous aident réparer le monde ! Vous voulez contribuer ?
Commencez à traduire ›

7 commentaires
Wouldn't it be easier to open the ZIF socket whilst it is still stuck down?
On step 11 I found that the cable was still stuck down by the bit under the metal case. The opening tool failed to get at this.
I cut the live head off a match and trimmed it to a long chisel edge.
Pine is soft,strong and non conductive.I was able to poke under the metal body and release the remaining adhesive seal.
Failure. Another broken iPod due to the incompleteness of step 20. I will add a step 21 with description but I will need some nice looking pictures.
Mine broke because of accidentally pulling the board out too fast, but it's dead anyways.
TOOLS: I don't see any offset legs in the screws themselves, however either my 00 phillips is bigger than yours, or these screws are actually 000 phillips. In either case, I found that the heads were full of adhesive, and using a tiny flathead driver and a sharp knife I was able to clear it out just enough to get the screws out.