Il est possible que cette traduction ne reflète pas les dernières mises à jour du tutoriel source. Aidez à mettre à jour la traduction ou bien consultez le tutoriel source.
Ce dont vous avez besoin
-
-
Enlevez le tiroir SIM.
-
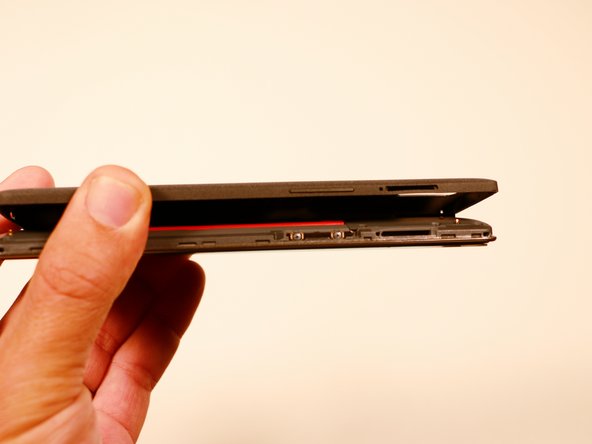
A l'aide d'un outil d'ouverture en plastique, séparez délicatement la coque arrière du corps principal du téléphone. Soyez très prudent au niveau de la fente de la carte SIM et aux autres endroits fragiles.
-
Vous pouvez rencontrer une certaine résistance en raison des clips de verrouillage situés sur le rebord interne du smartphone. Ne vous inquiétez pas. Déplacez délicatement l'outil d'ouverture dans une seule direction plutôt que de zigzaguer d'un endroit à l'autre.
-
De haut en bas, de gauche à droite, dans le sens des aiguilles d'une montre ou dans le sens inverse des aiguilles d'une montre. Une fois que vous avez fait le tour de la moitié de l'appareil, la coque est facilement démontable à la main.
-
-
-
Retirez les caches en plastique à l'aide d'une pincette.
-
Retirez les trois vis de 3,175 mm qui se trouvent sous ces caches. Utilisez un tournevis cruciforme #00.
-
Utilisez le même tournevis pour retirer les six autres vis de 3,175 mm.
A needle works best to remove the plugs.
I second this. I used a sewing pin and the plugs came out in no time!
Liam Ong -
when I lifted the motherboard cover the battery cable stuck on it so that I lifted both, the plastic cover and the cable - step 4 below was not necessary to perform. Be careful!
anyone know what is the 6 orange screws in step 2 are called?
e.g. M2 x 2
I lost some screws.
So where can I buy some replacement of these screws?
-
-
-
À l'aide d'un outil d'ouverture en plastique, soulevez délicatement le cache en plastique noir et retirez-le du téléphone.
-
-
-
-
Après avoir retiré le cache de la carte mère, on constate que la batterie est intacte et qu'elle est reliée à la carte mère par une nappe noire.
-
A l'aide d'une spatule, commencez délicatement à soulever la batterie par le côté opposé à la nappe. La batterie est fixée par un adhésif de haute qualité qui maintient celle-ci dans son emplacement. Procédez avec prudence.
Is it OK to use the battery if I bent it during removal? I had to 'iron' it flat, but I think it might still be useable...
the best way to remove the battery is to lever the left side up from the bottom and remove it from the glue with an old credit card
Do this! it comes up very easily this way. All the adhesive is on the right side.
Great suggestion with a card to remove the battery!
Thanks for this trick saved me a lot of time
George P -
I second Dangerous Picture's suggestion. I found it very helpful to remove the ribbon from the dock (it was easy to do) before trying to remove the battery.
on my phone extensive use of glue was concentrated on just one side (right hand side). Not impossible to remove, little tricky
I mistakenly removed the battery with force, and the back peeled and brought out smoke, seemingly like it's gonna explode. Help !!!
-
-
-
Une fois la batterie dégagée, utilisez notre si pratique spatule noire afin de déconnecter la nappe de celle-ci.
Thought I was going to snap my battery in half but patience and slight pressure did the trick.
Also agreeing the battery should be disconnected as soon as possible.
From where do I procure a new battery for it?????????
There are several connectors to the motherboard. In the picture above, one connector above and, below the screw thread, three more connectors. Be careful to reconnect any connectors accidentally disconnected while disconnecting / removeing the battery. In my case the connector shown at the top of the row came unconnected.
salut, pour moi le connecteur à la nappe était collé au cache en plastique qui couvrait la carte mère … mais le reste s’est bien passé.
Merci pour le tuto !
Thanks Buddy, I replaced battery of my one plus one and when I switched it on, touch was not working. It was heart sinking panic moment...Then I came across https://forum.xda-developers.com/oneplus... post, simple trick of sliding piece of paper below battery solved and infact improved the touch response. Thanks !
Kifch nikmandha
When putting in the new battery, the battery ribbon cable did not line up with the dock on the motherboard, on the replacement battery I ordered from iFixIt. I was able to carefully peel back the foil covering ribbon cable, align the cable, then press the foil back in place. Now, everything seems to be working.
-
-
-
Une fois la batterie retirée, utilisez le spudger pour débrancher les rubans restants.
-
Notez qu'il existe deux rubans latéraux, un de chaque côté (volume haut / bas et alimentation), et un ruban supérieur ainsi que ceux du compartiment de la batterie.
the digitizer ribbon connector has a small plastic piece that blocks the connector from being removed through the slit. make sure to remove it (simple push with an opening tool). then you can remove the connector/ribbon cable.
All the ribbons came off easily after I found them, save for the volume buttons. Iended up tearing the ribbon trying to maneuver it out with the motherboard itself. Do you guys have any tips for removing the volume control ribbons? They seem to be held down by tiny extrusions in the phone.
Another method for the side ribbons (power/volume) is desoldering the connectors - since I couldn't find any promising way to detach the buttons without damage I took this route and had success. Also note that you do not need to remove the mainboard and cameras for replacing the screen - a slight tilt should be enough to access the top ribbon (which belongs to the display assembly and has to be removed) so the side ribbons can stay in place.
I removed the side ribbon for the volume buttons is really easy by using the plastic tool between the two volume buttons in direction from up (backside of the phone) to down (screen of the phone). Trying to remove it from the volume down direction end of the cable almost destroyed the volume down button, so don’t try it
I just had to replace my screen, I skipped the removal of the side ribons and that worked perfectly. So don’t consider this step as mandatory to a screen replacement.
-
-
-
Après avoir retiré les rubans, il y a une dernière vis. Une fois que vous avez supprimé ceci, la carte mère est facilement sélectionnée avec un spudger.
-
C'est la seule vis qui diffère en taille. Cette vis est un philips 00, 3.00 mm. en longueur.
After removing the final screw that holds the motherboard in place, do not just lift away the motherboard. The antenna is fixed to the back of the motherboard in the bottom right corner. Lift the motherboard from the top, leaving the bottom part of the motherboard (the part that is nearest the battery) close to the phone body. The antenna is a black wire that runs from the motherboard around the right side of the battery recess. It is held to the back side of the motherboard by a small, round, brass-coloured connector. It can be unclipped from the motherboard using a small pair of tweezers.
There is a little tape in the battery box keep the antenna in place.
You can remove the tape and have a few centimeters of antenna free in case you accidentally disconnect it.
It is !&&* of a fiddeling to connect it again but it is feasible
The final screw is a Phillips 000
I encountered some resistance when lifting up the motherboard (and putting it back in later), from the corner near the sim card slot. Either because of a manufacturing defect or the plastic deforming due to age, the side of the PCB was snagging against the chassis. Got it out eventually but you have to be careful.
-
-
-
Une fois que la carte mère a été retirée, retirez simplement la caméra arrière avec un pinceau ou une pince à angle.
you don't need to remove the front or rear camera - once the motherboard is free, nothing else has to be done to it.
The camera may fall off as the connector is pretty slack.
You don't have to remove it but be careful not drop or lose it
-


Pour remonter votre appareil, suivez ces instructions dans l'ordre inverse.
Pour remonter votre appareil, suivez ces instructions dans l'ordre inverse.
Annulation : je n'ai pas terminé ce tutoriel.
5 autres ont terminé cette réparation.
Merci à ces traducteurs :
88%
[deleted] nous aide à réparer le monde ! Vous voulez contribuer ?
Commencez à traduire ›
Équipe

USF Tampa, Team 3-3, Brown Fall 2014 Membre de l'équipe USF Tampa, Team 3-3, Brown Fall 2014
USFT-BROWN-F14S3G3
3 membres
20 tutoriels rédigés
It doesn't mention you have to remove SIM tray first.
pawel - Réponse
I used the #0 for the rear panel screws. The #00 is too small and will slip, stripping the screws if you're not extra careful.
anonymous 2668 - Réponse
where can i buy the battery??
Shaun Davis - Réponse
Has anyone answered this? I am looking too.
Elie Daou -
They sell it on here, although I found mine on eBay.
Roger -
Aliexpress for $9 (original)
David van Ballegooijen -
The last three hidden screws are a !&&* of a time consumer to remove. probably you would need only a certain type of tweezers - I got stuck at midway and now I cannot get go have my phone detect the sim card either probably because the six screws are removed. I can now turn the phone back on but with no service or wifi connections are detected. This phone is a disaster!
Manan Shah - Réponse
Ivdid that too but son in law found I had reinstalled sim card in backwards or upside down.
wildcat75666 -
Where did you buy the micro USB piece? Thanks a lot!
Davide Rota - Réponse
EBay. I bought new battery cause old ibe was dead would not charge. Just ordered new cables fit 9.00 something free shipping. Anyway hope this fixes problem cause new battery did not fix problems.
wildcat75666 -
I was able to open going from the microusb slot and working my way around. The corners are tough, though.
Roger - Réponse
in my phone the battery was glued with double sided adhesive tape, only on the right side. I pried the left side up first, and carefully removed the battery. to lift the battery I used first used a suction cup(?) followed by a plectrum like tool to lift te battery, and keep it lifted
Eelco Busch - Réponse
A word of caution: the back panel is harder to remove than you might think. Especially because you may be removing the *screen* by mistake. When you have a "grip" with the tool make sure the metallic border is not coming off with it, and when you have removed enough to be able to lift the panel, make sure it isn't attached by ribbons - in that case you've been removing the screen. A good idea is to gently press your finger nail against the weak plastic located between the back and the SIM slot, and going up and down and sideways until you hear a click. Then you can start from there with the opening tool. As recommended be very gentle around the SIM slot.
Menahem Julien Raccah Lisei - Réponse
Where do I get the plastic opening tool?
Julie Hejducek - Réponse