Ce dont vous avez besoin
-
-
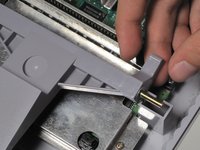
Retirez les six vis situées sous le système à l'aide du tournevis Gamebit 4,5 mm.
-
-
-
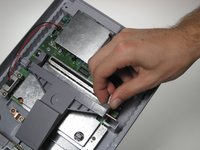
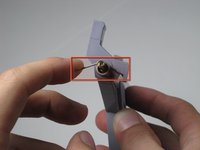
Retirez les deux vis cruciformes n° 2 de 11,7 mm reliant l'interrupteur d'alimentation à la carte mère.
-
-
-
-
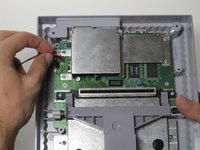
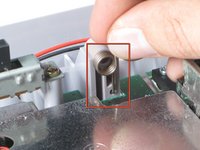
Soulevez les ports du contrôleur hors du boîtier, cela doit être fait sans trop de force. Notez l'emplacement de la connexion du câble plat.
-
-
-
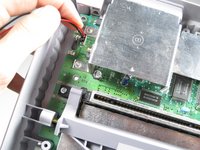
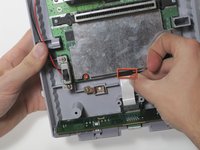
Retirez les deux vis cruciformes de 11,6 mm qui relient le blindage avant à la carte mère.
-


Pour remonter votre appareil, suivez ces instructions dans l'ordre inverse.
Pour remonter votre appareil, suivez ces instructions dans l'ordre inverse.
Annulation : je n'ai pas terminé ce tutoriel.
45 autres ont terminé cette réparation.
Merci à ces traducteurs :
100%
[deleted] nous aide à réparer le monde ! Vous voulez contribuer ?
Commencez à traduire ›
Équipe

Cal Poly, Team 4-47, Amido Fall 2010 Membre de l'équipe Cal Poly, Team 4-47, Amido Fall 2010
CPSU-AMIDO-F10S4G47
4 membres
25 tutoriels rédigés
4 commentaires
There are several versions of the Super Nintendo. Steps for my version are a bit different.
This seems to be a newer super nintendo. If you have one of the older ones, there will be a bit more screws but still basically the same steps.
There are two versions of the Super Nintendo- the one pictured here, and one with a sound chip board behind the game cartridge reader. These two models have different shells that are not interchangeable (important to know if you're looking to buy a replacement housing for your SNES)
Gena FM -
It’s possible they may be referring to the European/Japanese version of the Super Nintendo/Super Famicom. Either that, or it’s one of the weird, misshapen “reskins”.