Introduction
Le retrait du panneau supérieur implique le retrait du boîtier avant pour pouvoir atteindre les vis nécessaires au retrait du panneau supérieur.
Ce dont vous avez besoin
-
-
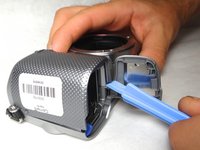
Ouvrez la porte de la batterie en déplaçant le curseur sur «OPEN».
-
Retirez la vis argentée de 3,25 mm à l'intérieur de la batterie à l'aide d'un tournevis cruciforme.
-
-
-
Retirez les trois vis (3,5 mm) du bas de la caméra avec le tournevis Phillips.
-
-
-
-
Retirez les deux vis de 4 mm de l'intérieur de la batterie et une vis de 3,5 mm à côté.
We already removed the screw next to battery lock. The one close to blue plastic lock.
How to repair this part of the interior pack if my blue thing is broken
-
-
-
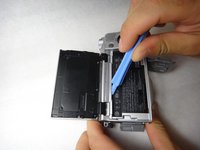
En utilisant à nouveau le spudger, faites délicatement levier par le haut de l'appareil photo pour retirer le cadre arrière.
-
Le cadre arrière est fragile, utilisez donc la spatule doucement.
Pull the back pannel up starting at the bottom of the frame. There is a little hinge at inside the frame the top that will move up and make it much easier to remove the back panel (almost without effort)
The most difficult part of this disassembly is this plastic part. Very thin, flimsy and tend to easily break. Pay extra attention when prying this frame, especially the top part, between the screen hinges.
Update to my previous comment:
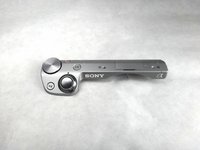
Remove the top case part where the shutter button, play button etc so that flimsy plastic frame can come out easily.
-
-
-
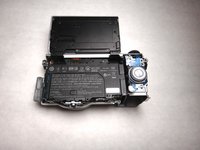
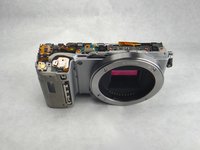
Le boîtier arrière doit maintenant être retiré et ressembler à ceci.
I guess not. battery stopper is on the body.
-


Pour remonter votre appareil, suivez ces instructions dans l'ordre inverse.
Pour remonter votre appareil, suivez ces instructions dans l'ordre inverse.
Annulation : je n'ai pas terminé ce tutoriel.
Une autre personne a terminé cette réparation.
Merci à ces traducteurs :
100%
[deleted] nous aide à réparer le monde ! Vous voulez contribuer ?
Commencez à traduire ›
Équipe

Cal Poly, Team 8-9, Regan Spring 2014 Membre de l'équipe Cal Poly, Team 8-9, Regan Spring 2014
CPSU-REGAN-S14S8G9
4 membres
14 tutoriels rédigés
Un commentaire
Hey Steven! This is all wrong! That's not the wright order: actually the top panel is the first part that can be removed, you don't need to tear down the rear panel and the front handgrip.. (it also may cause the damage of the rear panel!).
So, in order to remove the top panel just follow this order:
STEP 2
STEP 5 (Just the upper screw (not that one between HDMI and USB port)
STEP 6 (Just the two 4mm screws)
STEP 10
STEP 12
Its a lot easier ;)
Daniele