Aller au contenu principal

Samsung Galaxy J3 Luna Pro Front and Back Camera Replacement

Ce dont vous avez besoin

  1. Samsung Galaxy J3 Luna Pro Front and Back Camera  Replacement, Motherboard Change: étape 1, image 1 de 1
    • Turn off the phone.

    • Remove the back cover and battery

  2. Samsung Galaxy J3 Luna Pro Front and Back Camera  Replacement: étape 2, image 1 de 3 Samsung Galaxy J3 Luna Pro Front and Back Camera  Replacement: étape 2, image 2 de 3 Samsung Galaxy J3 Luna Pro Front and Back Camera  Replacement: étape 2, image 3 de 3
    • Attach a suction cup to the screen and pry upwards.

    • Insert the plastic opening tool into the gap under the screen and work your way around the perimeter.

    • Don't remove the screen completely as there are cables still connection the two pieces.

  3. Samsung Galaxy J3 Luna Pro Front and Back Camera  Replacement: étape 3, image 1 de 3 Samsung Galaxy J3 Luna Pro Front and Back Camera  Replacement: étape 3, image 2 de 3 Samsung Galaxy J3 Luna Pro Front and Back Camera  Replacement: étape 3, image 3 de 3
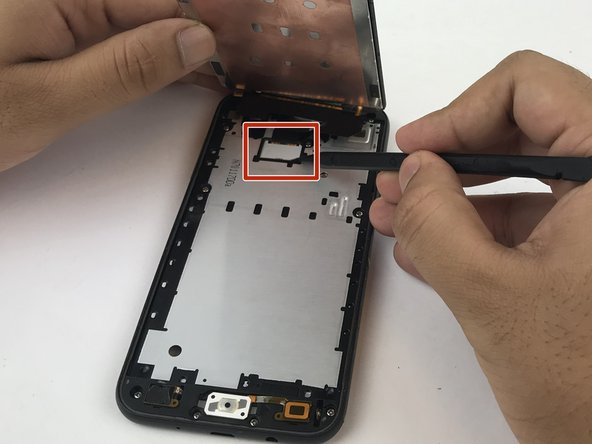
    • Use the pointy end of a spudger to remove the white plastic cover from the display cover.

    • Use the spudger to pry up the display cable from the motherboard.

    • Remove the screen.

  4. Samsung Galaxy J3 Luna Pro Front and Back Camera  Replacement: étape 4, image 1 de 3 Samsung Galaxy J3 Luna Pro Front and Back Camera  Replacement: étape 4, image 2 de 3 Samsung Galaxy J3 Luna Pro Front and Back Camera  Replacement: étape 4, image 3 de 3
    • Remove the eleven JIS 00 screws from the mid-frame.

    • Using a spudger, pry the mid-frame from the screen.

  5. Samsung Galaxy J3 Luna Pro Front and Back Camera  Replacement: étape 5, image 1 de 3 Samsung Galaxy J3 Luna Pro Front and Back Camera  Replacement: étape 5, image 2 de 3 Samsung Galaxy J3 Luna Pro Front and Back Camera  Replacement: étape 5, image 3 de 3
    • Remove the motherboard from the mid-frame.

  6. Samsung Galaxy J3 Luna Pro Front and Back Camera  Replacement, Front and Back Camera: étape 6, image 1 de 3 Samsung Galaxy J3 Luna Pro Front and Back Camera  Replacement, Front and Back Camera: étape 6, image 2 de 3 Samsung Galaxy J3 Luna Pro Front and Back Camera  Replacement, Front and Back Camera: étape 6, image 3 de 3
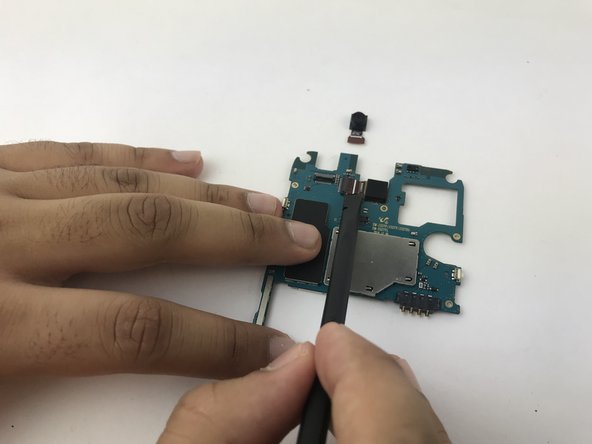
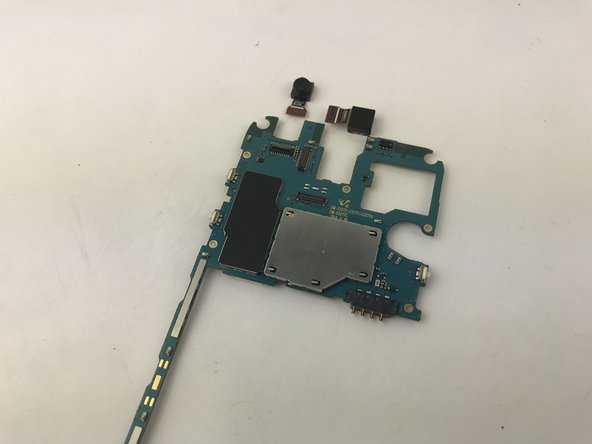
    • Use a spudger to flip up the retaining flaps on the front and rear camera ribbon cable ZIF sockets.

    • Pull the cables outs of the ZIF sockets.

Conclusion

To reassemble your device, follow these instructions in reverse order.

2 autres ont terminé cette réparation.

Jay Patel

Membre depuis le 01/29/18

150 Réputation

1 tutoriel rédigé

Équipe

USF Tampa, Team S5-G5, Passmore Spring 2018 Membre de l'équipe USF Tampa, Team S5-G5, Passmore Spring 2018

USFT-PASSMORE-S18S5G5

5 membres

5 tutoriels rédigés

0 commentaires

Ajouter un commentaire

Nombre de vues :

Dernières 24 heures : 0

7 derniers jours : 2

30 derniers jours : 16

Total : 1,345