Aller au contenu principal
Pour réparer ensemble - Je crée un compte

Samsung Galaxy SIII Mini VE Power Button Replacement

Ce dont vous avez besoin

  1. Samsung Galaxy SIII Mini VE Power Button Replacement, Removing Rear Casing: étape 1, image 1 de 3 Samsung Galaxy SIII Mini VE Power Button Replacement, Removing Rear Casing: étape 1, image 2 de 3 Samsung Galaxy SIII Mini VE Power Button Replacement, Removing Rear Casing: étape 1, image 3 de 3
    • Flip your phone so you are facing the back.

    • Locate the notch at the top and gently use your finger or an opening tool to remove the rear casing.

    Demander à FixBot

    Ajouter un commentaire

  2. Samsung Galaxy SIII Mini VE Power Button Replacement, Removing Battery: étape 2, image 1 de 2 Samsung Galaxy SIII Mini VE Power Button Replacement, Removing Battery: étape 2, image 2 de 2
    • Use your finger or an opening tool to pry the battery out of the phone.

    Demander à FixBot

    Ajouter un commentaire

  3. Samsung Galaxy SIII Mini VE Power Button Replacement, Removing Screws: étape 3, image 1 de 1
    • Use the Phillips #000 Screwdriver to remove the 10, 4mm screws holding the plastic frame in place.

    Demander à FixBot

    Ajouter un commentaire

  4. Samsung Galaxy SIII Mini VE Power Button Replacement: étape 4, image 1 de 2 Samsung Galaxy SIII Mini VE Power Button Replacement: étape 4, image 2 de 2
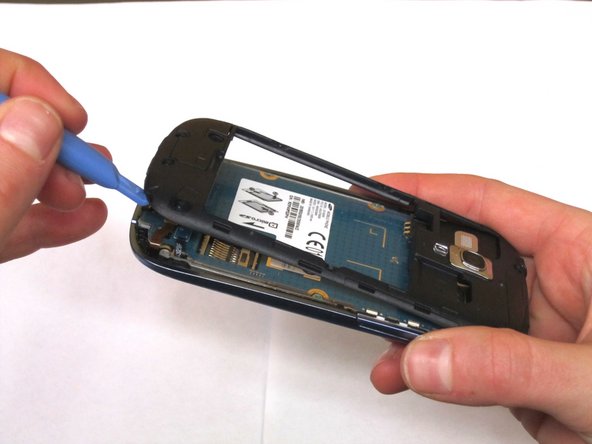
    • Using an opening tool, gently separate the plastic framing from the phone.

    Demander à FixBot

    Ajouter un commentaire

  5. Samsung Galaxy SIII Mini VE Power Button Replacement, Removing Circuit Board: étape 5, image 1 de 3 Samsung Galaxy SIII Mini VE Power Button Replacement, Removing Circuit Board: étape 5, image 2 de 3 Samsung Galaxy SIII Mini VE Power Button Replacement, Removing Circuit Board: étape 5, image 3 de 3
    Outil utilisé dans cette étape :
    Tweezers
    $4.99
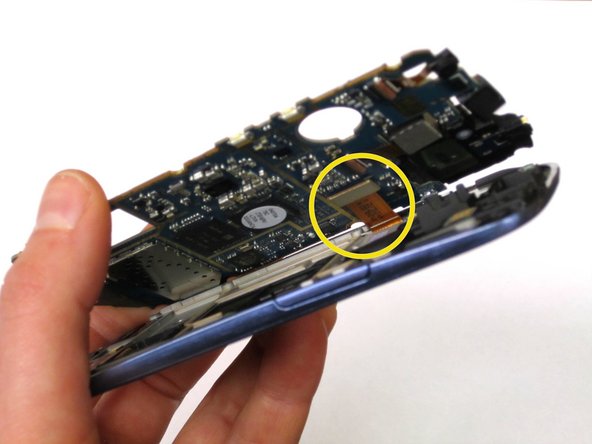
    • Unhook the two electrical connections at the bottom of the phone using your fingernail or a spudger.

    • Next, use the spudger and tweezers to remove the speaker at the top of the phone.

    • Once the 3 components have detached, the circuit board should release from the phone except for 1 connection on the underside.

    • Detach this connection using the spudger.

    Demander à FixBot

    Ajouter un commentaire

  6. Samsung Galaxy SIII Mini VE Power Button Replacement, Power Button: étape 6, image 1 de 2 Samsung Galaxy SIII Mini VE Power Button Replacement, Power Button: étape 6, image 2 de 2
    • The power button is connected by two plastic posts, simply lift the button away from the phone using your fingers.

    Demander à FixBot

    Ajouter un commentaire

Conclusion

To reassemble your device, follow these instructions in reverse order.

Annulation : je n'ai pas terminé ce tutoriel.

6 autres ont terminé cette réparation.

Megan

Membre depuis le 10/23/14

1 255 Réputation

6 tutoriels rédigés

Équipe

Michigan Tech, Team 1-8, Lauer Fall 2014 Membre de l'équipe Michigan Tech, Team 1-8, Lauer Fall 2014

MTU-LAUER-F14S1G8

3 membres

18 tutoriels rédigés

0 commentaires de tutoriel

Ajouter un commentaire

Nombre de vues :

Dernières 24 heures : 2

7 derniers jours : 8

30 derniers jours : 41

Total : 4,245