Il est possible que cette traduction ne reflète pas les dernières mises à jour du tutoriel source. Aidez à mettre à jour la traduction ou bien consultez le tutoriel source.
Introduction
Ce guide vous apprendra comment remplacer l'écran sur un Samsung Galaxy Tab 2 10.1.
Guide de réparation créé par l'un des employés de Coast I.T Services, le réparateur # 1 de Sunshine Coast: https://www.facebook.com/CoastITServices (QLD Australia)
Ce dont vous avez besoin
-
-
Vous êtes assis là, à regarder l'appareil avec un visage triste, cela va être une vraie mission .. Ouais ...
-
Votre première étape consiste à placer la tablette vers le haut afin que le logo Samsung soit lisible comme tel.
-
Ensuite, vous aurez envie d'obtenir le spudger métallique et faites-le glisser dans la rainure entre le boîtier gris foncé et l'écran en verre noir.
-
-
-
Vous allez vouloir faire glisser la pointe du spudger métallique dans la fissure étroite de l'appareil, se tortiller d'avant en arrière pour libérer les clips, si vous n'entendez pas un clic, faites glisser le spudger le long de l'écart pour trouver les clips.
-
Utilisez le Jimmy pour cette étape, n'utilisez pas l'outil d'ouverture d'iMac, même si cela peut sembler une bonne idée, cela ne fonctionnera pas.
-
Soyez également conscient de l'écran tactile.
-
-
-
Une fois que les clips ont été relâchés, l'avant de l'appareil devrait s'élever.
-
*** SOYEZ ATTENTIF AU BOUTON D'ALIMENTATION EN HAUT GAUCHE DU BOITIER, IL SE DÉPLACE LÉGÈREMENT DONC ATTENTION DE NE PAS L'ENDOMMAGER ET DE LE GARDER EN PLACE.
-
-
-
Cette étape n’est pas traduite. Aidez à la traduire
-
Your going to want to disconnect the power cable first, which is in the middle of the device, the little black connector shown in the middle of the first photo with the red blue and black cables coming out of it.
-
your going to want to get the Plastic Spudger and use the pointed end, slowly slide it under the cables and lift carefully, do the same on the other side until the connector pops off the socket.
-
Unplugging the battery will prevent any short circuiting, we are using a Anti-Static Mat in this repair so we don't really need to worry, but disconnect it anyway to be on the safe side.
-
There will be two of those green sticker covers on the connectors for the touchscreen etc, remove those using the precision tweezers "They are very sticky, do not apply heat", put them somewhere safe as they need to be re-applied.
-
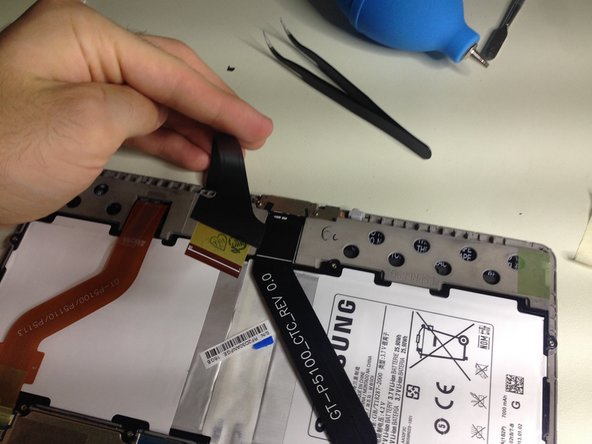
Proceed with disconnecting the middle ribbon cable and do so with care, flick up the latch on the back of the socket to release the cable and be sure not to bend of flex the cable as this will damage it.
-
-
Cette étape n’est pas traduite. Aidez à la traduire
-
Your going to want to use the iOpener tool for this repair, using a Heat Gun or Hair Dryer is just dumb and can cause damage to the LCD and other components, always use the iOpener.
-
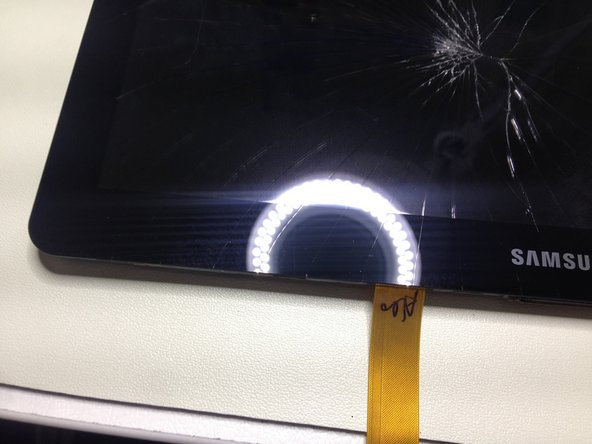
Follow instructions for heating the iOpener and then once done in the Microwave, lay it along the bottom of the device across the Samsung Logo so the entire bottom of the display is covered.
-
Let it sit for about 30 seconds or so and also press down on it slightly to speed up the loosening of the adhesive. You may be thinking to use the iMac Opening Tool for this one as it "slices" through the glue, think again, the glue on this device is so strong it will not slide, it will get stuck and keep popping off the handle, do not bother.
-
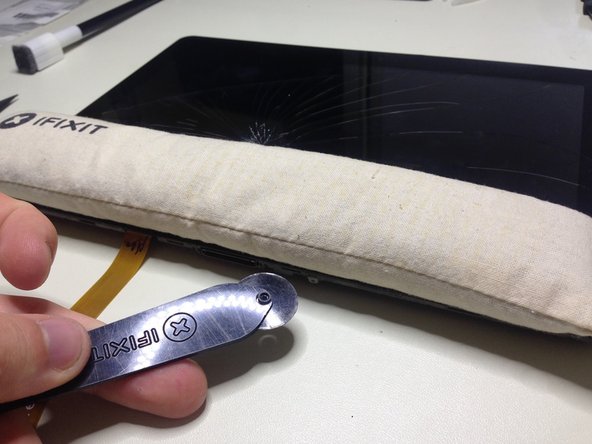
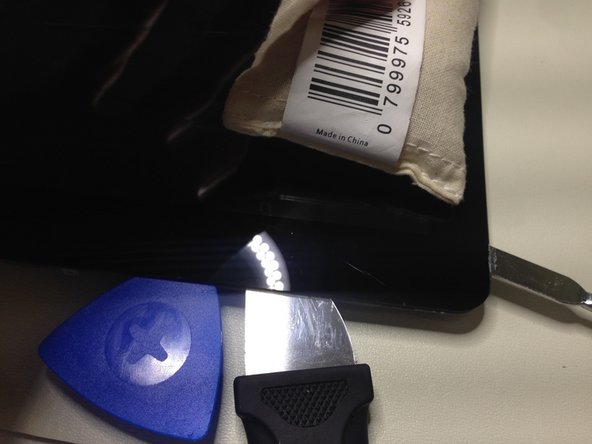
For this you have to take extreme care as it is very very hard to do! You must use the Jimmy for this repair and Guitar Picks to hold the device apart. Slowly slide the Jimmy along around the display, bottom, left side, right side but not yet the top.
-
Ensure you have enough of a gap between the glass touchscreen and the device itself or it will stick again, continuously apply heat, you may need to heat the iOpener multiple times to successfully remove the display, just remember, DO NOT LET THAT GLASS TOUCH THE DEVICE AGAIN OR THE ADHESIVE WILL BOND AGAIN and you'll be back to square one.
-
Slowly slide the Jimmy around the device until only the top of the display remains. This next step requires extreme care as it does involve the front camera etc.
-
-
Cette étape n’est pas traduite. Aidez à la traduire
-
BE VERY CAREFUL WHEN USING THE JIMMY AS YOU DO NOT WANT TO TEAR THE RIBBON CABLE ANYWAY.
-
Your last step in removing the Glass Panel is to heat the iOpener one more time and apply it along the top of the device, press down on the iOpener to apply more direct heat.
-
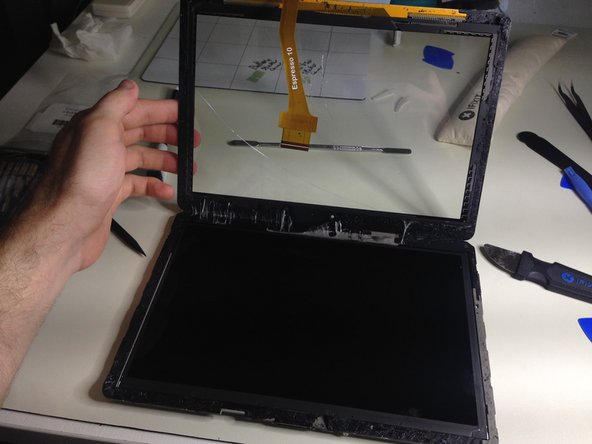
Give it 10 seconds and then begin grabbing the bottom of the Touchscreen Glass where the samsung logo is and begin to lift the display, rotating it on a 90 degree angle treating the top of the display like a hinge.
-
If the adhesive has been correctly heated the display should lift away properly and come away without damaging the camera etc.
-
-
Cette étape n’est pas traduite. Aidez à la traduire
-
You will notice the Black Adhesive, all of this has to be removed from the device before applying the new display.
-
Now it's time to apply the new Touchscreen Display, ensure the Flex Cable is out of the way and that the LCD and inside of the Touchscreen has had all the dust particles removed, once you apply the Touchscreen it's permanent until you re-do all the previous steps to remove it again, so be very very very careful and thorough.
-
Apply the touchscreen quickly once the adhesive protectors have been removed and the device is clear of dust.
-
Press down around the bezel of the screen to smooth out the adhesives bond.
-
Now flip the device over and reconnect the Touchscreen Flex Cable, and Power Connector, once both are reconnected, re-apply the green sticky covers to the connectors for protection and then load the device back into the back casing.
-
-
Cette étape n’est pas traduite. Aidez à la traduire
-
Ensure you press down to re-latch the clips around the device, when slotting the device in if you have trouble, slot the top of the device in first and then slide it down again like a hinge from the top, be careful with the speaker assembly as it has rubber seals around it.
-
Click all the clips into place and your done. Wipe off any finger prints and bravo! You've just completed this challenge.
-


Votre légende, vous avez conquis cet adhésif dur! Bravo!!!
Pas besoin de remonter votre appareil, tout est fait! Maintenant, collez un protecteur d'écran en verre trempé sur cet appareil.
Votre légende, vous avez conquis cet adhésif dur! Bravo!!!
Pas besoin de remonter votre appareil, tout est fait! Maintenant, collez un protecteur d'écran en verre trempé sur cet appareil.
Annulation : je n'ai pas terminé ce tutoriel.
36 autres ont terminé cette réparation.
Merci à ces traducteurs :
52%
[deleted] nous aide à réparer le monde ! Vous voulez contribuer ?
Commencez à traduire ›

Équipe

Coast I.T - Coast I.T Services Membre de l'équipe Coast I.T - Coast I.T Services
Business
2 membres
2 tutoriels rédigés
8 commentaires
Is there a way to buy the espresso 10 ribbon cable as I damaged it when removing it (even a plastic tool can pucture the cable)
Thank you
jjalt95@yahoo.com
Hi jjalt95,
I'll double check on that for you. It's a very delicate cable, we were able to do the repair without damaging it, some do find this repair difficult especially with the ribbon cable, I would actually check on iFixit's Parts otherwise we can order it in for you if you need any more at any point in time as we generally have access to all the parts. Just let me know.
Cheers,
Chris
Coast I.T Services
Hi do you sell replacement screens for grey Samsung galaxys2 tablet 10.1
Followed this and was easy. I did not have the microwave tool but I used a thin butter knife to remove the glass front. Just slide it around the entire front and lift as you go. Worked fine. Just watch out you don't scratch the lcd display...
Sometimes if those connectors are damaged as in not being released prior then you can use another piece of that cable to space the ribbon and make a tighter connection in the socket on the board. Cut off a piece of the cable from old screen. insert that and the new cable together so the two make a tight sandwitch type fit in the socket. Use the offcut piece above the new cable so the new one touches the contacts. Usually not undoing the latch makes for a loose connection but using a spacer of old cable makes him tight again. IPads are horrible and had to do that more than once on the $@$* digitizer cable...
All in all one of the easier tablets I have repaired... Cheers.