Aller au contenu principal

Samsung RF28R7201SG Refrigerator Icemaker Assembly Replacement

Ce dont vous avez besoin

  1. Samsung RF28R7201SG Refrigerator Icemaker Assembly Replacement, Unplug your refrigerator: étape 1, image 1 de 1
    • Unplug your refrigerator before you begin your repair.

  2. Samsung RF28R7201SG Refrigerator Icemaker Assembly Replacement, Open the refrigerator doors: étape 2, image 1 de 2 Samsung RF28R7201SG Refrigerator Icemaker Assembly Replacement, Open the refrigerator doors: étape 2, image 2 de 2
    • Open both French doors for the refrigerator compartment.

  3. Samsung RF28R7201SG Refrigerator Icemaker Assembly Replacement, Remove the ice tray: étape 3, image 1 de 3 Samsung RF28R7201SG Refrigerator Icemaker Assembly Replacement, Remove the ice tray: étape 3, image 2 de 3 Samsung RF28R7201SG Refrigerator Icemaker Assembly Replacement, Remove the ice tray: étape 3, image 3 de 3
    • Pull the ice tray straight out of its housing and remove it.

  4. Samsung RF28R7201SG Refrigerator Icemaker Assembly Replacement, Unfasten the cable cover panel: étape 4, image 1 de 2 Samsung RF28R7201SG Refrigerator Icemaker Assembly Replacement, Unfasten the cable cover panel: étape 4, image 2 de 2
    • Use a Phillips screwdriver to remove the 16.5 mm‑long screw securing the cable cover panel.

  5. Samsung RF28R7201SG Refrigerator Icemaker Assembly Replacement, Remove the cable cover panel: étape 5, image 1 de 3 Samsung RF28R7201SG Refrigerator Icemaker Assembly Replacement, Remove the cable cover panel: étape 5, image 2 de 3 Samsung RF28R7201SG Refrigerator Icemaker Assembly Replacement, Remove the cable cover panel: étape 5, image 3 de 3
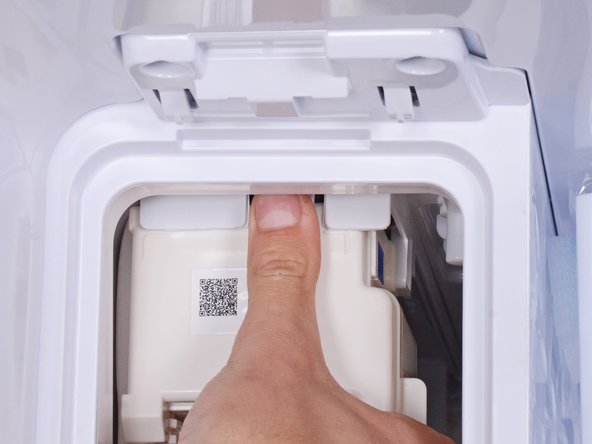
    • Use your fingers to slide the cable cover panel towards the front of the refrigerator to unlatch it.

    • Remove the cable cover panel.

    • During reassembly, make sure this panel clips fully in place, or the ice tray won't slide in properly.

  6. Samsung RF28R7201SG Refrigerator Icemaker Assembly Replacement, Disconnect the icemaker harness: étape 6, image 1 de 2 Samsung RF28R7201SG Refrigerator Icemaker Assembly Replacement, Disconnect the icemaker harness: étape 6, image 2 de 2
    • Disconnect the left-most yellow connector:

    • Squeeze the locking tab with the red mark with your fingers

    • Rock the connector gently side to side to disconnect it

    • Use your fingers or a screwdriver to guide the wire harness out of the wall clips.

  7. Samsung RF28R7201SG Refrigerator Icemaker Assembly Replacement, Unfasten the air tunnel: étape 7, image 1 de 1
    • Use a Phillips screwdriver to remove the 16.5 mm-long screw securing the air tunnel flap.

  8. Samsung RF28R7201SG Refrigerator Icemaker Assembly Replacement, Remove the icemaker assembly: étape 8, image 1 de 3 Samsung RF28R7201SG Refrigerator Icemaker Assembly Replacement, Remove the icemaker assembly: étape 8, image 2 de 3 Samsung RF28R7201SG Refrigerator Icemaker Assembly Replacement, Remove the icemaker assembly: étape 8, image 3 de 3
    • A plastic clip holds the air tunnel flap in place.

    • Use a flathead screwdriver to pry and loosen the air tunnel flap from the plastic clip.

  9. Samsung RF28R7201SG Refrigerator Icemaker Assembly Replacement: étape 9, image 1 de 2 Samsung RF28R7201SG Refrigerator Icemaker Assembly Replacement: étape 9, image 2 de 2
    • Use your fingers to pull the air tunnel flap down enough to access the internals.

  10. Samsung RF28R7201SG Refrigerator Icemaker Assembly Replacement: étape 10, image 1 de 2 Samsung RF28R7201SG Refrigerator Icemaker Assembly Replacement: étape 10, image 2 de 2
    • Use a flathead screwdriver to gently pry the refrigerant loop down by 1–1.5 cm.

    • During reassembly, use your fingers to push the refrigerant loop back up.

  11. Samsung RF28R7201SG Refrigerator Icemaker Assembly Replacement: étape 11, image 1 de 3 Samsung RF28R7201SG Refrigerator Icemaker Assembly Replacement: étape 11, image 2 de 3 Samsung RF28R7201SG Refrigerator Icemaker Assembly Replacement: étape 11, image 3 de 3
    • A plastic clip holds the icemaker in place.

    • Use your fingers to press and release the plastic clip.

    • This clip is stiff and may require substantial force.

  12. Samsung RF28R7201SG Refrigerator Icemaker Assembly Replacement: étape 12, image 1 de 2 Samsung RF28R7201SG Refrigerator Icemaker Assembly Replacement: étape 12, image 2 de 2
    • Pull the front edge of the icemaker assembly down slightly to loosen it.

    • Be careful not to bend the refrigerant loop too much as you pull the front edge, or you'll damage the loop.

    • Carefully slide the icemaker assembly out of its housing.

  13. Samsung RF28R7201SG Refrigerator Icemaker Assembly Replacement: étape 13, image 1 de 2 Samsung RF28R7201SG Refrigerator Icemaker Assembly Replacement: étape 13, image 2 de 2
Conclusion

To reassemble your device, follow these instructions in reverse order.

Take your e-waste to an R2 or e-Stewards certified recycler.

Repair didn’t go as planned? Ask our Answers community for help.

nicO

Membre depuis le 04/14/15

15 927 Réputation

88 tutoriels rédigés

Équipe

Global Fixers Membre de l'équipe Global Fixers

Community

33 membres

572 tutoriels rédigés

0 commentaires

Ajouter un commentaire

Nombre de vues :

Dernières 24 heures : 3

7 derniers jours : 42

30 derniers jours : 108

Total : 579