Aller au contenu principal

Toshiba Satellite R15-S829 Hard Drive Replacement

Ce dont vous avez besoin

  1. Toshiba Satellite R15-S829 Hard Drive Replacement, Battery Replacement: étape 1, image 1 de 1
    • Unplug the charging cable from the laptop.

    • Turn off the laptop.

    • Turn the laptop over and locate the battery.

  2. Toshiba Satellite R15-S829 Hard Drive Replacement: étape 2, image 1 de 3 Toshiba Satellite R15-S829 Hard Drive Replacement: étape 2, image 2 de 3 Toshiba Satellite R15-S829 Hard Drive Replacement: étape 2, image 3 de 3
    • Push the small switch near the corner of the laptop to the unlocked position.

    • Push the bigger switch in the direction of the icon and pull the battery away from the laptop.

  3. Toshiba Satellite R15-S829 Hard Drive Replacement, Hard Drive Replacement: étape 3, image 1 de 1
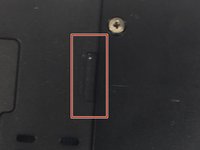
    • First, begin by locating the spot of the cover of the hard drive located on the bottom of the laptop.

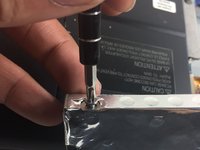
  4. Toshiba Satellite R15-S829 Hard Drive Replacement: étape 4, image 1 de 1
    • Remove the screw of the cover.

  5. Toshiba Satellite R15-S829 Hard Drive Replacement: étape 5, image 1 de 2 Toshiba Satellite R15-S829 Hard Drive Replacement: étape 5, image 2 de 2
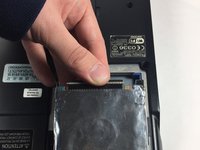
    • Locate the indent where the hard drive can be removed. Remove the cover.

  6. Toshiba Satellite R15-S829 Hard Drive Replacement: étape 6, image 1 de 2 Toshiba Satellite R15-S829 Hard Drive Replacement: étape 6, image 2 de 2
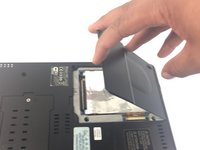
    • Remove the hard drive using your hand.

  7. Toshiba Satellite R15-S829 Hard Drive Replacement: étape 7, image 1 de 3 Toshiba Satellite R15-S829 Hard Drive Replacement: étape 7, image 2 de 3 Toshiba Satellite R15-S829 Hard Drive Replacement: étape 7, image 3 de 3
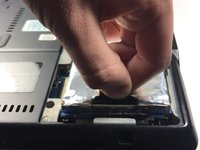
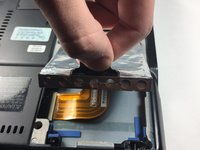
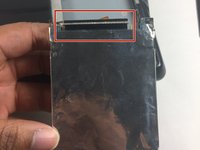
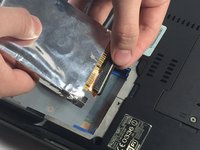
    • Now remove the power ribbon from the hard drive.

  8. Toshiba Satellite R15-S829 Hard Drive Replacement: étape 8, image 1 de 1
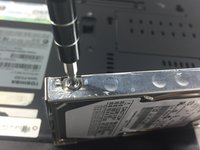
    • Locate the screws on each side of the encasing of the hard drive.

  9. Toshiba Satellite R15-S829 Hard Drive Replacement: étape 9, image 1 de 2 Toshiba Satellite R15-S829 Hard Drive Replacement: étape 9, image 2 de 2
    • Use your Phillips screwdriver to remove the screws and be careful not to lose the screws.

  10. Toshiba Satellite R15-S829 Hard Drive Replacement: étape 10, image 1 de 1
    • Remove the encasing from the hard drive.

Conclusion

To reassemble your device, follow these instructions in reverse order.

Mike Strother

Membre depuis le 10/20/16

299 Réputation

2 tutoriels rédigés

Équipe

UMass Dartmouth, Team 5-8, Martin Fall 2016 Membre de l'équipe UMass Dartmouth, Team 5-8, Martin Fall 2016

UMASSD-MARTIN-F16S5G8

3 membres

5 tutoriels rédigés

0 commentaires

Ajouter un commentaire

Nombre de vues :

Dernières 24 heures : 1

7 derniers jours : 5

30 derniers jours : 10

Total : 415