Aller au contenu principal

Toshiba Tecra M2 CPU Replacement

Ce dont vous avez besoin

  1. Toshiba Tecra M2 CPU Replacement, Battery: étape 1, image 1 de 1
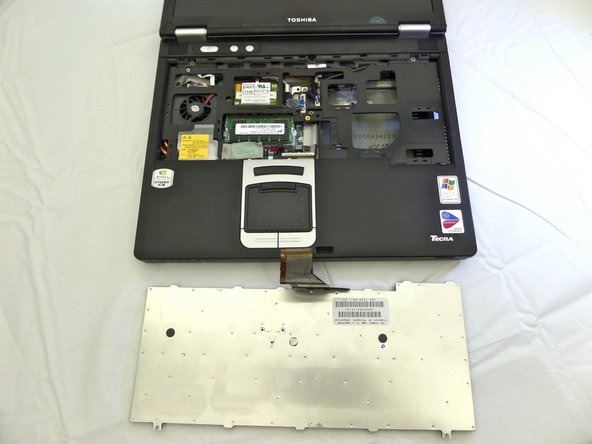
    • Flip the laptop upside down so the back compartment is facing up.

    • Place left thumb on the battery lock tab.

    • Place right thumb on the battery release latch.

  2. Toshiba Tecra M2 CPU Replacement: étape 2, image 1 de 2 Toshiba Tecra M2 CPU Replacement: étape 2, image 2 de 2
    • Slide both tabs outward at the same time to release battery pack.

  3. Toshiba Tecra M2 CPU Replacement: étape 3, image 1 de 1
    • Pull out the battery after it has popped out and set aside.

    • The battery and the battery cover are in one piece

  4. Toshiba Tecra M2 CPU Replacement, CPU: étape 4, image 1 de 1
    • Use a #00 phillips head screwdriver to remove the 8mm screw for the keyboard strip located under the battery.

  5. Toshiba Tecra M2 CPU Replacement: étape 5, image 1 de 1
    • Turn the device over and open it up to the display.

    • Gently lift a corner of the keyboard strip until it pops out of its position.

  6. Toshiba Tecra M2 CPU Replacement: étape 6, image 1 de 1
    • Using a #00 phillips head screwdriver, remove the two 4mm screws found underneath the keyboard strip.

  7. Toshiba Tecra M2 CPU Replacement: étape 7, image 1 de 2 Toshiba Tecra M2 CPU Replacement: étape 7, image 2 de 2
    • Pop the keyboard up gently and rest on top of the touch pad

    • The keyboard is attached underneath by a thin film. Do not rip the keyboard off. Gently lay it down without ripping the film.

  8. Toshiba Tecra M2 CPU Replacement: étape 8, image 1 de 2 Toshiba Tecra M2 CPU Replacement: étape 8, image 2 de 2
    • Using a #00 phillips head screwdriver, remove the 6mm screw holding the metal plate down.

  9. Toshiba Tecra M2 CPU Replacement: étape 9, image 1 de 2 Toshiba Tecra M2 CPU Replacement: étape 9, image 2 de 2
    • Gently remove the keyboard connector film from the motherboard with fingers by lifting upwards.

    • Set aside the keyboard.

  10. Toshiba Tecra M2 CPU Replacement: étape 10, image 1 de 1
    • Using a #00 phillips head screwdriver, remove the three 13mm screws holding down the touch pad's frame from underneath the keyboard.

  11. Toshiba Tecra M2 CPU Replacement: étape 11, image 1 de 3 Toshiba Tecra M2 CPU Replacement: étape 11, image 2 de 3 Toshiba Tecra M2 CPU Replacement: étape 11, image 3 de 3
    • Flip laptop back upside down.

    • Remove the 5mm lock screw, using a #00 phillips head screwdriver.

    • Slide bay latch toward the battery compartment.

    • Remove CD-RW/DVD-ROM drive.

  12. Toshiba Tecra M2 CPU Replacement: étape 12, image 1 de 1
    • Remove the 4.5mm screw located under the CD-RW/DVD-ROM drive compartment, using a #00 phillips head screwdriver.

  13. Toshiba Tecra M2 CPU Replacement: étape 13, image 1 de 1
    • Remove the three 17mm screws found on the backside of the laptop using a #00 phillips head screwdriver.

    • Remove the ten 8mm screws using a #00 phillips head screwdriver.

  14. Toshiba Tecra M2 CPU Replacement: étape 14, image 1 de 2 Toshiba Tecra M2 CPU Replacement: étape 14, image 2 de 2
    Outil utilisé dans cette étape :
    Tweezers
    $4.99
    J'achète
    • Flip the laptop back over and unplug the touch pad's power cord from the motherboard gently using a pair of tweezers.

  15. Toshiba Tecra M2 CPU Replacement: étape 15, image 1 de 2 Toshiba Tecra M2 CPU Replacement: étape 15, image 2 de 2
    • Lift off the plastic cover and set it aside.

  16. Toshiba Tecra M2 CPU Replacement: étape 16, image 1 de 2 Toshiba Tecra M2 CPU Replacement: étape 16, image 2 de 2
    • Using a #00 phillips head screwdriver, unscrew the three 5mm screws holding down the heat sink securing bracket.

    • Lift off the securing bracket and set aside.

  17. Toshiba Tecra M2 CPU Replacement: étape 17, image 1 de 1
    • Wiggle the heat sink until it lifts off the top of your CPU. There is thermal paste underneath and it may stick.

  18. Toshiba Tecra M2 CPU Replacement: étape 18, image 1 de 3 Toshiba Tecra M2 CPU Replacement: étape 18, image 2 de 3 Toshiba Tecra M2 CPU Replacement: étape 18, image 3 de 3
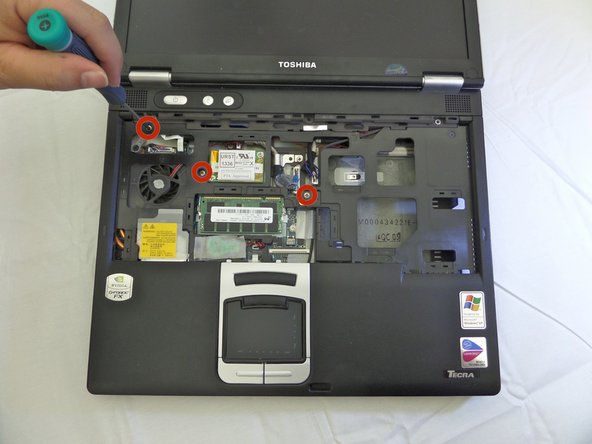
    • Turn a flathead #3 screwdriver counter-clockwise to unlock the CPU socket.

    • Grab the CPU with your index finger and thumb and pull directly upwards.

    • Apply a new coat of thermal paste before reassembling.

    • Comment appliquer de la pâte thermique

Conclusion

To reassemble your device, follow these instructions in reverse order.

2 autres ont terminé cette réparation.

Cindy Nguyen

Membre depuis le 09/08/14

386 Réputation

3 tutoriels rédigés

Équipe

CSU Fullerton, Team 1-6, Bruce Fall 2014 Membre de l'équipe CSU Fullerton, Team 1-6, Bruce Fall 2014

CSUF-BRUCE-F14S1G6

3 membres

9 tutoriels rédigés

Un commentaire

"Step 4 - CPU" THAT IS NOT A 8MM SCREW! THERE IS NOW A HOLE IN MY COMPUTER!!

[deleted] - Réponse

Ajouter un commentaire

Nombre de vues :

Dernières 24 heures : 2

7 derniers jours : 7

30 derniers jours : 14

Total : 1,607