Aller au contenu principal

Uniden Dect 6.0 Display Replacement

Ce dont vous avez besoin

  1. Uniden Dect 6.0 Display Replacement, Battery: étape 1, image 1 de 1
    • Locate the battery compartment on the back of the Uniden home phone.

    • Place your finger on the groove, and pull directly back on the cover to access to the battery.

  2. Uniden Dect 6.0 Display Replacement: étape 2, image 1 de 1
    • Remove the white battery pack from the battery compartment.

  3. Uniden Dect 6.0 Display Replacement: étape 3, image 1 de 1
    • Remove the red-and-black-wired port from the plug directly under the battery compartment.

  4. Uniden Dect 6.0 Display Replacement, Keyboard: étape 4, image 1 de 2 Uniden Dect 6.0 Display Replacement, Keyboard: étape 4, image 2 de 2
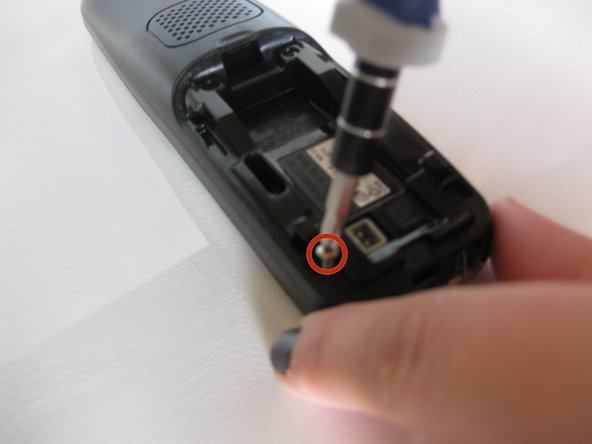
    • Using a Phillips #1 screwdriver, remove the two .9 mm screws on the back of the device on each side of the battery pack.

  5. Uniden Dect 6.0 Display Replacement: étape 5, image 1 de 1
    • Using your fingers, gently lift and separate the front of the housing from the back housing.

    • Potential for device damage: While separating the back housing from the front, be sure to open from the sides as pictured.

  6. Uniden Dect 6.0 Display Replacement: étape 6, image 1 de 1
    • Gently remove the loose keyboard from the lined gel casing located under the front housing of the front of the phone.

  7. Uniden Dect 6.0 Display Replacement, Gel Casing: étape 7, image 1 de 1
    • To better access the screen, remove the loose gel casing that sits under the keyboard.

  8. Uniden Dect 6.0 Display Replacement: étape 8, image 1 de 1
    • Lift out the attached motherboard piece and turn it sideways to access the side of the phone.

    • Potential for device damage: Use caution to avoid severing the wires that connect the motherboard to the phone.

  9. Uniden Dect 6.0 Display Replacement: étape 9, image 1 de 1
    Outil utilisé dans cette étape :
    Tweezers
    $4.99
    J'achète
    • Gently use the tweezers to access the motherboard panel and lift it straight up.

Conclusion

To reassemble your device, follow these instructions in reverse order.

3 autres ont terminé cette réparation.

Megan Lawrence

Membre depuis le 01/14/15

534 Réputation

5 tutoriels rédigés

Équipe

USF Sarasota-Manatee, Team 1-3, Stewart Winter 2015 Membre de l'équipe USF Sarasota-Manatee, Team 1-3, Stewart Winter 2015

USFSM-STEWART-W15S1G3

4 membres

14 tutoriels rédigés

0 commentaires

Ajouter un commentaire

Nombre de vues :

Dernières 24 heures : 1

7 derniers jours : 6

30 derniers jours : 38

Total : 6,451