Introduction
Ersetze die untere Abdeckung deiner Xbox 360.
Ce dont vous avez besoin
-
-
Greife die Festplatteneinheit mit einer Hand und drücke mit der anderen Hand den kleinen Knopf, während du die Festplatteneinheit nach oben hebst.
-
Nimm die Festplatteneinheit von der Konsole.
-
-
-
Führe das flache Ende eines Spudgers oder die Kante eines Xbox 360 opening tools in den kleinen Schlitz an der Seite des Front Pannels in der Unterseite.
-
Hebel die vordere Kante des Lüfters weg von der Frontplatte.
You can avoid this step by pulling the front cover off. Just make sure you don't break the springs for the USB bay area.
Hello, thank you ifix for this guide, I followed this guide, I got stuck at some point but I resolved it. Also I want to share this resource: Step by Step guide to fix Xbox 360 errors it helped me go through all the things associated with Xbox 360 and the troubleshooting of errors. Hope this can also help you all.
-
-
-
Führe die flache Seite eines Spudgers zwischen der Frontabdeckung und der Außenhülle, nahe des An/Aus-Schalters, ein.
-
Führe den Spudger entlang der Kante der Frontabdeckung um die Klammern zu lösen, die sie an der Konsole halten.
The faceplate just pulls off, using a tool is completely unneccessary. https://beta.support.xbox.com/help/xbox-...
-
-
-
-
Die obere Lüftereinheit wird mit Klammern in der Konsole gehalten. Die ersten zwei sind hier rot markiert.
-
-
-
Führe das flache Ende eines Spudgers in die kleine, bereits erwähnte, Öffnung ein um die Klammern zu lösen.
I found this step difficult. I wasn't able to see where the clips were from the pictures. If you look at step 14 you can see what the clips look like after the vent is taken off. Once you realize where they are it is a lot easier.
-
-
-
Stelle die Konsole senkrecht mit der Oberkante nach unten hin.
-
Ziehe vorsichtig den Garantie-Sticker von der Konsole ab.
LOL “Romove the warenty seal”
-
-
-
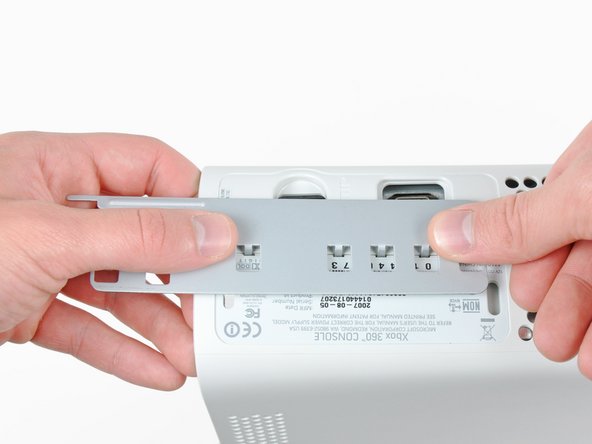
Drücke das Xbox 360 Opening Tool in die Schlitze für die Klammern, die Ober- und Unterseite verbinden in der Nähe der I/O Ports.
-
Während du das Opening Tool in die Xbox drückst, drücke die obere und untere Hülle auseinander um die Klammern zu lösen.
I didn't have an XBox tool, so I followed instructions in this video for this step (https://www.youtube.com/watch?v=qaxIB6cX...) to pry it open with your fingers and a screwdriver.
The small (metal) women's hair clip is best for un-latching the tabs. The screw drivers just make the holes bigger.
You can also use the pointed end of a plastic spudger to push each clip free while you separate the case with your free hand.
-
-
-
Während du die obere und untere Hülle auseinander drückst, nutze die Spitze eines Spudgers oder den Stift eines Xbox 360 Opening Tools um die lange Klammer (rot markiert) in das Gehäuse zu drücken.
-
Die Klammer löst sich und hinterlässt die Klammern in der Nähe des Stromanschlusses als einzige Klammern zurück, die die Gehäuseteile verbinden.
-


Arbeite die Schritte in umgekehrter Reihenfolge ab, um dein Gerät wieder zusammenzubauen.
Arbeite die Schritte in umgekehrter Reihenfolge ab, um dein Gerät wieder zusammenzubauen.
Annulation : je n'ai pas terminé ce tutoriel.
39 autres ont terminé cette réparation.
Merci à ces traducteurs :
100%


Ces traducteurs nous aident réparer le monde ! Vous voulez contribuer ?
Commencez à traduire ›

WARNING: Just replacing the drive will not make it work correctly. Microsoft has married the drives to the motherboard. Hence, in order to get full operation out of the drive you'll have to perform more steps not listed here. Search in the FAQ on this specific topic for more details. Otherwise, before buying a new drive, try cleaning the inside of the old one and/or replace the belt involved in opening and closing the drive door.
- Good Luck
Eric - Réponse
Thanks..helped!
joseph zulu - Réponse
bress the button and lift with the same hand! i thought mine was stuck because of this pic!!!
Maths with Luigi - Réponse