Aller au contenu principal
Pour réparer ensemble - Je crée un compte

iPad Display Assembly 4 Pc. Adhesive Application

Ce dont vous avez besoin

  1. iPad Display Assembly 4 Pc. Adhesive Application, iPad Display Assembly 4 Pc. Adhesive Application: étape 1, image 1 de 2 iPad Display Assembly 4 Pc. Adhesive Application, iPad Display Assembly 4 Pc. Adhesive Application: étape 1, image 2 de 2
    Outil utilisé dans cette étape :
    Tweezers
    $4.99
    • Before installing new adhesive, thoroughly clean the display assembly and the frame of all residue.

    • Use tweezers to pull up sections of tape residue.

    • Use an opening tool or a spudger to scrape residue off. You can use high concentration (over 90%) isopropyl alcohol to soften the adhesive.

    • Remove the residue by wiping in one direction to prevent smearing.

    • Do not scrape with a metal tool, or you will scratch the display assembly's surface.

    Demander à FixBot

    Ajouter un commentaire

  2. iPad Display Assembly 4 Pc. Adhesive Application: étape 2, image 1 de 1
    • Lay out the replacement adhesive strips around the display assembly so that they correspond to the correct sides.

    Demander à FixBot

    Ajouter un commentaire

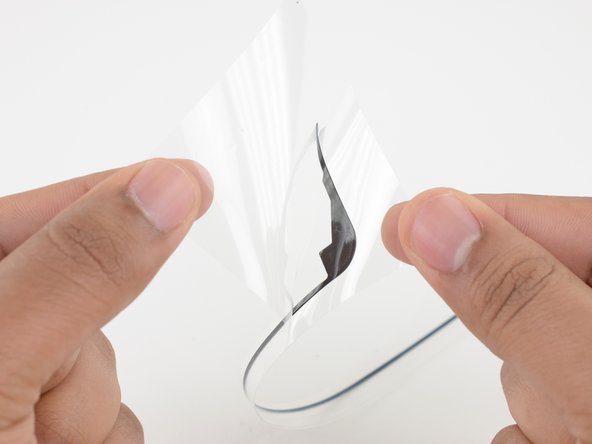
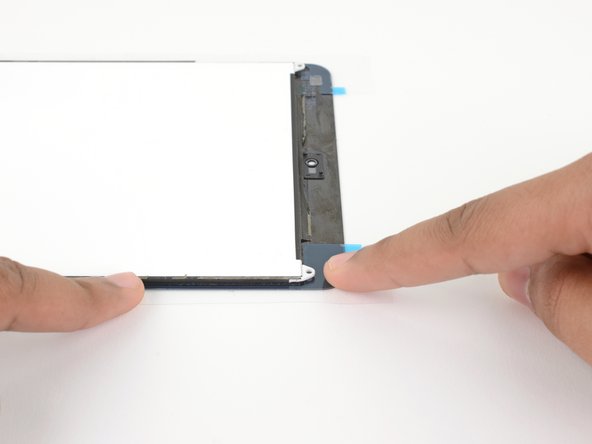
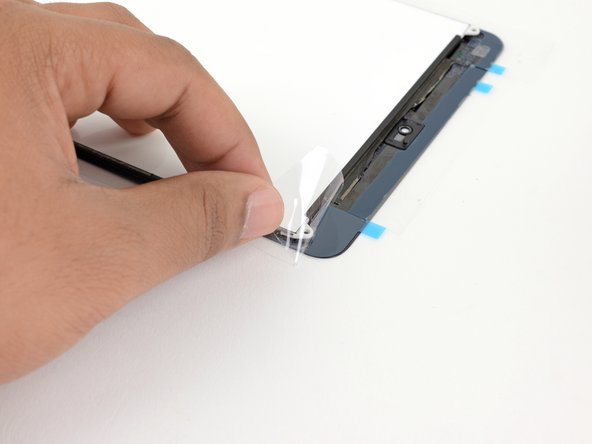
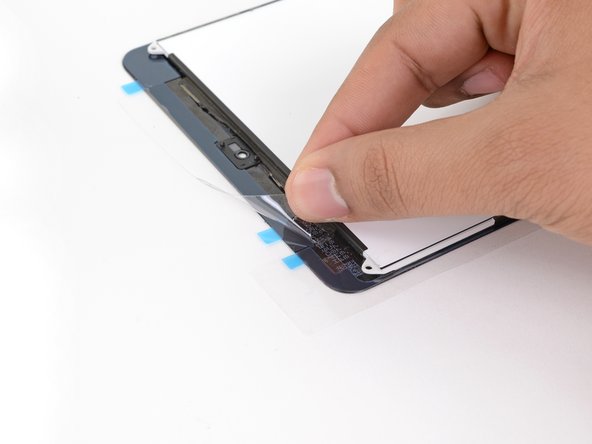
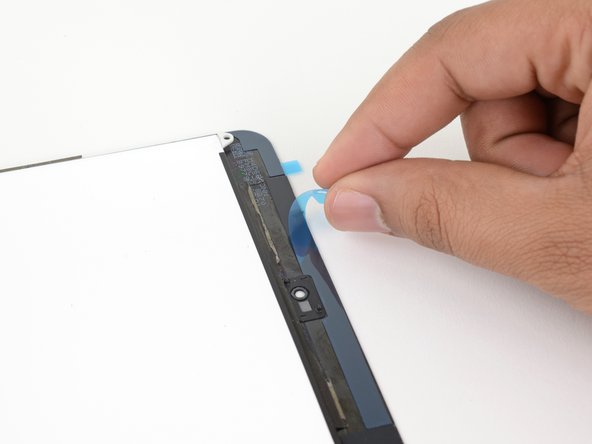
  3. iPad Display Assembly 4 Pc. Adhesive Application: étape 3, image 1 de 2 iPad Display Assembly 4 Pc. Adhesive Application: étape 3, image 2 de 2
    • Each adhesive strip is encased in four layers of plastic—three on top and one on the bottom.

    • Peel and remove the topmost plastic cling layer from the left adhesive strip.

    • Peel and remove the bottom plastic liner from the strip.

    • The top of the adhesive strip should still be covered by a colored plastic layer as well as a clear plastic stiffening layer.

    • The bottom of the adhesive strip should now be exposed and sticky.

    Demander à FixBot

    Ajouter un commentaire

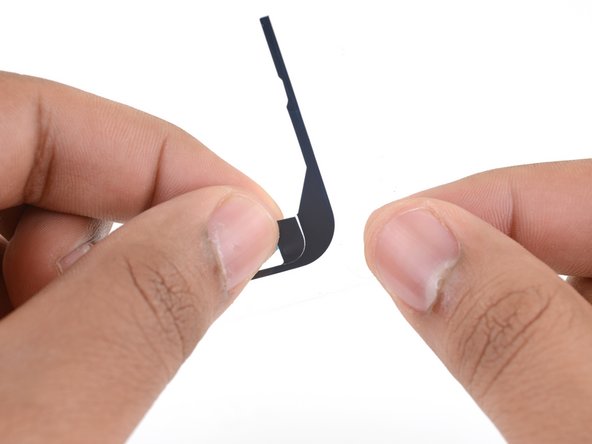
  4. iPad Display Assembly 4 Pc. Adhesive Application: étape 4, image 1 de 2 iPad Display Assembly 4 Pc. Adhesive Application: étape 4, image 2 de 2
    • If there are extra bits of adhesive on the strips that are not required for your particular model of iPad, remove them now.

    Demander à FixBot

    Ajouter un commentaire

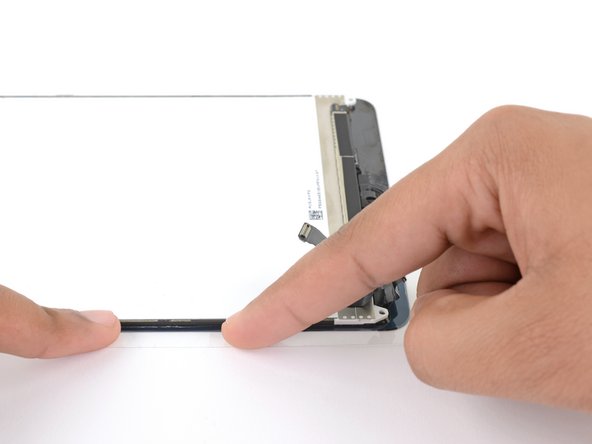
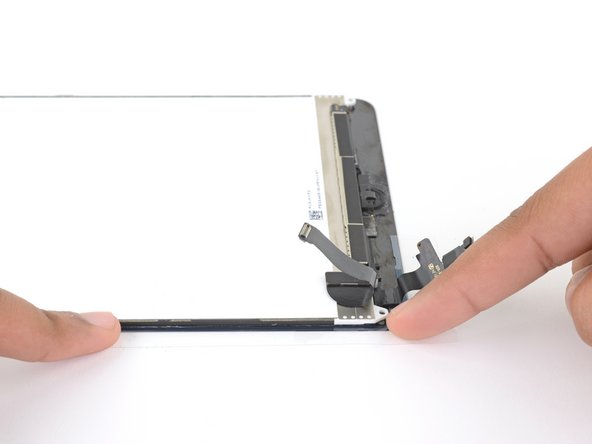
  5. iPad Display Assembly 4 Pc. Adhesive Application: étape 5, image 1 de 3 iPad Display Assembly 4 Pc. Adhesive Application: étape 5, image 2 de 3 iPad Display Assembly 4 Pc. Adhesive Application: étape 5, image 3 de 3
    • Align the left adhesive strip to the left edge of the display assembly.

    • Beginning from one corner, lay the adhesive strip onto the display assembly and press the strip into place.

    • If necessary, use a spudger to press down the narrow parts of the adhesive strip.

    Demander à FixBot

    Ajouter un commentaire

  6. iPad Display Assembly 4 Pc. Adhesive Application: étape 6, image 1 de 3 iPad Display Assembly 4 Pc. Adhesive Application: étape 6, image 2 de 3 iPad Display Assembly 4 Pc. Adhesive Application: étape 6, image 3 de 3
    • Repeat the process with the right adhesive strip.

    • Peel and remove the topmost cling layer from the strip.

    • Peel and remove the bottom liner layer from the strip.

    • Align the adhesive strip to the right edge of the display assembly.

    • Starting from one corner, lay the adhesive strip onto the display assembly and press in place.

    Demander à FixBot

    Ajouter un commentaire

  7. iPad Display Assembly 4 Pc. Adhesive Application: étape 7, image 1 de 3 iPad Display Assembly 4 Pc. Adhesive Application: étape 7, image 2 de 3 iPad Display Assembly 4 Pc. Adhesive Application: étape 7, image 3 de 3
    • Repeat the process for the top adhesive strip.

    • Peel and remove the topmost cling layer from the strip.

    • Peel and remove the bottom liner from the strip.

    • Align the strip to the top of the display assembly such that the straight adhesive line bridges the gap between the left and right strips.

    • Press the strip in place.

    Demander à FixBot

    Ajouter un commentaire

  8. iPad Display Assembly 4 Pc. Adhesive Application: étape 8, image 1 de 3 iPad Display Assembly 4 Pc. Adhesive Application: étape 8, image 2 de 3 iPad Display Assembly 4 Pc. Adhesive Application: étape 8, image 3 de 3
    • Repeat the process for the bottom adhesive strip.

    • Peel and remove the topmost cling layer from the strip.

    • Peel and remove the bottom liner from the strip.

    • Align the strip to the bottom of the display assembly such that the straight adhesive line bridges the gap between the left and right strips.

    • Press the strip in place.

    Demander à FixBot

    Ajouter un commentaire

  9. iPad Display Assembly 4 Pc. Adhesive Application: étape 9, image 1 de 3 iPad Display Assembly 4 Pc. Adhesive Application: étape 9, image 2 de 3 iPad Display Assembly 4 Pc. Adhesive Application: étape 9, image 3 de 3
    • Peel and remove the clear plastic stiffening layer from all four adhesive strip sections.

    Demander à FixBot

    Ajouter un commentaire

  10. iPad Display Assembly 4 Pc. Adhesive Application: étape 10, image 1 de 1
    • Continue with the reassembly process until you are ready to seal the device.

    Demander à FixBot

    Ajouter un commentaire

  11. iPad Display Assembly 4 Pc. Adhesive Application: étape 11, image 1 de 2 iPad Display Assembly 4 Pc. Adhesive Application: étape 11, image 2 de 2
    • Peel and remove the four colored plastic liners to expose the adhesive.

    • Close the device and place something heavy, such as a stack of large books, on top for thirty minutes to help the new adhesive bond.

    • Alternatively, you can use screen vice clamps around the perimeter of your device to set the new adhesive.

    Demander à FixBot

    Ajouter un commentaire

Conclusion

Repair didn’t go as planned? Check out our Answers Community for troubleshooting help.

Annulation : je n'ai pas terminé ce tutoriel.

2 autres ont terminé cette réparation.

Tarun Thiruma

Membre depuis le 11/20/19

40 447 Réputation

134 tutoriels rédigés

0 commentaires de tutoriel

Ajouter un commentaire

Nombre de vues :

Dernières 24 heures : 2

7 derniers jours : 15

30 derniers jours : 84

Total : 3,247