Aller au contenu principal

iPad Mini 6 Top Speaker Replacement

Conditions préalables uniquement
Ce tutoriel est uniquement destiné à être utilisé comme prérequis d'autres tutoriels. Il ne se suffit pas à lui-même.
  1. iPad Mini 6 Top Speaker Replacement, Unfasten the front camera shield: étape 1, image 1 de 2 iPad Mini 6 Top Speaker Replacement, Unfasten the front camera shield: étape 1, image 2 de 2
    • The next 11 steps will show how to remove the top speaker.

    • Use a Phillips #000 screwdriver to remove the two 1.2 mm screws securing the front camera shield to the frame.

  2. iPad Mini 6 Top Speaker Replacement, Remove the front camera shield: étape 2, image 1 de 2 iPad Mini 6 Top Speaker Replacement, Remove the front camera shield: étape 2, image 2 de 2
    Outil utilisé dans cette étape :
    Tweezers
    $4.99
    J'achète
    • Use tweezers, or your fingers, to remove the front camera shield.

  3. iPad Mini 6 Top Speaker Replacement, Disconnect the volume button board: étape 3, image 1 de 2 iPad Mini 6 Top Speaker Replacement, Disconnect the volume button board: étape 3, image 2 de 2
    • Use a spudger to pry up and disconnect the volume button board's press connector secured to the frame.

  4. iPad Mini 6 Top Speaker Replacement, Reposition the volume button board's cable: étape 4, image 1 de 2 iPad Mini 6 Top Speaker Replacement, Reposition the volume button board's cable: étape 4, image 2 de 2
    • Use tweezers, or your fingers, to peel back the volume button board's cable from the top speaker.

  5. iPad Mini 6 Top Speaker Replacement, Disconnect the top speaker: étape 5, image 1 de 2 iPad Mini 6 Top Speaker Replacement, Disconnect the top speaker: étape 5, image 2 de 2
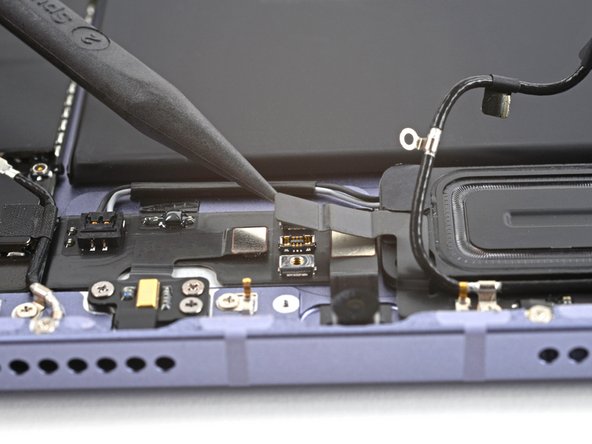
    • Use the point of spudger to pry up and disconnect the top speaker's cable.

    • Be very careful when performing this step; apply equal force to both cords to prevent any damage to the connector.

  6. iPad Mini 6 Top Speaker Replacement, Reposition the top speaker's cable: étape 6, image 1 de 2 iPad Mini 6 Top Speaker Replacement, Reposition the top speaker's cable: étape 6, image 2 de 2
    • The top speaker's cable is lightly adhered to the frame.

    • Gently peel back the cable to separate it from the frame.

  7. iPad Mini 6 Top Speaker Replacement, Heat the top speaker: étape 7, image 1 de 1
    • Apply a heated iOpener to the top-left edge of the device for 90 seconds to loosen the top speaker's adhesive.

  8. iPad Mini 6 Top Speaker Replacement, Top speaker information: étape 8, image 1 de 2 iPad Mini 6 Top Speaker Replacement, Top speaker information: étape 8, image 2 de 2
    • While you're waiting for the adhesive to loosen, note the following:

    • Adhesive is located around the perimeter of the speaker.

    • Insert a pick 2 mm to separate this adhesive.

    • Adhesive is also located in the center of the speaker.

    • Insert a pick 7 mm to separate this adhesive.

  9. iPad Mini 6 Top Speaker Replacement, Separate the top speaker's adhesive: étape 9, image 1 de 3 iPad Mini 6 Top Speaker Replacement, Separate the top speaker's adhesive: étape 9, image 2 de 3 iPad Mini 6 Top Speaker Replacement, Separate the top speaker's adhesive: étape 9, image 3 de 3
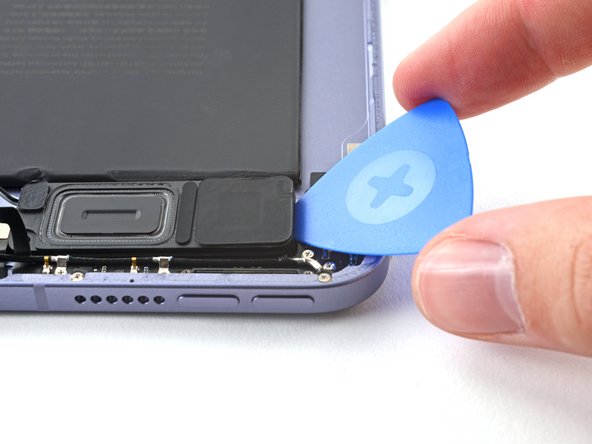
    • Insert an opening pick between the top speaker and the frame.

    • Insert the pick at least 7 mm to separate the center adhesive.

  10. iPad Mini 6 Top Speaker Replacement: étape 10, image 1 de 3 iPad Mini 6 Top Speaker Replacement: étape 10, image 2 de 3 iPad Mini 6 Top Speaker Replacement: étape 10, image 3 de 3
    • Slice along the perimeter of the top speaker to separate the adhesive.

  11. iPad Mini 6 Top Speaker Replacement, Remove the top speaker: étape 11, image 1 de 3 iPad Mini 6 Top Speaker Replacement, Remove the top speaker: étape 11, image 2 de 3 iPad Mini 6 Top Speaker Replacement, Remove the top speaker: étape 11, image 3 de 3
    • At this point, the perimeter of the speaker should be separated from the frame. If there's still resistance around the edges of the speaker, use an opening pick to cut the adhesive again.

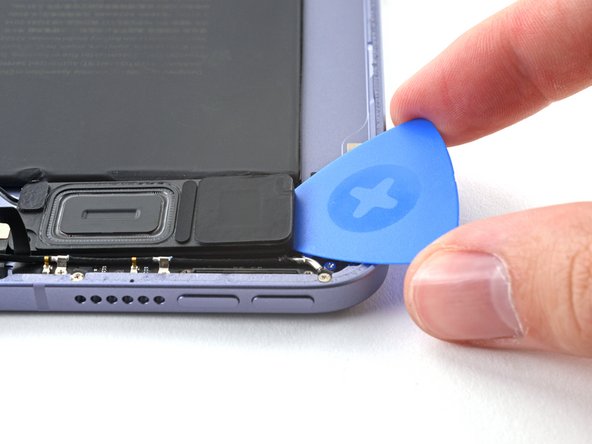
    • Pry up with the opening pick to completely separate the top speaker from the frame.

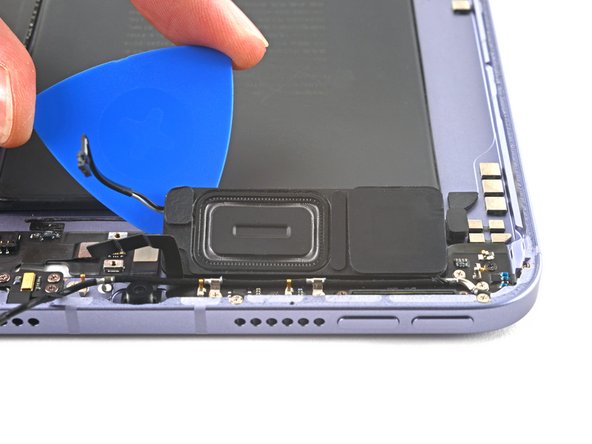
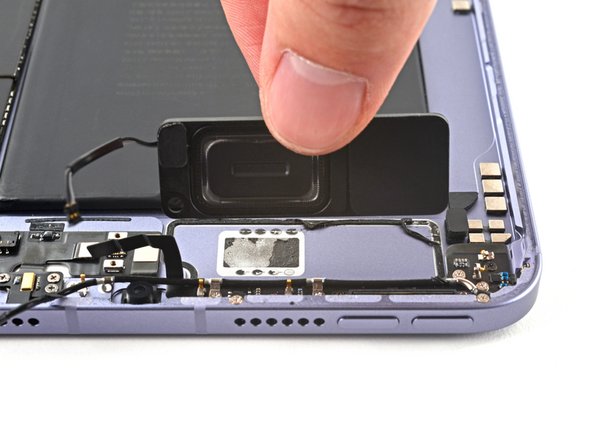
    • Remove the top speaker.

Conclusion

To reassemble your device, follow these instructions in reverse order.

Alex Diaz-Kokaisl

Membre depuis le 01/16/22

125 280 Réputation

582 tutoriels rédigés

Équipe

iFixit Membre de l'équipe iFixit

Staff

137 membres

17 457 tutoriels rédigés

0 commentaires

Ajouter un commentaire

Nombre de vues :

Dernières 24 heures : 0

7 derniers jours : 3

30 derniers jours : 3

Total : 42