Introduction
In this repair guide, we show you how to replace the logic board on the iPhone 11
Recommended Tools: Pentalobe screwdriver, Phillips screwdriver, Y-Type screwdriver, Standoff screwdriver, suction cup, tweezers, spudger and heat gun because the display is glued on.
Ce dont vous avez besoin
Vidéo d'introduction
-
-
Power off your iPhone before beginning disassembly.
-
Remove the two 6.7 mm-long pentalobe P2 screws at the bottom edge of the iPhone.
-
-
-
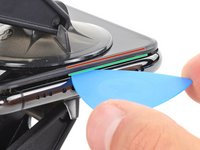
Measure 3 mm from the tip and mark the opening pick with a permanent marker.
-
-
-
Lay overlapping strips of clear packing tape over the iPhone's screen until the whole face is covered.
-
If you can't get the suction cup to stick in the next few steps, fold a strong piece of tape (such as duct tape) into a handle and lift the screen with that instead.
-
-
Outil utilisé dans cette étape :Clampy - Anti-Clamp$24.95
-
Pull the blue handle backwards to unlock the Anti-Clamp's arms.
-
Slide the arms over either the left or right edge of your iPhone.
-
Position the suction cups near the bottom edge of the iPhone—one on the top, and one on the bottom.
-
Squeeze the cups together to apply suction to the desired area.
-
-
-
Heat an iOpener and thread it through the arms of the Anti-Clamp.
-
Fold the iOpener so it lays on the bottom edge of the iPhone.
-
Wait one minute to give the adhesive a chance to release and present an opening gap.
-
Insert an opening pick into the gap under the screen and the plastic bezel, not the screen itself.
-
Skip the next three steps.
-
-
-
Use a hairdryer or heat gun or prepare an iOpener and apply it to the lower edge of the iPhone for about a minute.
-
-
-
Pull up on the suction cup with firm, constant pressure to create a slight gap between the front panel and rear case.
-
Insert an opening pick into the gap under the screen and the plastic bezel, not the screen itself.
-
-
-
Slide the opening pick around the lower left corner and up the left edge of the iPhone, slicing through the adhesive holding the display in place.
-
-
-
Pull the small nub on the suction cup to detach it from the front panel.
-
-
-
-
Open the iPhone by swinging the display up from the left side, like the back cover of a book.
-
Prop the display up against something sturdy.
-
-
-
To access the screws in the following step, tilt the display by slightly lifting its lower edge.
-
-
Outil utilisé dans cette étape :Magnetic Project Mat$16.96
-
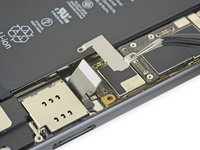
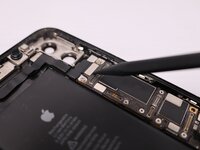
Use a Y000 driver to remove the three 1.1 mm-long screws securing the battery connector bracket.
-
-
-
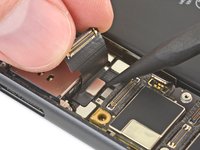
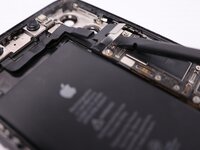
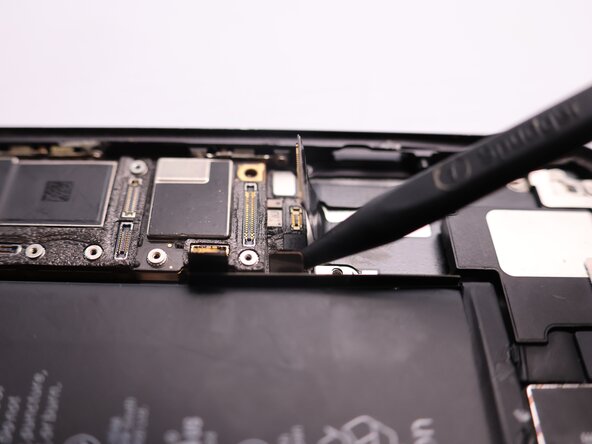
Use a spudger or a clean fingernail to pry the battery connector up from its socket on the logic board.
-
Bend the connector slightly away from the logic board to prevent it from accidentally contacting the socket.
-
-
-
Use a Y000 driver to remove the five 1.1 mm screws securing the logic board cover bracket.
-
-
-
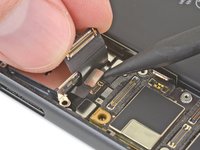
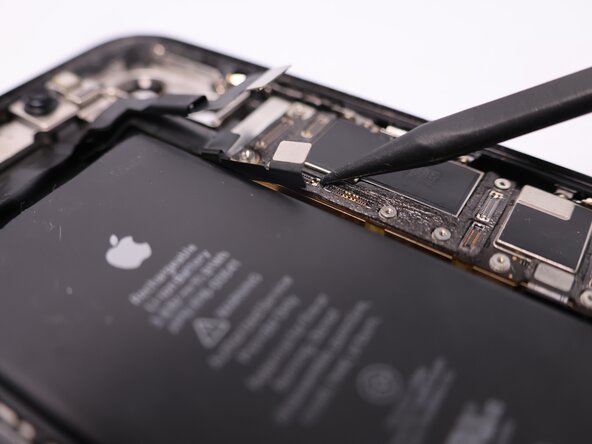
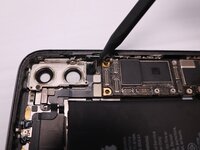
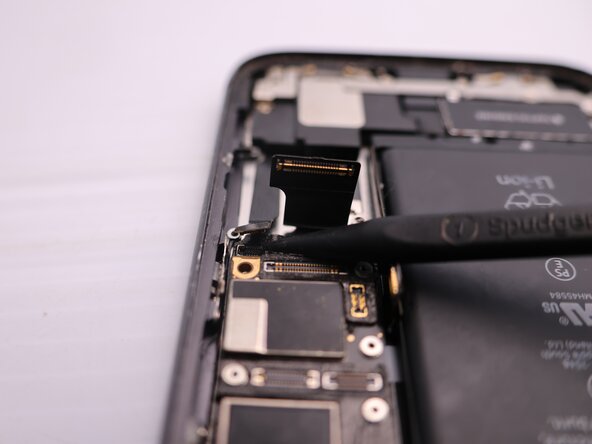
Use a spudger or a fingernail to disconnect the LCD panel cable connector.
-
Disconnect the digitizer connector next to it.
-
-
-
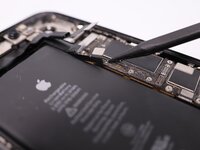
Use the point of a spudger or a fingernail to disconnect the front panel sensor assembly connector.
-
-
-
Remove the two Phillips screws securing the rear camera cover:
-
One 1.4 mm screw
-
One 1.3 mm screw
-
-
-
Lift the camera cover from the edge closest to the battery, and remove it.
-
-
-
Use a spudger or a fingernail to disconnect the two camera cable connectors by prying them straight up from their sockets.
-
-
-
Insert the point of a spudger at the bottom right corner of the camera, between the camera assembly and the iPhone's frame.
-
Gently pry up to lever the camera out of the iPhone.
-
-
-
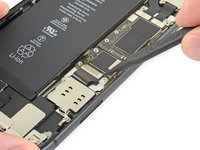
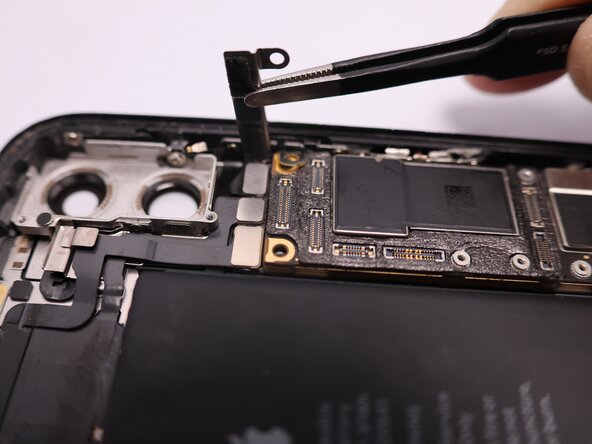
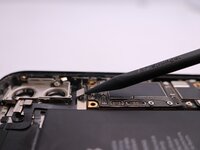
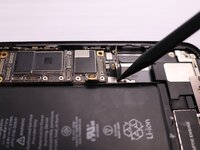
Use a spudger or a fingernail to pry up and disconnect the flex cable for the Lightning connector assembly.
-
-
-
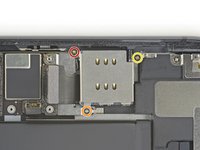
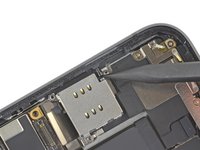
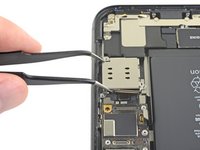
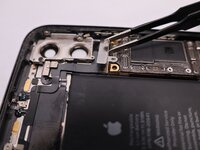
Remove the three Phillips screws surrounding the SIM card reader:
-
One 1.5 mm screw
-
One 1.9 mm screw
-
One 1.6 mm screw securing a grounding bracket
-
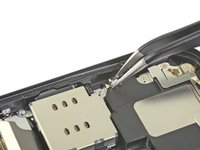
Removing the grounding bracket secured by the final screw.
-
-
-
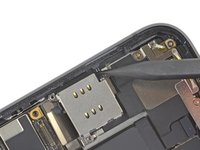
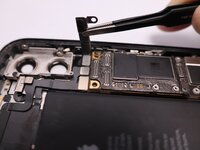
Use a standoff driver to remove the 3.1 mm screw securing the SIM card reader connector bracket.
-
-
-
Remove the SIM reader's connector bracket.
-
-
-
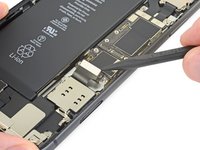
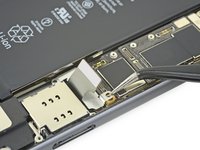
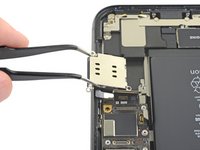
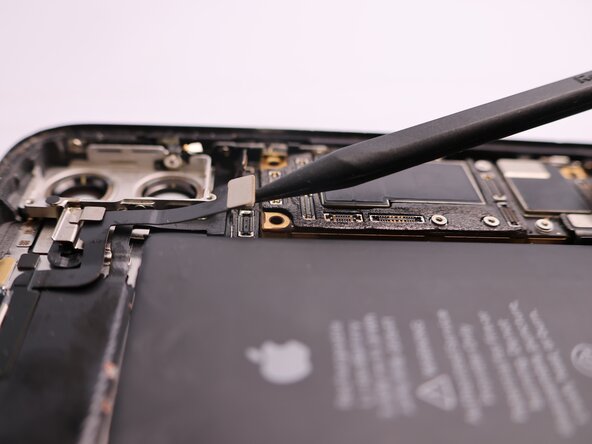
While gently lifting the Lightning connector flex cable out of the way, use the point of a spudger to pry up and disconnect the SIM card reader flex cable.
-
-
-
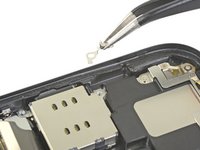
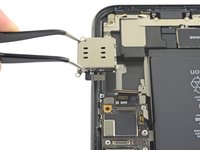
Use the point of a spudger to push the SIM eject plunger out towards the edge of the phone.
-
-
-
Lift the SIM card reader and slide it toward the outside edge of the iPhone.
-
Remove the SIM card reader.
-
-
-
Use a spudger or fingernail to disconnect the two front camera cable connectors by prying them from straight up from their sockets.
-
-
-
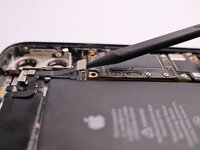
Use a spudger to disconnect the cable connectors for the volume, power, and silent switch.
-
-
-
Use a spudger to disconnect the cable connectors for the lighting port and wireless charging coil.
-


To reassemble your device, follow these instructions in reverse order.
Annulation : je n'ai pas terminé ce tutoriel.
51 autres ont terminé cette réparation.

18 commentaires de tutoriel
where can I buy a logic board for an Iphone 11
Try AliExpress or eBay
Top, explications claires. Merci pour votre vidéo.