Aller au contenu principal

iPhone 6 Plus iSclack Opening Procedure

Conditions préalables uniquement
Ce tutoriel est uniquement destiné à être utilisé comme prérequis d'autres tutoriels. Il ne se suffit pas à lui-même.

Ce dont vous avez besoin

  1. iPhone 6 Plus iSclack Opening Procedure, iSclack Opening Procedure: étape 1, image 1 de 3 iPhone 6 Plus iSclack Opening Procedure, iSclack Opening Procedure: étape 1, image 2 de 3 iPhone 6 Plus iSclack Opening Procedure, iSclack Opening Procedure: étape 1, image 3 de 3
    Outil utilisé dans cette étape :
    iSclack
    $24.99
    J'achète
    • The next two steps demonstrate using the iSclack, a great tool for safely opening the iPhone 6 Plus that we recommend for anyone doing more than one repair. If you aren't using the iSclack, skip down two steps.

    • If the plastic depth gauge is attached at the center of the iSclack, remove it now—it's not needed for larger phones like the iPhone 6 Plus.

    • Close the handle on the iSclack, opening the suction cup jaws.

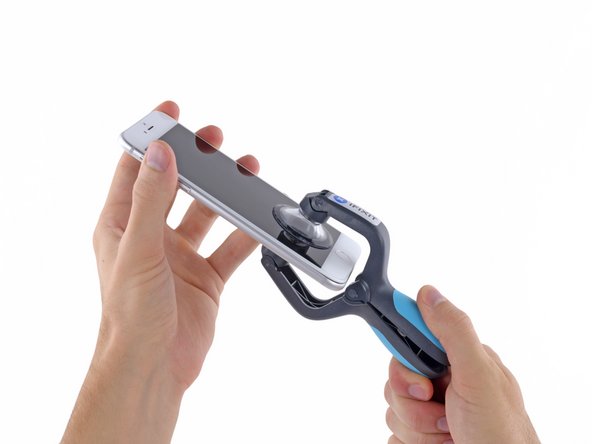
    • Place the bottom of your iPhone in between the suction cups.

    • Position the iSclack's upper suction cup against the display, near the home button.

    • Open the handles to close the jaws of the iSclack. Center the suction cups and press them firmly onto the top and bottom of the iPhone.

    • If your display or back glass is badly cracked, covering it with a layer of clear packing tape may help the suction cups adhere. The iSclack also includes two pieces of tape for this purpose.

  2. iPhone 6 Plus iSclack Opening Procedure: étape 2, image 1 de 2 iPhone 6 Plus iSclack Opening Procedure: étape 2, image 2 de 2
    • Hold onto your iPhone securely and close the handle of the iSclack to separate the suction cups, pulling the front panel up from the rear case.

    • The iSclack is designed to safely open your iPhone enough to separate the pieces, but not enough to damage any of the display cables.

    • Peel the two suction cups off your iPhone.

    • Skip the next three steps and continue on to Step 7.

Conclusion

To reassemble your device, follow these instructions in reverse order.

0 commentaires

Ajouter un commentaire

Nombre de vues :

Dernières 24 heures : 0

7 derniers jours : 3

30 derniers jours : 13

Total : 621