Aller au contenu principal

Remplacement du commutateur Romer G du clavier Logitech G PRO

Anglais
Français

Traduction de l’étape 15

Étape 15
Logitech G PRO Keyboard Romer G Switch Replacement: étape 0, image 1 de 3 Logitech G PRO Keyboard Romer G Switch Replacement: étape 0, image 2 de 3 Logitech G PRO Keyboard Romer G Switch Replacement: étape 0, image 3 de 3
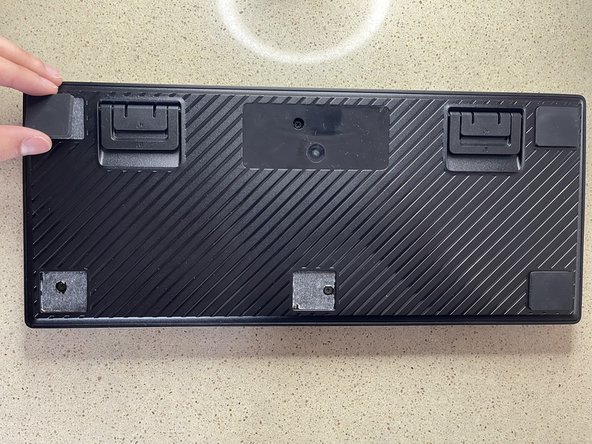
  • Apply some adhesive to each location where there was a rubber pad on the bottom of the keyboard. Then place each of the rubber feet back on top of the adhesive.

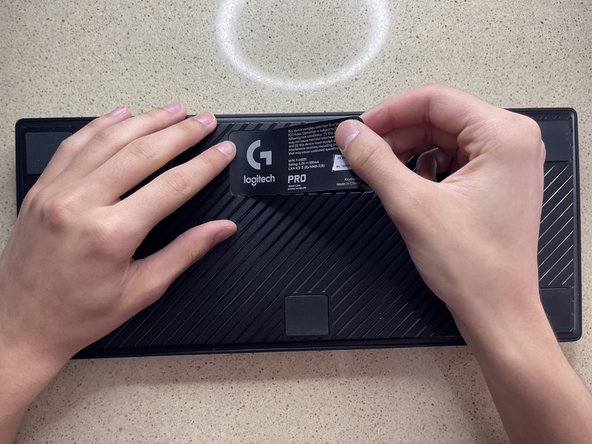
  • Take the Logitech branding sticker and reapply it back to its location.

  • The Logitech sticker does not need adhesive as it should retain its original adhesive and can just be reapplied.

Appliquez un peu d'adhésif à chaque endroit où il y avait un tampon en caoutchouc au bas du clavier. Remettez ensuite chacun des pieds en caoutchouc sur le dessus de l'adhésif.

Prenez l'autocollant de marque Logitech et réappliquez-le à son emplacement.

L'autocollant Logitech n'a pas besoin d'adhésif car il doit conserver son adhésif d'origine et peut simplement être réappliqué.

Vos contributions sont faites dans le cadre de la licence open source Creative Commons.