Traduction de l’étape 1
Étape 1


-
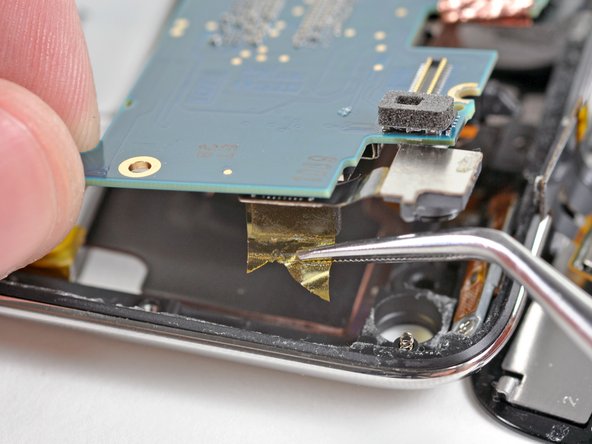
Use an iPod opening tool to peel the edge of the yellow kapton tape that covers the rear-facing camera and the logic board.
-
Continue peeling the tape from the bottom of the rear-facing camera connector.
-
Use a pair of tweezers to grasp and remove the tape from the top of the rear-facing camera connector.
Vos contributions sont faites dans le cadre de la licence open source Creative Commons.