Aller au contenu principal

Remplacement de l'écran du Huawei P9 Lite

Anglais
Français

Traduction de l’étape 2

Étape 2
Huawei P9 Lite Display Replacement: étape 0, image 1 de 3 Huawei P9 Lite Display Replacement: étape 0, image 2 de 3 Huawei P9 Lite Display Replacement: étape 0, image 3 de 3
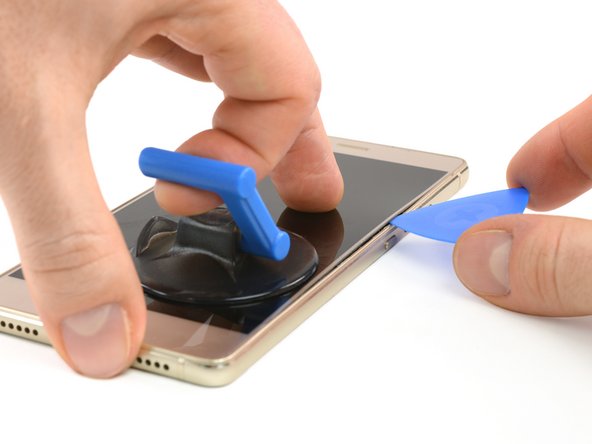
  • With a suction handle you can lift the display a little bit to create a gap.

  • Insert just the tip of an opening pick in the gap and steadily slide it along the edge towards the top. You may need to go back and forth a few times.

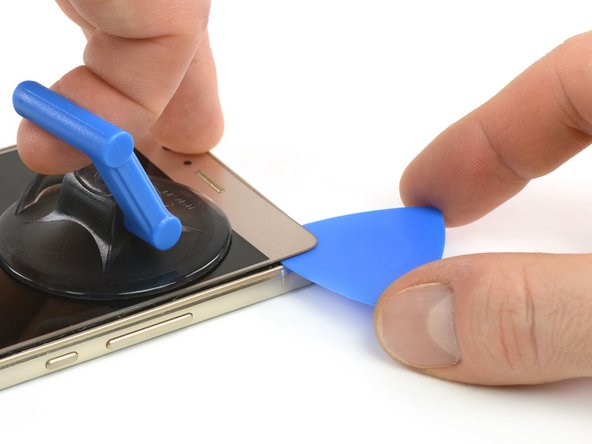
  • Try to get around the corner and behind the top part of the display. Re-position the suction handle if needed.

  • Leave the opening pick behind the display to avoid the re-sealing of the adhesive.

Soulevez légèrement l'écran avec une ventouse pour ouvrir un espace.

Insérez juste la pointe d'un médiator dans cet espace et faites-la glisser tout le long du bord vers le haut de l'appareil. Vous devrez peut-être faire plusieurs allers et retours.

Essayez de progresser le long du coin et de la partie supérieure de l'écran. Changez la ventouse de place si nécessaire.

Laissez le médiator derrière l'écran pour éviter que la colle adhère à nouveau.

Vos contributions sont faites dans le cadre de la licence open source Creative Commons.