Traduction de l’étape 3
Étape 3


-
Insert the flat end of a spudger under the loudspeaker at the gap on the left side.
-
Work the spudger under the loudspeaker to seperate it from the adhesive and remove the loudspeaker.
-
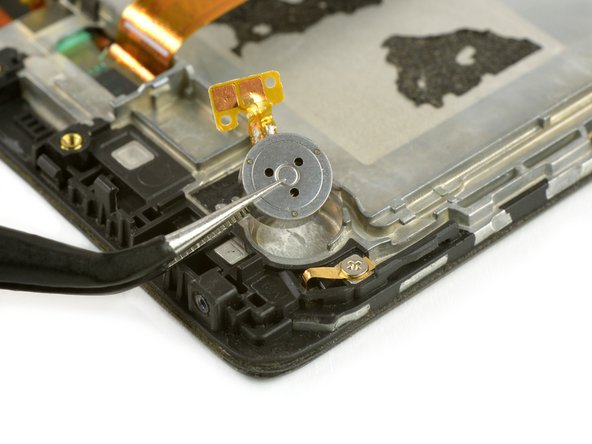
Use tweezers to take the vibration unit out of its housing.
Vos contributions sont faites dans le cadre de la licence open source Creative Commons.