Aller au contenu principal

Procédure d'ouverture de l'iPad Pro 10,5"

Info : Vous modifiez un tutoriel prérequis. Toutes les modifications apportées affecteront les 21 tutoriels qui comprennent cette étape.

Anglais
Français

Traduction de l’étape 7
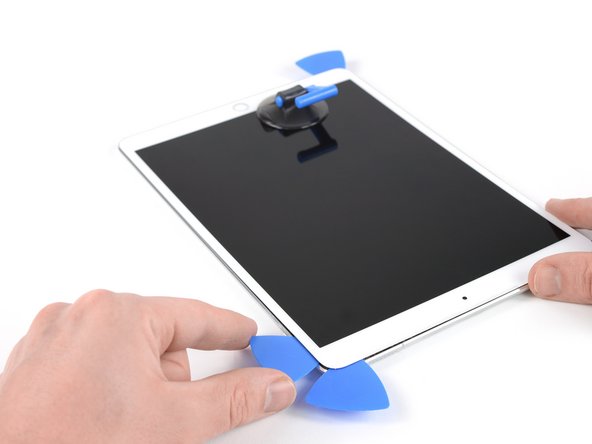
Étape 7
iPad Pro 10.5" Opening Procedure: étape 0, image 1 de 3 iPad Pro 10.5" Opening Procedure: étape 0, image 2 de 3 iPad Pro 10.5" Opening Procedure: étape 0, image 3 de 3
  • Apply heat to the final, right edge of the iPad for about two minutes, or until it's slightly too hot to touch comfortably.

  • Insert a fourth opening pick at the top right corner of the iPad.

  • Slide the opening pick down to the bottom right corner to cut the adhesive.

  • Slide the opening pick around the bottom right corner—pausing to apply more heat if needed—and cut the remaining adhesive on the bottom edge, but stop before you reach the home button.

Chauffez le dernier côté (droit) de l'iPad pendant environ deux minutes ou jusqu'à ce qu'il soit légèrement trop chaud au toucher.

Insérez le quatrième médiator dans le coin supérieur droit de l'iPad.

Faites-le glisser tout le long du côté droit afin de couper l'adhésif.

Faites glisser le médiator autour du coin inférieur droit (après l'avoir refait chauffé si nécessaire) et tranchez les restes d'adhésif du côté inférieur de l'iPad. Cependant, arrêtez-vous quand vous atteignez le bouton home.

Vos contributions sont faites dans le cadre de la licence open source Creative Commons.