Info : Vous modifiez un tutoriel prérequis. Toutes les modifications apportées affecteront le tutoriel qui comprend ces étapes.
Traduction de l’étape 22
Étape 22

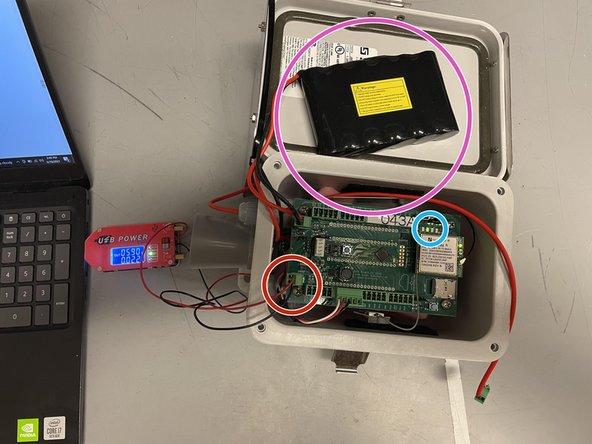


Adjusting Solar Charger Potentiometer
-
Obtain USB power supply, plug into a laptop, and set output to 5.9V
-
Plug in the green terminal block from the power supply into the Open-Storm board solar port.
-
Confirm the solar charge LED is off.
-
Plug in a dead battery to the battery port. This step will not work with a charged battery
-
CAREFULLY turn the silver potentiometer next to the charge controller IC with a small flathead screw driver until the charge light turns on.
Vos contributions sont faites dans le cadre de la licence open source Creative Commons.