Aller au contenu principal

Remplacement de l'écran du Google Pixel 3

Anglais
Français

Traduction de l’étape 1

Étape 1
Google Pixel 3 Display Assembly Replacement, Weaken the display assembly's adhesive: étape 0, image 1 de 3 Google Pixel 3 Display Assembly Replacement, Weaken the display assembly's adhesive: étape 0, image 2 de 3 Google Pixel 3 Display Assembly Replacement, Weaken the display assembly's adhesive: étape 0, image 3 de 3
Weaken the display assembly's adhesive
  • Apply a heated iOpener to the bottom edge of the screen for a minute.

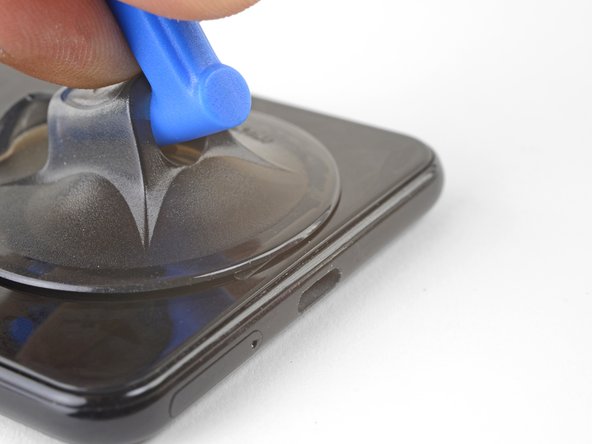
  • Place a suction cup near the bottom edge of the screen, near the USB-C port.

  • Lift on the suction cup with strong, steady force to create a gap.

  • Depending on how aged your phone is, this may take significant force. If you are having trouble, apply more heat and try again.

  • You can also try heating and pulling up a long edge of the phone to gain access.

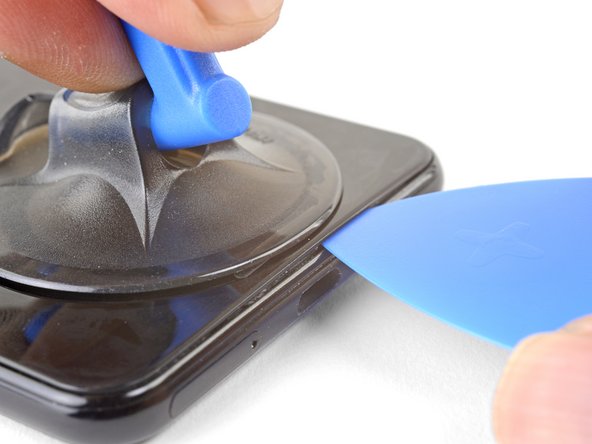
  • Insert an opening pick into the gap.

Posez un iOpener chaud sur le bord inférieur de l'écran pendant une minute.

Appliquez une ventouse à côté du bord inférieur de l'écran et du port USB-C.

Soulevez la ventouse fortement et constamment pour ouvrir un espace.

Cela nécessitera un certain effort selon l'âge de votre téléphone. Si vous avez du mal, faites chauffer plus et recommencez.

Vous pouvez également essayer de chauffer et de soulever un bord long du téléphone pour ouvrir l'espace.

Insérez un médiator dans l'espace.

Vos contributions sont faites dans le cadre de la licence open source Creative Commons.