Aller au contenu principal

Remplacement de l'écran du Google Pixel 3

Anglais
Français

Traduction de l’étape 5

Étape 5
Google Pixel 3 Display Assembly Replacement, Cut through the adhesive: étape 0, image 1 de 3 Google Pixel 3 Display Assembly Replacement, Cut through the adhesive: étape 0, image 2 de 3 Google Pixel 3 Display Assembly Replacement, Cut through the adhesive: étape 0, image 3 de 3
Cut through the adhesive
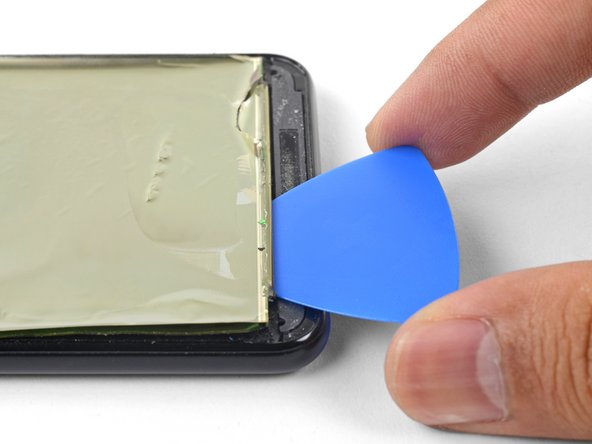
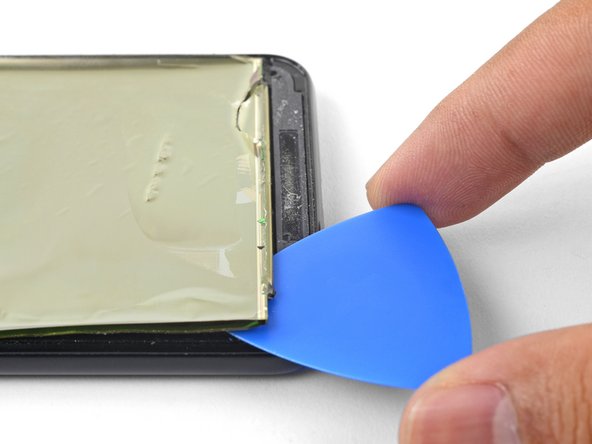
  • The remaining part of the screen is affixed to the phone frame by a large patch of adhesive.

  • Insert an opening pick into the seam between the phone frame and the bottom edge of the screen remains.

  • Pry along the edge to loosen the screen from the frame.

  • If you are having trouble, apply a heated iOpener over the screen to help loosen the adhesive.

Ce qui reste de l'écran est fixé au châssis du téléphone par une grande quantité de colle.

Insérez un médiator dans la jointure entre le châssis du téléphone et le bord inférieur de la dernière partie de l'écran.

Faites levier le long du bord pour détacher l'écran du châssis.

Si vous avez du mal, posez un iOpener chauffé sur l'écran pour faire ramollir l'adhésif.

Vos contributions sont faites dans le cadre de la licence open source Creative Commons.