Aller au contenu principal

Sostituzione Tasti Joy-Con destro Nintendo Switch

Anglais
Italien

Traduction de l’étape 11

Étape 11
Nintendo Switch Right Joy-Con Buttons Replacement: étape 0, image 1 de 2 Nintendo Switch Right Joy-Con Buttons Replacement: étape 0, image 2 de 2
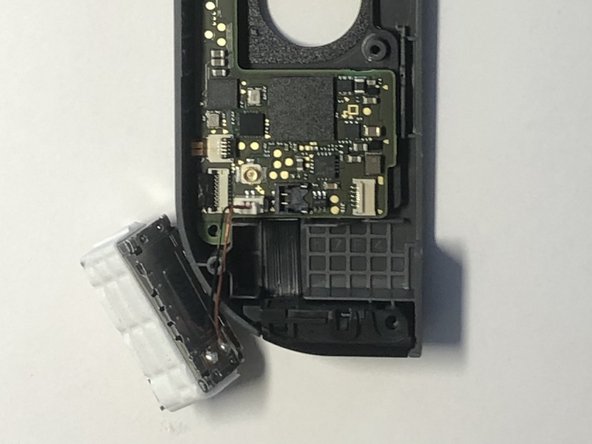
  • Using a spudger, gently pry upwards on both the left and right sides of the vibrator.

  • The vibrator is held in place with adhesive so it may take a bit of force to remove.

  • Once the vibrator is removed from its holder do not disconnect the cable. Instead, just move it to the side.

Usando uno spudger, fai leva delicatamente su entrambi i lati del motore della vibrazione.

Il motore della vibrazione è tenuto fermo con dell'adesivo, quindi potrebbe richiedere della forza per essere rimosso.

Dopo aver rimosso il motore della vibrazione dal suo support, non scollegare il cavo. Spostalo invece da parte.

Vos contributions sont faites dans le cadre de la licence open source Creative Commons.