Traduction de l’étape 1
Étape 1

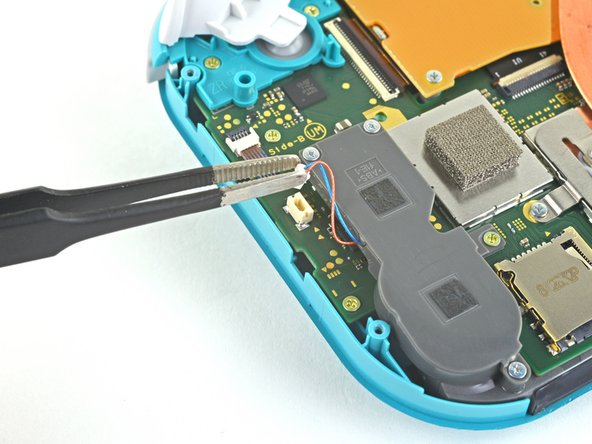


Remove the right speaker
-
Use a pair of tweezers or your fingers to pull the right speaker cable straight up and out of its socket on the motherboard.
| [title] Remove the right speaker | |
| - | [* black] Use a pair of tweezers or your fingers to pull the right speaker cable straight up and out of its socket on the motherboard. |
| + | [* black] Use a pair of [product|IF145-020|tweezers] or your fingers to pull the right speaker cable straight up and out of its socket on the motherboard. |
| [* icon_caution] Do not pull from the wires, or else you risk ripping the wires off the connector. |
Vos contributions sont faites dans le cadre de la licence open source Creative Commons.