Traduction de l’étape 15
Étape 15


-
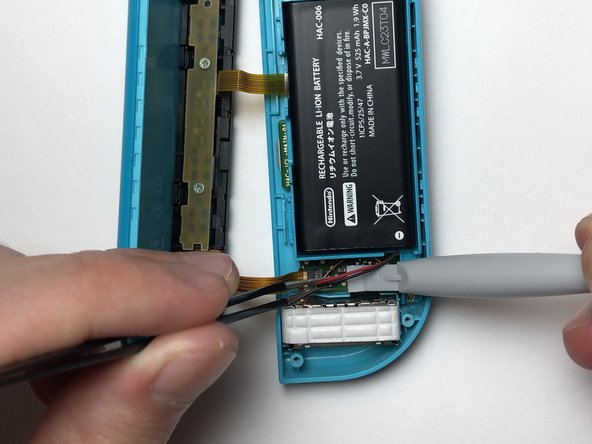
Place the battery into the mid-frame.
-
Use tweezers to align the battery plug over the socket and with a pry tool or an object with a flat edge, press the plug into the socket.
Vos contributions sont faites dans le cadre de la licence open source Creative Commons.