Aller au contenu principal

remplacement de la caméra du Creative Ziio 7"

Anglais
Français

Traduction de l’étape 3

Étape 3
Creative Ziio 7" Camera Replacement: étape 0, image 1 de 2 Creative Ziio 7" Camera Replacement: étape 0, image 2 de 2
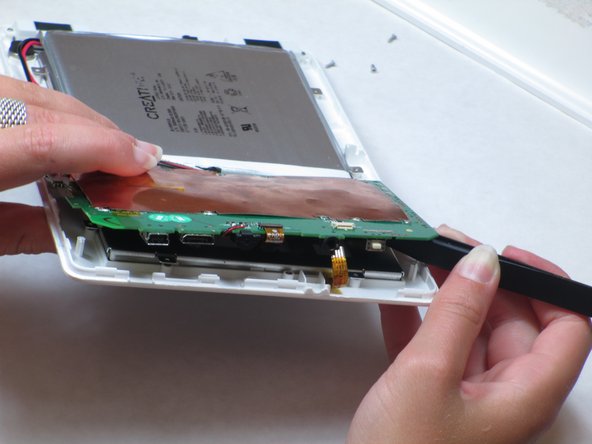
  • Lift up the motherboard.

  • A mesh-like strip on the right side will be connected to the bottom of the motherboard.

  • Remove the tape on top of the strip. Use tweezers or pliers to pull on the strip and unplug it.

Soulevez la carte mère.

Une bande en forme de maille sur le côté droit sera connectée au bas de la carte mère.

Retirez le ruban adhésif sur le dessus de la bande. Utilisez une pince à épiler ou une pince pour tirer sur la bande et débranchez-la.

[* black] Lift up the motherboard.
-[* black] A mesh-like strip on the right side will be connected to the bottom of the motherboard.
+[* icon_note] A mesh-like strip on the right side will be connected to the bottom of the motherboard.
[* black] Remove the tape on top of the strip. Use tweezers or pliers to pull on the strip and unplug it.

Vos contributions sont faites dans le cadre de la licence open source Creative Commons.