Traduction de l’étape 4
Étape 4

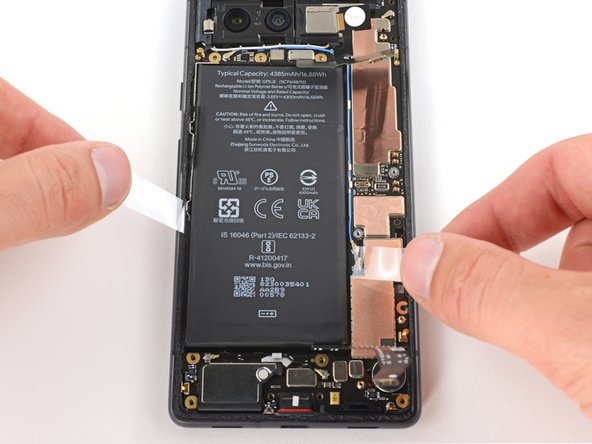
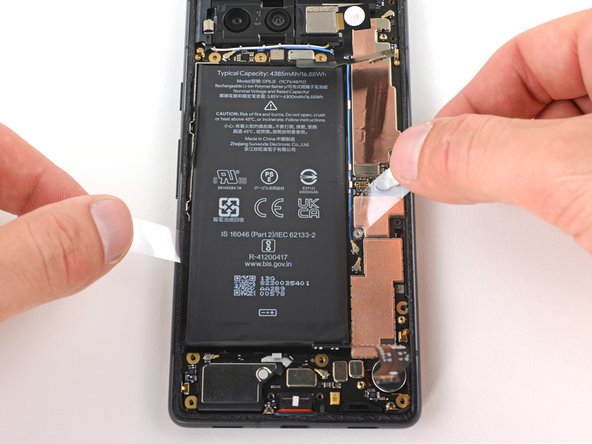


Slide the battery jacket
-
Firmly grip both sides of the battery jacket. Hold them at a low angle, but up high enough so they don't snag on any logic board components or the frame.
-
Slide each end of the jacket toward the top of the battery in a sawing motion to cut through the bottom portion of adhesive.
-
Stop sawing when the jacket reaches halfway up the battery.
Vos contributions sont faites dans le cadre de la licence open source Creative Commons.