Traduction de l’étape 31


-
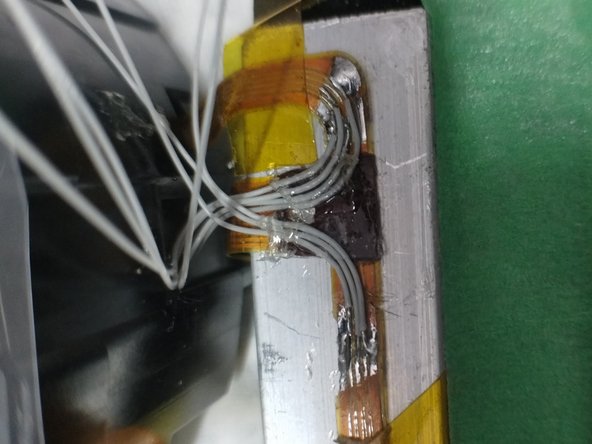
Use masking tape to hold things in place while you work on them. I also cut some pieces of rigid foam to hold things in position. I recommend mounting this on a board that you can rotate for soldering at convenient angles. Cover the lenses (I used pieces of ziplock bag taped across) to avoid flux splash or dust while working.
-
Use a scalpel to scrape away some of the epoxy coating, being careful not to cut the copper traces.
-
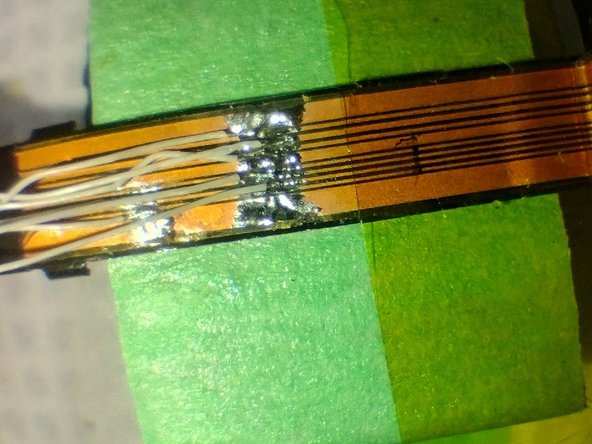
Use some 34AWG stranded wire to replace the damaged section to flex PCB.
-
Use a multimeter to check the best you can, as you don't want to have to disassemble it again after testing.
-
Clean with flux remover on cotton swabs. Followed by IPA. Insulate with kapton/polyamide tape. Use double sided tape to reattach cables where they need to go.
-
Soldering the ribbon was very difficult. The traces were ~0.1 - 0.2mm wide. Stagger the soldering positions to help avoid shorts. At this stage I'm giving this repair job a 20% chance of success. If this doesn't work I will manufacturing a new flex ribbon - although I fitting to the motor will be challenging without removing the calibration screws.
Vos contributions sont faites dans le cadre de la licence open source Creative Commons.