Aller au contenu principal

iPad Air 2 Wi-Fi フロントパネル取り外し

Info : Vous modifiez un tutoriel prérequis. Toutes les modifications apportées affecteront les 18 tutoriels qui comprennent cette étape.

Anglais
Japonais

Traduction de l’étape 29

Étape 29
iPad Air 2 Wi-Fi  Opening Procedure: étape 0, image 1 de 2 iPad Air 2 Wi-Fi  Opening Procedure: étape 0, image 2 de 2
  • To reduce the risk of a short, you can use a battery isolation pick to disconnect the battery.

  • Be very careful when you isolate the battery using a battery blocker. The battery contacts are easily damaged, resulting in irreversible damage to the logic board.

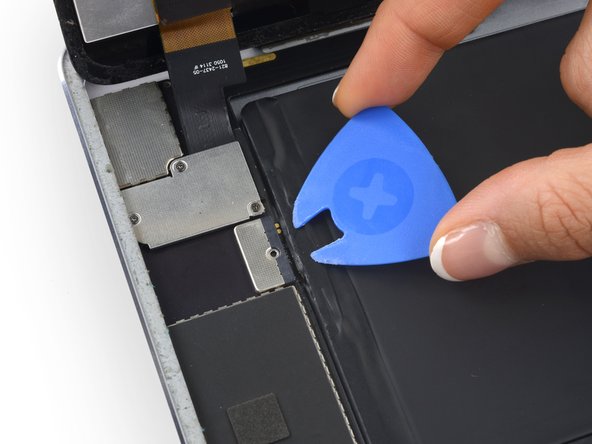
  • Slide a battery isolation pick underneath the battery connector area of the logic board, and leave it in place while you work.

  • Alternatively, make a battery blocker using a playing card and slide it underneath the logic board connector to disconnect the battery.

ショートする危険性を減らすために、バッテリー用絶縁ピックを使用してバッテリーの接続を切って下さい。

バッテリーブロッカーを使用してバッテリーを分離する場合は、十分に注意してください。バッテリーの接点が損傷しやすく、ロジックボードが不可逆的に損傷します。

メイン基板のバッテリーコネクターエリアの下に、バッテリー絶縁ピックをスライドさせ、作業中はそのままにしておきます。

または、トランプでバッテリーブロッカーを作り 、ロジックボードのコネクタの下に滑り込ませてバッテリーを外す方法もあります。

Vos contributions sont faites dans le cadre de la licence open source Creative Commons.