Info : Vous modifiez un tutoriel prérequis. Toutes les modifications apportées affecteront le tutoriel qui comprend ces étapes.
Traduction de l’étape 5
Étape 5
-
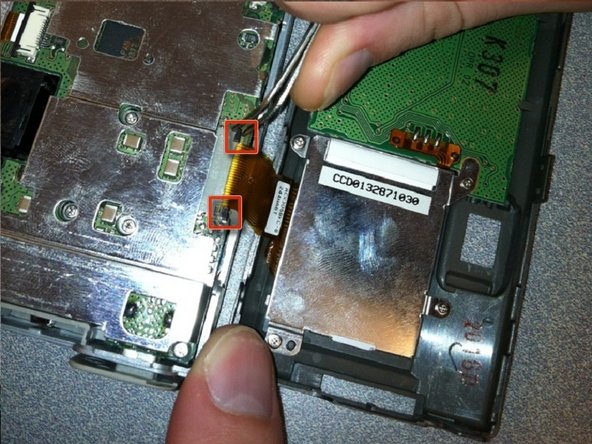
Begin reassembling the camera with the orange strip with the yellow edge.
-
Align the orange strip on the back half of the camera with its slot on the front part of the camera.
-
Use the metal tweezers to push the black tabs at each side of the slot toward the center. The tabs will hold the orange ribbon in place.
| [* black] Begin reassembling the camera with the orange strip with the yellow edge. | |
| [* black] Align the orange strip on the back half of the camera with its slot on the front part of the camera. | |
| - | [* black] Use the'' metal tweezers'' to insert the orange ribbon into the slot. Push the ribbon in as far as it can go into the slot. |
| - | [* black] Use the'' metal tweezers'' to push the black tabs at each side of the slot toward the center. The tabs will hold the orange ribbon in place. |
| + | [* black] Use the metal tweezers to push the black tabs at each side of the slot toward the center. The tabs will hold the orange ribbon in place. |
Vos contributions sont faites dans le cadre de la licence open source Creative Commons.