Aller au contenu principal

Remplacement du haut-parleur du Leapfrog My Own Leaptop

Anglais
Français

Traduction de l’étape 4

Étape 4
Leapfrog My Own Leaptop Speaker Replacement Guide: étape 0, image 1 de 2 Leapfrog My Own Leaptop Speaker Replacement Guide: étape 0, image 2 de 2
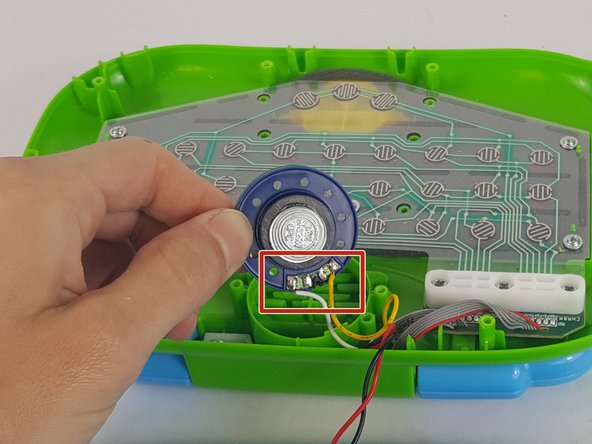
  • Once the cover is removed, gently lift up the speaker making sure not to rip or break the wires.

  • If you are disassembling the device to clean the speaker, clean it at this point with a soft, lightly dampened cloth.

  • Gently turn the speaker over and carefully desolder the white and yellow wires from the speaker.

Une fois le cache retiré, soulevez doucement le haut-parleur en veillant à ne pas déchirer ni briser les fils.

Si vous démontez l'appareil pour nettoyer le haut-parleur, nettoyez-le à ce stade avec un chiffon doux légèrement humidifié.

Retournez doucement le haut-parleur et dessouder soigneusement les fils blanc et jaune du haut-parleur.

Vos contributions sont faites dans le cadre de la licence open source Creative Commons.