Traduction de l’étape 2
Étape 2


-
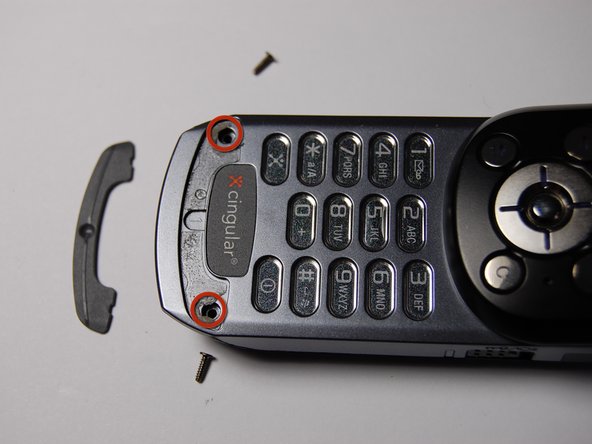
Remove the plastic piece near the base of the keypad.
-
Then remove the two 6mm screws beneath the plastic cover with a Phillips head screwdriver.
| - | [* black] Remove plastic piece near the base of the keypad. |
|---|---|
| + | [* black] Remove the plastic piece near the base of the keypad. |
| [* icon_note] This will require prying it off with a plastic opening tool and breaking the seal with the glue. Unfortunately there is no way around this. | |
| - | [* red] Then remove the two 6mm screws beneath the plastic cover with a Phillips head screw driver. |
| - | [* black] Now you are ready to remove the plastic back cover. |
| + | [* red] Then remove the two 6mm screws beneath the plastic cover with a Phillips head screwdriver. |
Vos contributions sont faites dans le cadre de la licence open source Creative Commons.