Aller au contenu principal

Remplacement de l'écran de l'iPhone 4S

Info : Vous modifiez un tutoriel prérequis. Toutes les modifications apportées affecteront les 4 tutoriels qui comprennent cette étape.

Anglais
Français

Traduction de l’étape 11

Étape 11
iPhone 4S Screen Replacement, Display Assembly Installation (Cont'd): étape 0, image 1 de 3 iPhone 4S Screen Replacement, Display Assembly Installation (Cont'd): étape 0, image 2 de 3 iPhone 4S Screen Replacement, Display Assembly Installation (Cont'd): étape 0, image 3 de 3
Display Assembly Installation (Cont'd)
  • Whether installing a replacement display assembly or re-using the existing display assembly, note the following:

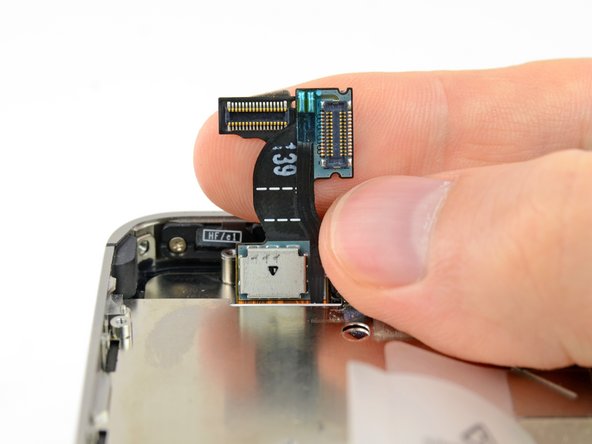
  • Carefully straighten the digitizer and LCD data cables, and feed them through the slot cut in the outer case.

  • The middle photo shows the digitizer cable being correctly fed through to its full length.

  • This photo shows the display assembly being installed incorrectly, with too much slack in the digitizer cable, which then forms a bend/loop that gets caught in the slot. The third photo also shows this loop.

  • If the digitizer cable has been installed incorrectly, it will not reach its socket on the logic board. Do not attempt to pull it through by force, or it will be cut by the sharp edge of its slot in the enclosure. Remove the display assembly, straighten the cable, and re-feed the cable through completely and correctly.

Que vous installiez un écran de remplacement ou que vous utilisiez l'écran existant, voici quelques recommandations:

Redressez soigneusement les nappes de données de la vitre tactile et de l'écran LCD et passez-les à travers la fente taillée dans le boîtier extérieur.

La photo du milieu montre la nappe de la vitre tactile correctement insérée sur toute sa longueur.

Cette photo montre l'ensemble écran installé incorrectement, avec trop de mou dans la vitre tactile, qui forme alors un pli/une boucle qui reste accroché à la fente. La troisième photo montre également cette boucle.

Si l'installation de la nappe du tactile n'est pas correcte, la nappe n'arrive pas jusqu'à son emplacement sur la carte mère. N'essayez surtout pas de forcer, sinon la nappe se déchire. Enlevez l'écran, mettez la nappe bien à plat, et passez-la à travers la fente correctement.

Vos contributions sont faites dans le cadre de la licence open source Creative Commons.