Introduction
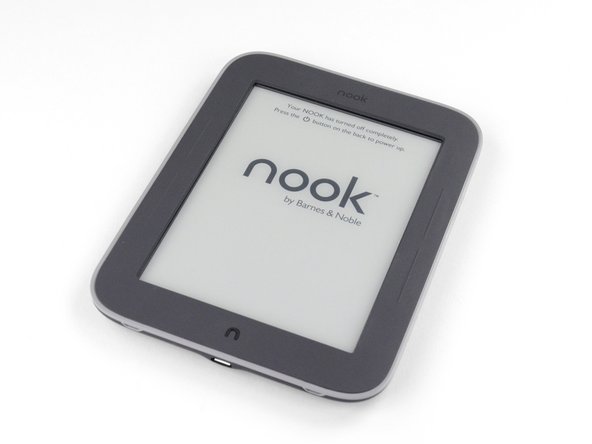
This is the 21st century; reading lights are old school, right? Heck, light bulbs, in general, are old school. If my electronic device can't light itself, I don't want it! Join us as we shed some light on the newest eReader from the bright minds at Barnes & Noble.
Did this teardown leave you glowing? Follow @ifixit on Twitter for live updates on the latest products and teardowns.
Ce dont vous avez besoin
-
-
In an attempt to solve the centuries-old problem of how to read in the dark, Barnes & Noble brings us a revamped version of last year's Nook Simple Touch.
-
The specs are identical to last year's model with one main addition:
-
Adjustable GlowLight technology
-
2 GB internal storage, supports up to 32GB of additional storage via microSD card
-
16-level grayscale 6 inch E-Ink touchscreen with a max resolution of 600 x 800 pixels
-
802.11b/g/n Wireless connectivity
-
-
-
The back and sides of the device contain no surprises.
-
The power button is large, but must be pressed in a certain spot to actually click. It also seems rather loosely attached.
-
Four indents (two on top, two on bottom) in the front case of the GlowLight look like they may help out with disassembly. Possible points for repairability?
-
-
The front of the device contains the signature "n" button at the bottom and two sets of page up/page down buttons on the sides.
-
With the GlowLight backlight turned off, it kind of looks just like a Nook Simple Touch!
-
Okay, we're getting antsy; let's dig in!
-
-
-
The instability of the power button proves helpful as we easily pop it off with a plastic opening tool.
-
The clips on the outside and the ease of prying off the button gave us a warm, fuzzy, repair-friendly feeling. That tamper-proof sticker, however, did not.
-
Oh well…so long warranty! Our metal spudger takes care of that.
-
-
-
It appears that only a single T5 Torx screw, which is easily removed with our 54 Bit Driver Kit, stands between us and the glowing innards of the newest Nook.
-
With the screw out of our way all we have to do is slide the rear panel down to free it.
-
Tamper-proof sticker aside, this device is starting to receive some glowing repairability reviews around the office.
-
-
-
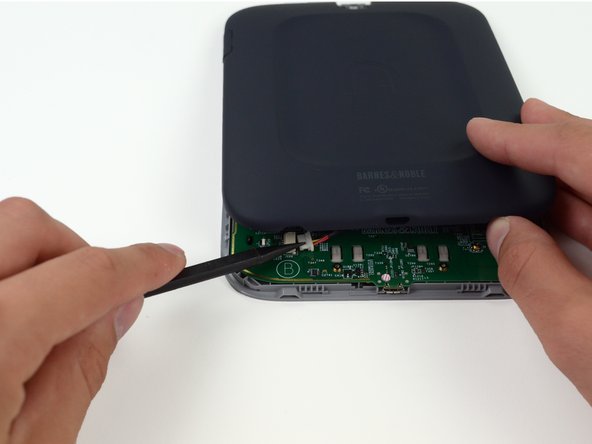
As our spudger comes out to disconnect the solitary battery connector, we wait for something along the lines of this to happen.
-
Unfortunately, this is all we get. No glowing aura; no chest full of gold; not even a speck of pixie dust. The only explanation is that the GlowLight must have some other form of mythical power behind it.
-
-
-
-
The only two components attached to the rear panel are the microSD flap and the battery.
-
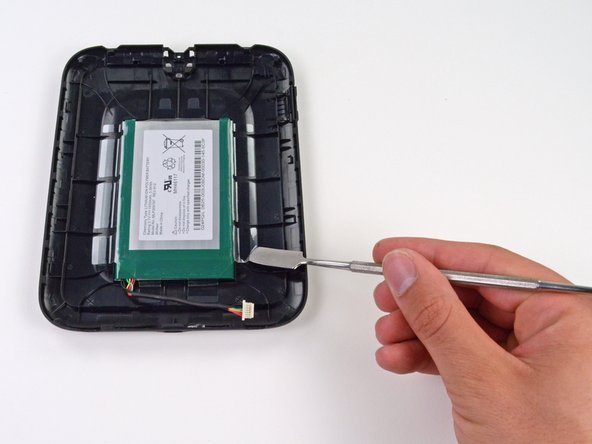
The battery is held in place by some heavy duty tape, but our metal spudger eventually unsticks it all.
-
The battery is rated at 3.7V and 1530 mAh for 5.66 Wh—a solid rating for an e-reader.
-
Barnes & Noble claims that the battery provides, at an average of one hour of reading per night, one month of usage per charge with the GlowLight on, or two with it off.
-
-
-
We remove the motherboard and are amazed as a bright aura of GlowLight magic emits from the innards of the device (aura not pictured).
-
Though the device has proven very simple to take apart, we do note that all of the components are held on with a lot of adhesive. We have not had to use a heat gun yet, but we tread carefully as we remove the heavily adhered motherboard from the frame.
-
-
-
The prominent chips on the front side of the motherboard include:
-
Texas Instruments HP4067 High Speed CMOS 16 Channel Analog Multiplexer/Demultiplexer
-
Samsung K4X2G323PC mobile 2Gb (or 256 MB) DRAM
-
Texas Instruments OMAP 3621 BCYN 800 MHz TI processor
-
Samsung KLM2G1HE3F NAND flash memory.
-
Texas Instruments TPS65921B Power Management Circuit for USB and ADC.
-
E-INK TPS65181
-
Jorjin WG7310-2A Wi-Fi module
-
-
-
On the back of the motherboard we found:
-
Empty space...hmmm...
-
Closer inspection reveals rows of emitters and receivers that make up the infrared grid touchscreen.
-
-
-
Time to remove the frame from the display assembly. Any guesses as to how it is secured?
-
If you guessed boatloads of adhesive, you were correct!
-
With the help of a spudger, we carefully pry the frame from the display assembly, nervously holding our breath at every creeeeek emitted from the loosening frame.
-
The frame is made out of magnesium, as opposed to the aluminum plate found in the non-lit Simple Touch. We verified this magnesium claim the hard way, apparently not having learned our lesson from last time.
-
After removing the frame, we are finally ready to take out the display assembly. We start by, surprisingly, removing more adhesive holding the display cable in place.
-
-
-
To separate the display assembly from the front case, we slide a plastic opening tool around its outer perimeter to release yet another full set of tape strips.
-
While we understand the timeless idea of using gobs of tape to keep things together, we are beginning to wonder if there is a conspiracy with a tape manufacturer going on here…
-
-
-
We pry the plastic display bezel from the display assembly with our plastic opening tool .
-
The bezel is secured by a layer of tape (surprising right?) and seems to be composed out of a green translucent plastic.
-
And guess what - we found something interesting inside this device! No, seriously! We'll analyze it…WITH SCIENCE!
-
-
-
It's time for another Science with iFixit!
-
Fireflies and glowsticks are one thing, but GlowLight is a different technology. The chief claim of GlowLight is that it evenly distributes the light across the whole screen.
-
Although there has been speculation as to how it actually works, the GlowLight has nothing to do with the magnesium frame inside. The interesting technology uses the display assembly itself to achieve the evenly-lit screen.
-
-
-
The display assembly contains the front glass and array of GlowLight LEDs, all fused together into one component.
-
Notice the array of eight LEDs located on top of the display assembly. These LEDs are the only light for the entire screen.
-
The glass over the E-ink screen takes the light from the eight LEDs and evenly distributes it across the screen.
-
How, you ask?
-
The glass is specially designed using a fundamental principle of optics: diffraction.
-
-
-
Light coming from the LEDs goes into the glass, which contains a diffraction grating—an optical component that has slits or grooves as part of its structure. Usually, a diffraction grating is a separate piece of an assembly, but B&N's engineers integrated it into the glass.
-
This diffraction grating bends and disperses the light throughout the screen. Barnes & Noble really did their homework on this one, because instead of a simple linear diffraction grating (think of a bunch of parallel slits), it appears that the diffraction grating varies throughout the glass to evenly disperse the light.
-
How do we know it's a diffraction grating?
-
Lasers. We took a laser and beamed it through the glass panel onto a wall. Unlike the light of the white LEDs found on the Nook, the green laser beam (which is all the same wavelength), was split into the diffraction pattern shown. If no diffraction grating was present in the screen, the laser beam would be projected as a singular dot on the wall.
-
-
-
Nook Simple Touch with GlowLight Repairability Score: 7 out of 10 (10 is easiest to repair).
-
The opening procedure was very simple, and aside from the massive amounts of adhesive, every part came free rather easily.
-
There were a total of only 12 screws (all T5 Torx), 11 of which were the same length.
-
The battery can easily be replaced by taking out one screw and one connector.
-
Every single internal component is held down by a lot of tape or glue, which may need to be reapplied upon reassembly.
-
The front glass, GlowLight LEDs, and digitizer are fused together, so breaking any of these parts will require replacement of the entire display assembly.
-


9 commentaires
Question, while you had the glowlight apart, did you happen to see what material is on the underside of the glass that is causing the " tearing / ripping" issue that is all over the internet? I was wondering if there was some sort of poorly applied screen protector?... thank you...
Great guide, no mention of the battery though, we have tries these batteries and they are really good.
Could you please name the model of display for nook simple touch with glow light?
Is it possible to find it in sale?
Is it possible to install display from nook simple touch (ED060SCE) to model with glowlight, it will work correct but without backlight, am i right?
Kermit45, I just bought a broken Nook Glowlight very cheap. It turns on, you can even turn on the light by holding the "N" button but the display is broken. I wanted to buy a new screen and repair it.
I tried the screen of my nook Simple Touch on it and it turns on and displays the boot sequence and lock screen but I can't unlock it so touch doesn't work.
I tried the screen still attached to its original aluminium frame so I guess somehow this frame interferes the infrared of the Nook Glowlight that has a different magnesium frame.
I tried the Simple Touch screen attached to the video connector but with the Glowlight mainboard still attached to the Glowlight screen and frame and I was able to touch the broken Glowlight screen to control what I was seeing in the Simple Touch screen so definitely the screen is compatible, only difference is the light. Reference of Glowlight panel is ED060SCE(LF) T1-0I. Reference of the Simple Touch Panel is simply ED060SCE(LF) T1.
I have seen ads online for the ED060SCE(LF) T1-0I panel but they don't include the light panel so it seems it is an addition of Barnes & Noble and not part of the original piece. I have also seen it for Kindle and Sony readers with light, but the light connectors are different. I still haven't found it with the light connector for the Nook Glowlight. :-(