Introduction
Utilisez ce tutoriel pour remplacer les modules de joystick gauche et droit de votre manette de jeu IINE Retro Pocket.
Ce dont vous avez besoin
-
-
-
Posez la manette sur votre surface de travail.
-
Retournez la manette de sorte que son dos soit orienté vers le haut, avec les gâchettes orientées à l'opposé de vous.
-
Avec un tournevis cruciforme #1, retirez les quatre vis noires de 7,5 mm des coins de la plaque arrière.
 Demander à FixBot
-
-
-
Utilisez la pointe d'un médiator pour séparer la plaque arrière. Commencez par le coin inférieur et faites levier vers le bas.
-
À mesure que vous progressez vers le centre, vous finirez par désengager les clips de maintien situés de chaque côté de la matrice de LED témoin.
-
Soulevez la plaque arrière vers le haut et vers vous, puis mettez-la de côté.
-
-
-
Une fois la plaque arrière retirée, vous avez accès aux composants internes de la manette.
-
-
-
-
-
Localisez le connecteur de la batterie.
-
À l'aide d'une pincette, appuyez délicatement sur les encoches du connecteur de batterie et déconnectez-le de la prise.
-
-
-
-
Localisez le connecteur ZIF du joystick droit.
-
Avec une pincette, soulevez le clapet noir du connecteur ZIF pour le déverrouiller.
-
Déconnectez la nappe du joystick en tirant délicatement dessus, bien droit, pour la sortir du connecteur.
-
-
-
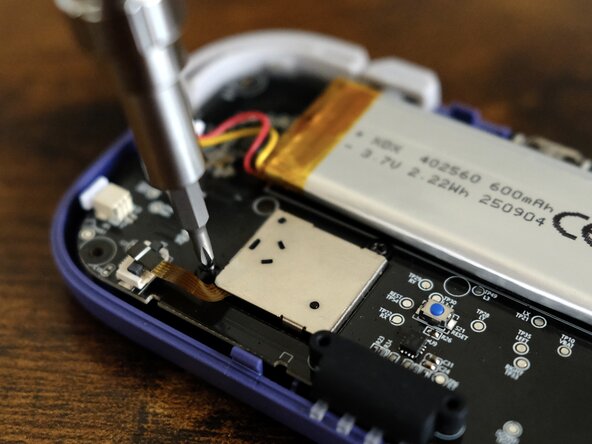
Avec un tournevis cruciforme #00, retirez les deux vis cruciformes noires de 3,5 mm qui fixent le joystick droit.
-
-
-
Soulevez le module du joystick et mettez-le de côté.
-
-
-
Localisez le connecteur ZIF du joystick gauche.
-
Avec une pincette, soulevez le clapet noir du connecteur ZIF pour le déverrouiller.
-
Déconnectez la nappe du joystick en la tirant délicatement tout droit hors du connecteur.
-
-
-
Avec un tournevis cruciforme #00, retirez les deux vis cruciformes noires de 3,5 mm qui fixent le joystick gauche.
-
-
-
Soulevez le module du joystick et mettez-le de côté.
-
-


Pour remonter votre appareil, suivez ces instructions en sens inverse.
Une fois la manette entièrement remontée, connectez-la à votre Nintendo Switch et calibrez le nouveau joystick.
Annulation : je n'ai pas terminé ce tutoriel.
2 autres ont terminé cette réparation.
Merci à ces traducteurs :
100%

Translation Bot nous aide à réparer le monde ! Vous voulez contribuer ?
Commencez à traduire ›
