
How to disassemble LCD panel.
how to take apart screen in order to replace broken LCD? Thanks!
Cette question est-elle utile ?
Indice
3

Rep: 37
![]() 2
2
![]() 1
1
how to take apart screen in order to replace broken LCD? Thanks!
Cette question est-elle utile ?

Rep: 497,4k
![]() 11
11
![]() 385
385
![]() 1,5k
1,5k
Hi,
Here’s a video that shows how to replace the screen in a Asus Zephyrus but it doesn’t state the model number but perhaps it may be similar.
Here’s a link to an Asus parts supplier that may help in finding a replacement screen if you don’t already have one.
If you select the exact model number in the #4 selection box (GA401nnn models) and then click on Display in the Categories section you will find the part numbers for the various LCD screens that may be used in the laptop.
If you then search online using the part number only in the search term there may be other suppliers that may suit you better. As it seems to be a very new release model, spare parts may be harder to get from other suppliers.
Usually the part number is shown somewhere on the back of the LCD panel if you wish to verify that you’re ordering the correct part number.
Hopefully this is of some help.
Cette réponse est-elle utile ?

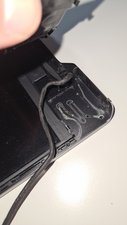
Hi ,had another problem at the same location.
After a small fall (about 30 cm's )the closing/opening arm of the screen was de-attached from the glue (yeah I couldn't believe that too but...no screws just glue ,connecting between the arm and the screen lid.)that hoding to the screen.
So I decided to open the screen up following a tutorialon youtube , glue it back(the arm) and close,finnaly i did, now everything works just fine but I really can't understand how to put the right screen cable in place so it won't pick out the cover.
I also took a reference photo from the very opening of the back cover but it looks like everything just in place.
Btw ,sry bout my english ,hope you'll understand. Thanks for helping
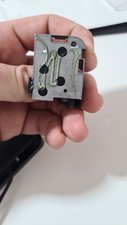
Adding some photos :
1.Reference photo after opening the back cover(putting everything back just in place after...)

#
#
#
#

#

Cette réponse est-elle utile ?
Hello. I have the same issue. What glue did you use?
Dernières 24 heures : 4
7 derniers jours : 21
30 derniers jours : 90
Total : 6,822
1 commentaire
Were you able to find a video or a guide on how to disassemble the display?
par Marco Meraz