Aller au contenu principal
Pour réparer ensemble - Je crée un compte

(Fat) Xbox 360 Hard Drive Replacement

Ce dont vous avez besoin

  1. (Fat) Xbox 360 Hard Drive Replacement, Change note: étape 1, image 1 de 2 (Fat) Xbox 360 Hard Drive Replacement, Change note: étape 1, image 2 de 2
    Outil utilisé dans cette étape :
    Essential Electronics Toolkit
    $29.95
    • Due to the EET missing several components present in the Pro Tech Go and only being $20 cheaper, the EET has been removed. The EET will work for this guide as-is, but if you are shopping for a new toolkit to complete this guide, the Pro Tech Go (new or refurbished, refurbished is ~$32 cheaper), or Pro Tech ($79 new/~$59.95 refurb) is the current recommended toolkit for this guide.

    • If you are interested in a refurbished kit stock levels change frequently but can be found here.

    Demander à FixBot

    Ajouter un commentaire

  2. (Fat) Xbox 360 Hard Drive Replacement, Remove the bottom screws: étape 2, image 1 de 3 (Fat) Xbox 360 Hard Drive Replacement, Remove the bottom screws: étape 2, image 2 de 3 (Fat) Xbox 360 Hard Drive Replacement, Remove the bottom screws: étape 2, image 3 de 3
    • EET owners: Your kit has this bit. No purchase needed.

    • Buy the drive at a cost you can afford to eat. This will void any warranties offered.

    • Remove the 3 screws from the bottom of the drive. Use a T6 Torx driver.

    • Remove the warranty seal and final screw. Use a T6 Torx driver.

    Demander à FixBot

    Ajouter un commentaire

  3. (Fat) Xbox 360 Hard Drive Replacement, Disassembly tip: étape 3, image 1 de 1
    • EET owners: Your kit has this bit. No purchase needed.

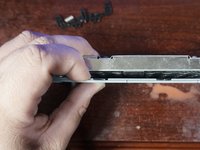
    • If the drive is difficult to open and you are opening it to put the drive into a later Xbox 360 with no intention to preserve the enclosure, a screwdriver or pry tool can help.

    • If you are opening it to replace the drive inside for an original console, it is best to use a plastic pry tool instead. While a screwdriver "works" it will likely mar the enclosure.

    Demander à FixBot

    Ajouter un commentaire

  4. (Fat) Xbox 360 Hard Drive Replacement, Open the drive: étape 4, image 1 de 3 (Fat) Xbox 360 Hard Drive Replacement, Open the drive: étape 4, image 2 de 3 (Fat) Xbox 360 Hard Drive Replacement, Open the drive: étape 4, image 3 de 3
    • EET owners: Your kit has this bit. No purchase needed.

    • If you are taking the enclosure apart for the bare drive, less caution is needed.

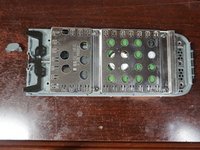
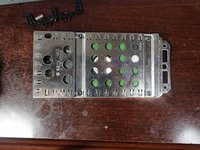
    • After removing the 4 bottom screws, remove the top cover. Remove the spring and locking tab before removing the drive cage.

    • Remove the drive cage from the drive enclosure. If the drive has never been opened, additonal force may be required.

    Demander à FixBot

    Ajouter un commentaire

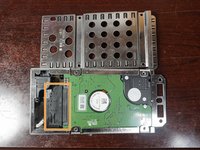
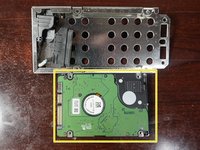
  5. (Fat) Xbox 360 Hard Drive Replacement, Disconnect and remove the hard drive: étape 5, image 1 de 3 (Fat) Xbox 360 Hard Drive Replacement, Disconnect and remove the hard drive: étape 5, image 2 de 3 (Fat) Xbox 360 Hard Drive Replacement, Disconnect and remove the hard drive: étape 5, image 3 de 3
    • EET owners: Your kit has this bit. No purchase needed.

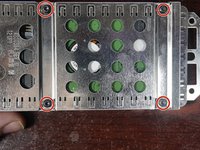
    • Remove the four T10 Torx screws securing the hard drive.

    • After removing the screws, slide the top cover off and disconnect the drive.

    • Disconnect the hard drive and remove it from the enclosure.

    Demander à FixBot

    Ajouter un commentaire

Ligne d'arrivée

Annulation : je n'ai pas terminé ce tutoriel.

11 autres ont terminé cette réparation.

Nick

Membre depuis le 11/10/09

104 969 Réputation

72 tutoriels rédigés

0 commentaires de tutoriel

Ajouter un commentaire

Nombre de vues :

Dernières 24 heures : 8

7 derniers jours : 57

30 derniers jours : 337

Total : 18,716