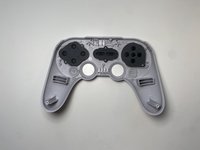
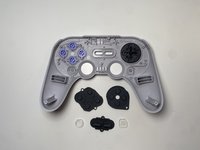
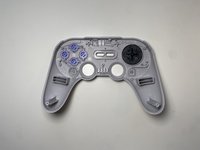
Aller au contenu principal

8BitDo SN30 Pro+ Controller Buttons Replacement

Ce dont vous avez besoin

  1. 8BitDo SN30 Pro+ Controller Buttons Replacement, Remove Battery: étape 1, image 1 de 3 8BitDo SN30 Pro+ Controller Buttons Replacement, Remove Battery: étape 1, image 2 de 3 8BitDo SN30 Pro+ Controller Buttons Replacement, Remove Battery: étape 1, image 3 de 3
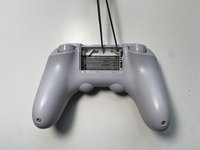
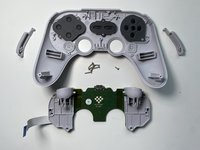
    • Place the controller face down.

    • Remove the battery cover.

    • Remove rechargeable battery or AA batteries.

  2. 8BitDo SN30 Pro+ Controller Buttons Replacement, Remove Trigger Buttons: étape 2, image 1 de 2 8BitDo SN30 Pro+ Controller Buttons Replacement, Remove Trigger Buttons: étape 2, image 2 de 2
    • Remove L2 and R2 trigger buttons by pushing them away from the grips.

  3. 8BitDo SN30 Pro+ Controller Buttons Replacement, Remove Screws: étape 3, image 1 de 2 8BitDo SN30 Pro+ Controller Buttons Replacement, Remove Screws: étape 3, image 2 de 2
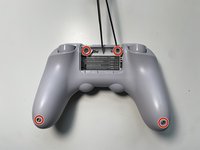
    • Use Tweezers to uncover two screws under the label in the battery compartment.

    • Use a T6 screwdriver to remove the four 7.3 mm screws securing the rear cover.

  4. 8BitDo SN30 Pro+ Controller Buttons Replacement, Unclip Covers: étape 4, image 1 de 3 8BitDo SN30 Pro+ Controller Buttons Replacement, Unclip Covers: étape 4, image 2 de 3 8BitDo SN30 Pro+ Controller Buttons Replacement, Unclip Covers: étape 4, image 3 de 3
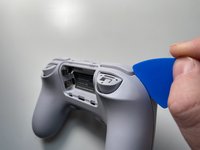
    • At the end of each grip, pry apart the covers.

    • Use fingernail or opening pick to undo the two top clips.

    • One clip next to L button.

    • One clip next to R button

    • Undo the final clip between the joysticks.

  5. 8BitDo SN30 Pro+ Controller Buttons Replacement, Separate Covers: étape 5, image 1 de 1
    • Carefully move the rear cover away and from the front cover. Place it to the left.

    • Do not completely separate. The two halves are still attached via a white ribbon cable.

  6. 8BitDo SN30 Pro+ Controller Buttons Replacement, Remove Ribbon Cable: étape 6, image 1 de 3 8BitDo SN30 Pro+ Controller Buttons Replacement, Remove Ribbon Cable: étape 6, image 2 de 3 8BitDo SN30 Pro+ Controller Buttons Replacement, Remove Ribbon Cable: étape 6, image 3 de 3
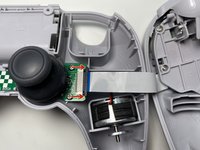
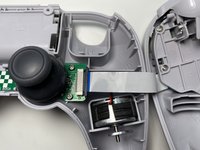
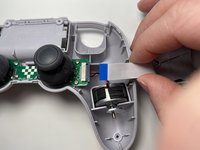
    • Unlock the ribbon cable by push open the black plastic tab.

    • The tab will slide about 1.5mm

    • Pull the ribbon cable out of the connector in the direction of the cable.

  7. 8BitDo SN30 Pro+ Controller Buttons Replacement, Remove Screws: étape 7, image 1 de 3 8BitDo SN30 Pro+ Controller Buttons Replacement, Remove Screws: étape 7, image 2 de 3 8BitDo SN30 Pro+ Controller Buttons Replacement, Remove Screws: étape 7, image 3 de 3
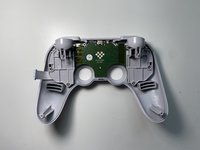
    • Use a Phillips screwdriver to remove the seven screws securing the main circuit board.

    • Six 10.1mm screws

    • One 5.8mm screws

  8. 8BitDo SN30 Pro+ Controller Buttons Replacement, Separate Main Board: étape 8, image 1 de 3 8BitDo SN30 Pro+ Controller Buttons Replacement, Separate Main Board: étape 8, image 2 de 3 8BitDo SN30 Pro+ Controller Buttons Replacement, Separate Main Board: étape 8, image 3 de 3
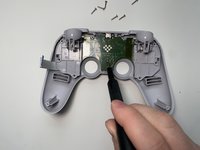
    • Slide the R buttons up and off its peg.

    • Slide the L button up and off its peg.

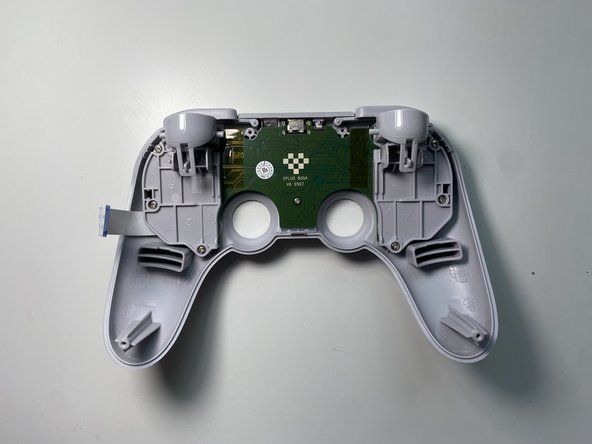
    • Remove the main board by rotating it towards the USB-C port. Then lift it out.

  9. 8BitDo SN30 Pro+ Controller Buttons Replacement, Remove Rubber Pads: étape 9, image 1 de 3 8BitDo SN30 Pro+ Controller Buttons Replacement, Remove Rubber Pads: étape 9, image 2 de 3 8BitDo SN30 Pro+ Controller Buttons Replacement, Remove Rubber Pads: étape 9, image 3 de 3
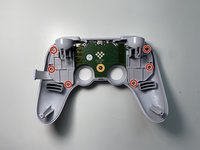
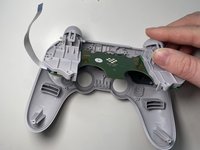
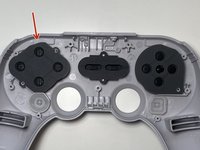
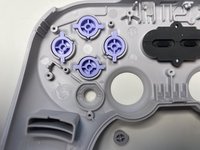
    • Use a pair of tweezers or your fingers to remove the five silicone rubber pads.

    • Three black conductive pads.

    • Two clear pads.

    • During reassembly, make sure AXBY conductive rubber has the cut out on the top.

  10. 8BitDo SN30 Pro+ Controller Buttons Replacement, Remove Buttons: étape 10, image 1 de 3 8BitDo SN30 Pro+ Controller Buttons Replacement, Remove Buttons: étape 10, image 2 de 3 8BitDo SN30 Pro+ Controller Buttons Replacement, Remove Buttons: étape 10, image 3 de 3
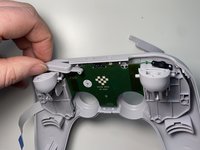
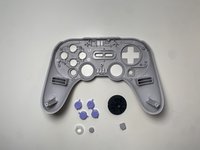
    • Use a pair of tweezers or your fingers to remove the buttons you wish to replace.

    • The Home button is two parts: the center button and the outer clear ring.

Conclusion

To reassemble your device, follow these instructions in reverse order.

7 autres ont terminé cette réparation.

Brian W

Membre depuis le 12/21/11

1 290 Réputation

8 tutoriels rédigés

3 commentaires

Hi, it looks like the buttons have little notches that limit where they can go. I was really hoping to modify it so that my a button is green and my b is red would that work if I file down that little notch?

Will Platt - Réponse

The buttons are all the same height, so feel free to file down. Those nubs are just part of assemble process.

But do leave the 2 longer stems on each side of the button, they stop it from rotating freely.

Brian W -

I just completed this guide, and it is 100% perfection. The photos are useful and clear, and explanations are on point. Many thanks.

Chris Zirker - Réponse

Ajouter un commentaire

Nombre de vues :

Dernières 24 heures : 3

7 derniers jours : 42

30 derniers jours : 148

Total : 6,913