Aller au contenu principal
Pour réparer ensemble - Je crée un compte

Acer Extensa 4420 Hard Drive Replacement

Ce dont vous avez besoin

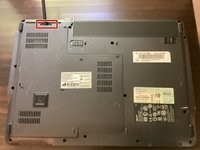
  1. Acer Extensa 4420 Hard Drive Replacement, Battery: étape 1, image 1 de 2 Acer Extensa 4420 Hard Drive Replacement, Battery: étape 1, image 2 de 2
    • First, make sure that the battery lock is turned off.

    • The battery lock makes it so the battery doesn't accidentally fall out of your computer while it is running.

    Demander à FixBot
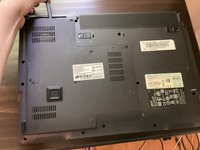
  2. Acer Extensa 4420 Hard Drive Replacement: étape 2, image 1 de 3 Acer Extensa 4420 Hard Drive Replacement: étape 2, image 2 de 3 Acer Extensa 4420 Hard Drive Replacement: étape 2, image 3 de 3
    • Then, slide the other battery lock while pulling the battery out.

    Demander à FixBot
  3. Acer Extensa 4420 Hard Drive Replacement, Back Panel: étape 3, image 1 de 1
    Outil utilisé dans cette étape :
    Phillips #00 Screwdriver
    $5.49
    • Unscrew all five screws on the back panel with a Phillips #00 screwdriver

    • The screws will stay in the back panel, so when you remove it, you don't have to worry about organizing the screws.

    Demander à FixBot
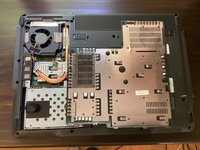
  4. Acer Extensa 4420 Hard Drive Replacement: étape 4, image 1 de 3 Acer Extensa 4420 Hard Drive Replacement: étape 4, image 2 de 3 Acer Extensa 4420 Hard Drive Replacement: étape 4, image 3 de 3
    Outil utilisé dans cette étape :
    Spudger
    $3.99
    • Take a spudger and start to pry open the back panel. Finish prying it open with your hands.

    • Be extra careful and try not to break any clips in this process.

    Demander à FixBot
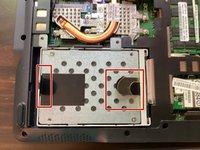
  5. Acer Extensa 4420 Hard Drive Replacement, Hard Drive: étape 5, image 1 de 1
    • Start by removing these 2 screws.

    Demander à FixBot
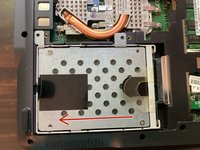
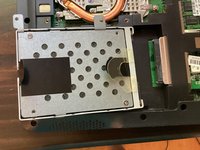
  6. Acer Extensa 4420 Hard Drive Replacement: étape 6, image 1 de 3 Acer Extensa 4420 Hard Drive Replacement: étape 6, image 2 de 3 Acer Extensa 4420 Hard Drive Replacement: étape 6, image 3 de 3
    • Then, pull one of the pull tabs left.

    • This shouldn't take too much force.

    Demander à FixBot
Conclusion

To reassemble your device, follow these instructions in reverse order.

TheMasterG

Membre depuis le 07/19/24

1 412 Réputation

12 tutoriels rédigés

0 commentaires de tutoriel

Ajouter un commentaire

Nombre de vues :

Dernières 24 heures : 0

7 derniers jours : 6

30 derniers jours : 34

Total : 153