Cette traduction a été générée automatiquement et n’a pas encore fait l’objet d’une relecture humaine. Vous parlez cette langue ? Relisez-la.
Introduction
Ce tutoriel vous donne des instructions étape par étape pour remplacer la carte mémoire de votre appareil.
Ce dont vous avez besoin
-
-
-
Faites glisser les loquets de maintien vers l'extérieur pour détacher la batterie.
 Demander à FixBot
-
-
-
-
-
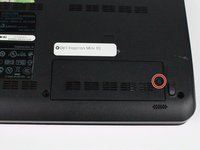
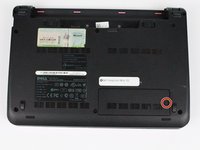
Sur la partie inférieure de l'ordinateur portable, repérez le cache amovible et la vis qui le fixe au châssis. Desserrez la vis et retirez le cache.
-
-
Outil utilisé dans cette étape :Tweezers$4.99
-
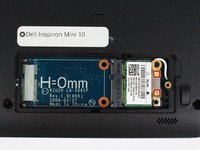
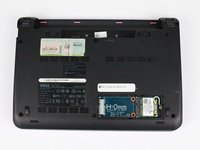
Retirez le câble d'antenne noir et blanc de l'adaptateur Wi-Fi en pinçant les contacts dorés avec le bout des doigts, ou avec une pincette, et tirez-les bien droit pour les détacher de l'adaptateur.
-
Dévissez l'unique vis cruciforme de 5 mm située en haut à droite de l'adaptateur. L'adaptateur devrait commencer à s'incliner par rapport au châssis de l'ordinateur. Une fois la vis complètement retirée, sortez l'adaptateur du logement de données.
-
-
-
-
-
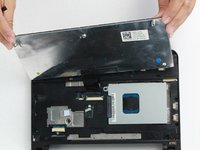
À l'aide d'un outil de levier, décollez délicatement le repose-poignets de son support. Commencez par un côté et progressez lentement sur tout le pourtour.
-
-
-
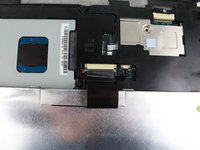
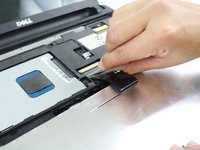
Retirez délicatement la nappe du pavé tactile du support de repose-poignets.
-
Soulevez le reste du repose-poignets pour le séparer de la base de l'ordinateur.
-
-
-
-
-
-
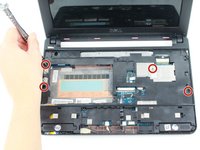
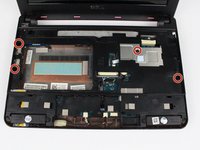
Retirez les trois vis Phillips 0 de 8 mm qui fixent le clavier.
-
-
-
Retournez l'appareil et ouvrez l'écran.
-
Détachez délicatement le clavier avec l'outil pour ouvrir, en travaillant sous les bords pour détacher les clips.
-
-
-
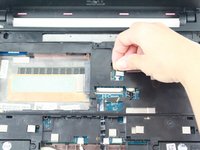
Poussez les clips de chaque côté de la nappe pour la détacher.
-
Déconnectez délicatement la nappe en tirant sur la languette d'extraction transparente.
-
Retirez le clavier.
-
-
-
-
-
Fermez l'appareil et retournez-le.
-
Retirez les cinq vis cruciformes de 8 mm.
-
-
-
Retournez l'appareil et ouvrez l'écran.
-
Retirez l'unique vis cruciforme de 8 mm qui fixe la cage du disque dur au châssis de l'appareil.
-
-
-
Tirez sur la languette d'extraction noire et faites glisser le support du disque dur vers le port USB situé sur le côté gauche de l'appareil jusqu'à ce qu'il se libère, puis sortez-le délicatement de l'appareil.
-
-
-
Retirez les quatre vis cruciformes Philips 0 de 6 mm qui fixent le support.
-
-
-
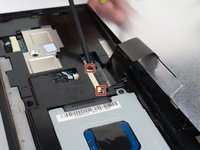
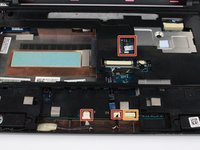
Déconnectez les éléments suivants :
-
Nappe du bouton de marche
-
Nappe du haut-parleur
-
Nappe du témoin de marche
-
Nappe Bluetooth (si installée)
-
-
-
-
-
Retirez les éléments suivants :
-
Deux vis cruciformes de 4 mm fixant la carte mère
-
Câble de l'adaptateur secteur
-
Connecteur du câble USB et de carte SIM
-
Connecteur du câble d'affichage
-
Soulevez délicatement la carte mère pour l'extraire.
-
-
-
-
-
Retournez la carte mère.
-
Poussez les clips situés de chaque côté de la carte mémoire jusqu’à ce qu’elle se soulève.
-
Retirez la carte mémoire.
-
-










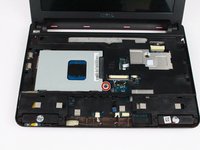
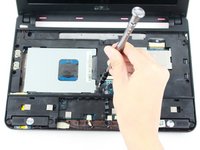


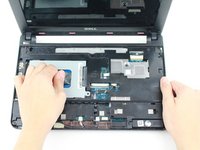
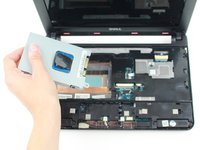




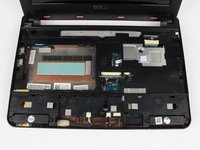


Pour remonter votre appareil, suivez ces instructions en sens inverse.
Annulation : je n'ai pas terminé ce tutoriel.
3 autres ont terminé cette réparation.

Équipe

UW Tacoma, Team 1-4, Rose Fall 2016 Membre de l'équipe UW Tacoma, Team 1-4, Rose Fall 2016
UWT-ROSE-F16S1G4
4 membres
120 tutoriels rédigés
4 commentaires de tutoriel
It is possible to upgrade the memory by simply (!) cutting aq hole in the bottom of the computer case. I used the pictures and Vulcan logic to determine the location and dimensions of the required hole. I used a vibrating saw to cut the hole. You need to be careful not to cut too deep. Once you have a square panel cut out, you need to snip through the copper shield covering the memory card. Then it is a simple in and out replacement. I used a leftover 2 Gig memory card from my MacBook Pro.
Mucheasier than taking out all those screws and connectors!
Here’s an easier-but riskier- technique. Cut a rectangular hole in the bottom of your Mini 10V. I did it and it worked. Needles to say, you must be careful not to cut too deep! Measure in from the left side (computer shut, upside down and the empty battery compartment away from you) 3/4 inch, and 4.5 inch (from the edge. the lines you draw will be 3.75 inches apart. measure up from the keyboard edge 2.5 inches and 4.75 inches and draw horizontal lines. The ‘box’ you drew is your cutting template. Once inside you need to cut a copper shield to get to the memory card. From that point on it’s easy. I used the 2 gig memory card from my MacBook Pro. When you’re done, glue the panel you cut out back in place and reinsert battery and you’re ready to go. (For cutting the hole, I used a vibrating multi tool with a saw blade)
Disclaimer: Your mileage may vary. If you brick your Mini 10V, you can buy another on Ebay for ~$75.
Good Luck.
Excellent step-by-step graphical explanation makes it look easy by following the instructions congratulations.
Not all Mini 10's have upgradable RAM. When I tore mine down, I found there was nothing of interest on the back of the board where the guide says there's a SODIMM slot. Then again, my board seems to be quite different from the one used in this guide: my wireless module was not accessible from the outside but was found underneath the keyboard; my board did not extend all the way to the SD card slot, as that was a separate board connected to the main board by a ribbon cable; and what looked to be a heatsink covering a SODIMM slot turned out to be a daughter board containing the CPU and the RAM together. Mind you, this guide served its purpose in getting my netbook torn all the way down; it simply didn't serve its final intention. The model number for my Mini 10 is PP19S, which happens to have a very colorful shell on the top. If your model number matches mine, save yourself the trouble: the RAM cannot be upgraded conventionally. Then again, if you're comfortable installing surface-mount RAM... :p
