Introduction
Votre batterie a des problèmes et doit être remplacée ? Ce tutoriel vous guidera à travers les étapes nécessaires pour installer une nouvelle batterie dans votre Nintendo 3DS XL en un rien de temps !
Ce dont vous avez besoin
-
-
Desserrez les deux vis cruciformes #00 de 4,2 mm de long situées en haut de la coque arrière.
-
-
-
-
Tenez l'appareil de manière à ce que la coque soit orienté vers le haut.
-
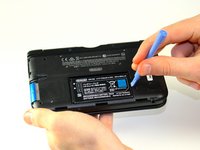
À l'aide d'un outil d'ouverture en plastique, soulevez la coque en commençant par le coin supérieur droit.
-
Tenez le bord de la coque pour vous assurer qu'il ne se remet pas en place.
-
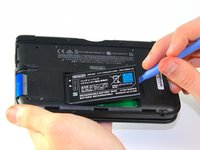
Recherchez la petite section sous le compartiment du stylet. Retirez la coque à ce stade si elle est toujours attachée.
-
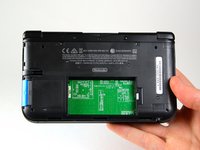
Retirez la coque de l'appareil et mettez-la de côté.
-


Pour remonter votre appareil, suivez ces instructions dans l'ordre inverse.
Pour remonter votre appareil, suivez ces instructions dans l'ordre inverse.
Annulation : je n'ai pas terminé ce tutoriel.
52 autres ont terminé cette réparation.
Merci à ces traducteurs :
100%


Ces traducteurs nous aident réparer le monde ! Vous voulez contribuer ?
Commencez à traduire ›



Équipe

Cal Poly, Team 9-13, Regan Spring 2014 Membre de l'équipe Cal Poly, Team 9-13, Regan Spring 2014
CPSU-REGAN-S14S9G13
5 membres
44 tutoriels rédigés
6 commentaires
Time estimate: 3 - 9 hours Difficulty: Very difficult ??????
More like 30-90 seconds, and that's if you have to search for a screwdriver.
It should be noted that the bottom three clips on the bottom of the backplate can’t just be snapped in, they need to be slipped in, so when removing the backplate, it should be tiled away from the system and then pulled up from the bottom, and those three clips on the bottom should be the first clips in when you’re putting it back together, sliding them in with the backplate at an angle, and then the rest of the clips just snap in.
Nice tip. Ty.
Just did this. For reasmbly I recommend putting the bottom/lower part of the case on first before you screw it back on.
