Aller au contenu principal
Pour réparer ensemble - Je crée un compte

DJI Phantom 3 Advanced Flight Controller Replacement

Ce dont vous avez besoin

    1. DJI Phantom 3 Advanced Flight Controller Replacement, Battery: étape 1, image 1 de 2 DJI Phantom 3 Advanced Flight Controller Replacement, Battery: étape 1, image 2 de 2
      • With the battery facing you, locate the two tabs on the top and bottom of the battery as shown.

      • Remember to disarm and power down your quadcopter before beginning any disassembly.

      Demander à FixBot

      Ajouter un commentaire

    2. DJI Phantom 3 Advanced Flight Controller Replacement: étape 2, image 1 de 2 DJI Phantom 3 Advanced Flight Controller Replacement: étape 2, image 2 de 2
      • Press the two tabs with your finger and thumb, and gently slide the battery towards you, out of the quadcopter frame.

      • With your other hand, be sure to hold the quadcopter steady to ensure that it stays still.

      Demander à FixBot

      Ajouter un commentaire

    1. DJI Phantom 3 Advanced Flight Controller Replacement, Cover: étape 3, image 1 de 1
      • Turn the Phantom 3 Advanced upside down.

      Demander à FixBot

      Ajouter un commentaire

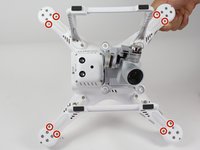
    2. DJI Phantom 3 Advanced Flight Controller Replacement: étape 4, image 1 de 1
      • Remove the four 7mm long 2mm screws with a T-6 screwdriver.

      • There is one screw per arm, located at the tip of the arm.

      Demander à FixBot

      Ajouter un commentaire

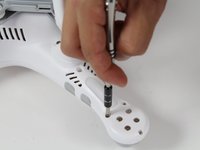
    3. DJI Phantom 3 Advanced Flight Controller Replacement: étape 5, image 1 de 2 DJI Phantom 3 Advanced Flight Controller Replacement: étape 5, image 2 de 2
      • Remove the eight 5mm long 2.5mm screws using the T-8 screwdriver.

      • There are two 5mm screws on each arm.

      Demander à FixBot

      Ajouter un commentaire

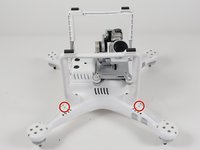
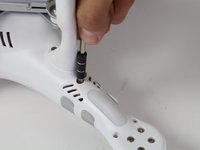
    4. DJI Phantom 3 Advanced Flight Controller Replacement: étape 6, image 1 de 2 DJI Phantom 3 Advanced Flight Controller Replacement: étape 6, image 2 de 2
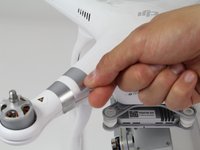
      • Remove the four 10mm long deep 3mm screws using the T-8 screwdriver.

      • There is one screw on each arm located near the landing gear.

      Demander à FixBot

      Ajouter un commentaire

    5. DJI Phantom 3 Advanced Flight Controller Replacement: étape 7, image 1 de 3 DJI Phantom 3 Advanced Flight Controller Replacement: étape 7, image 2 de 3 DJI Phantom 3 Advanced Flight Controller Replacement: étape 7, image 3 de 3
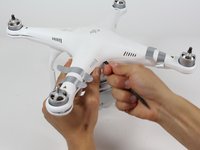
      • Carefully flip the phantom back over with the motors facing up.

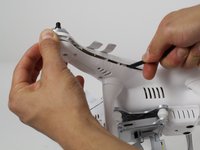
      • Peel back the silver stickers from the seam in the cover.

      • Using a plastic spudger, slowly separate the two halves of the plastic shell.

      • This step requires some force, and the plastic will click loudly as the shell separates.

      • Do not fully remove the cover. There is a wire that needs to be detached from the control board before the cover is completely free.

      Demander à FixBot

      Ajouter un commentaire

    6. DJI Phantom 3 Advanced Flight Controller Replacement: étape 8, image 1 de 3 DJI Phantom 3 Advanced Flight Controller Replacement: étape 8, image 2 de 3 DJI Phantom 3 Advanced Flight Controller Replacement: étape 8, image 3 de 3
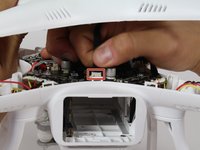
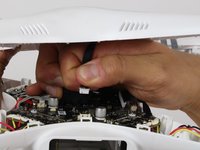
      • Slowly remove the upper half of the plastic case about halfway. There is a ribbon cable that's connects the cover and the control board.

      • Follow the ribbon cable to the control board and locate the connector that connects the cable to the control board.

      • Press the tab on the side of the connector and pull up on the cable.

      • Continue to remove the shell the rest of the way.

      Demander à FixBot

      Ajouter un commentaire

    1. DJI Phantom 3 Advanced Flight Controller Replacement, Flight Controller: étape 9, image 1 de 1
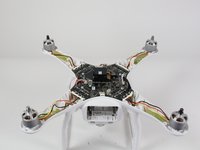
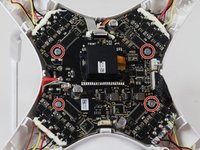
      • Locate the five ribbon cables that need to be disconnected from the control board.

      • Locate the red and black battery wires.

      • Follow the three wires from each motor and the three wires from each LED to where they connect on the control board.

      Demander à FixBot

      Ajouter un commentaire

    2. DJI Phantom 3 Advanced Flight Controller Replacement: étape 10, image 1 de 3 DJI Phantom 3 Advanced Flight Controller Replacement: étape 10, image 2 de 3 DJI Phantom 3 Advanced Flight Controller Replacement: étape 10, image 3 de 3
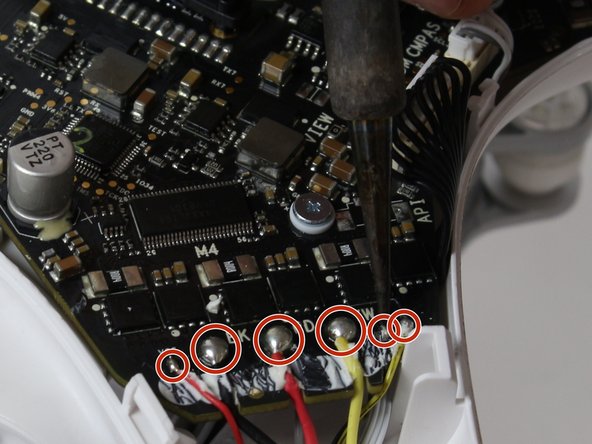
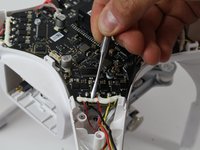
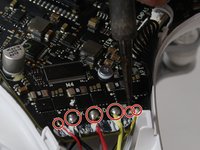
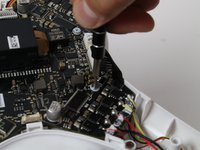
      • Use a plastic opening tool to remove the glue that covers the motor and LED wires. Use a metal opening tool if necessary.

      • Desolder the six motor and LED wires where they connect on the flight controller for each arm. Refer to the Desoldering Guide on how to desolder.

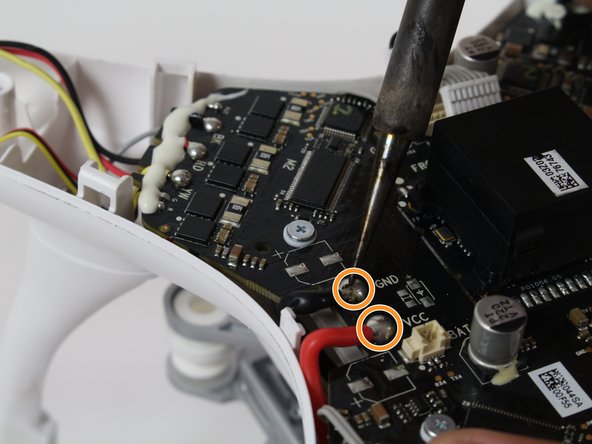
      • Desolder the battery wires.

      Demander à FixBot

      Ajouter un commentaire

    3. DJI Phantom 3 Advanced Flight Controller Replacement: étape 11, image 1 de 2 DJI Phantom 3 Advanced Flight Controller Replacement: étape 11, image 2 de 2
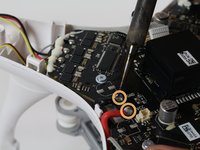
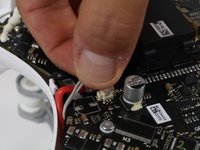
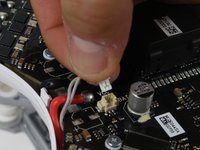
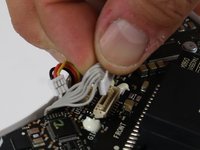
      • Remove the cable next to where the battery wires were connected. Pinch and hold the top of the connector, then pull it out.

      Demander à FixBot

      Ajouter un commentaire

    4. DJI Phantom 3 Advanced Flight Controller Replacement: étape 12, image 1 de 3 DJI Phantom 3 Advanced Flight Controller Replacement: étape 12, image 2 de 3 DJI Phantom 3 Advanced Flight Controller Replacement: étape 12, image 3 de 3
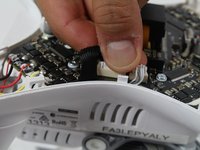
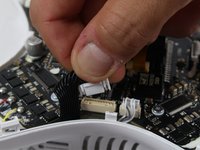
      • Remove the black ribbon cable and the 3-wire cable next to it. Press the small tab on the ribbon cable connector and pull it out.

      Demander à FixBot

      Ajouter un commentaire

    5. DJI Phantom 3 Advanced Flight Controller Replacement: étape 13, image 1 de 3 DJI Phantom 3 Advanced Flight Controller Replacement: étape 13, image 2 de 3 DJI Phantom 3 Advanced Flight Controller Replacement: étape 13, image 3 de 3
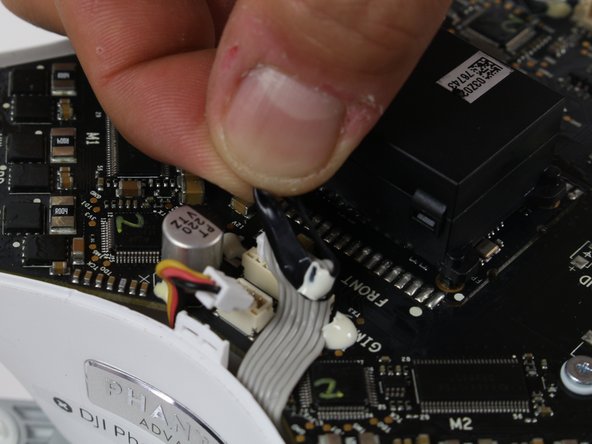
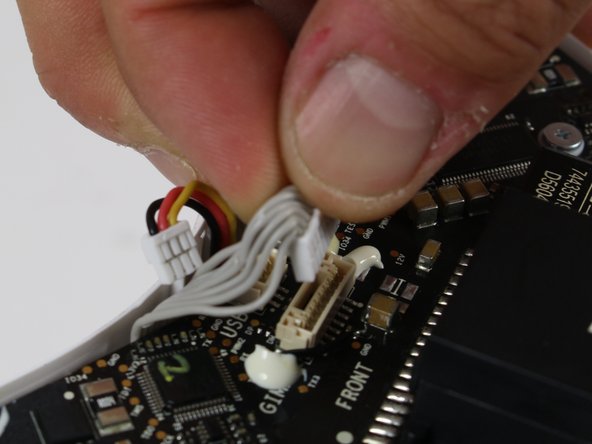
      • Locate the ribbon cable that is next to the word "Front" on the flight controller.

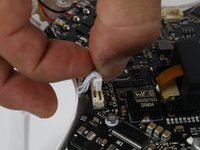
      • Remove the small cable next to the ribbon cable by pinching on the side tab and pulling up on the connector. It has black, red and yellow wires.

      • Remove the black band from the ribbon cable.

      • Remove the ribbon cable by pinching on the side tab and pulling up on the connector.

      Demander à FixBot

      Ajouter un commentaire

    6. DJI Phantom 3 Advanced Flight Controller Replacement: étape 14, image 1 de 2 DJI Phantom 3 Advanced Flight Controller Replacement: étape 14, image 2 de 2
      • Remove the four 6.5mm long 2mm screws with a philips head 00 screwdriver.

      • Remove the flight controller now by slowly pulling if off of the frame.

      Demander à FixBot

      Ajouter un commentaire

Conclusion

To reassemble your device, follow these instructions in reverse order.

Annulation : je n'ai pas terminé ce tutoriel.

11 autres ont terminé cette réparation.

Robert Comstock

Membre depuis le 10/06/16

436 Réputation

2 tutoriels rédigés

Équipe

Cal Poly, Team 10-2, Livingston Fall 2016 Membre de l'équipe Cal Poly, Team 10-2, Livingston Fall 2016

CPSU-LIVINGSTON-F16S10G2

3 membres

12 tutoriels rédigés

2 commentaires de tutoriel

Very clear and helpful. Thank You.

Herb - Réponse Partager

Excellent with great visuals. Can really see what to do

Leo Miller - Réponse Partager

Ajouter un commentaire

Nombre de vues :

Dernières 24 heures : 0

7 derniers jours : 12

30 derniers jours : 53

Total : 8,139