Aller au contenu principal
Pour réparer ensemble - Je crée un compte

Dell Inspiron 13-7352 Memory Module (RAM) Replacement

Ce dont vous avez besoin

    1. Dell Inspiron 13-7352 Memory Module (RAM) Replacement, Battery: étape 1, image 1 de 3 Dell Inspiron 13-7352 Memory Module (RAM) Replacement, Battery: étape 1, image 2 de 3 Dell Inspiron 13-7352 Memory Module (RAM) Replacement, Battery: étape 1, image 3 de 3
      • Before you begin, be sure to turn off your laptop and unplug it from the outlet.

      • Use a Phillips screwdriver to remove the ten 7.5mm screws that securing the back panel.

      • Use the plastic opening tool to pry up and loosen the back panel.

      • Remove the back panel.

      Demander à FixBot

      Ajouter un commentaire

    2. Dell Inspiron 13-7352 Memory Module (RAM) Replacement: étape 2, image 1 de 2 Dell Inspiron 13-7352 Memory Module (RAM) Replacement: étape 2, image 2 de 2
      • Use a Phillips screwdriver to remove the two 3 mm screws securing the battery.

      • Unclip the hard drive wire from the battery.

      Demander à FixBot

      Ajouter un commentaire

    3. Dell Inspiron 13-7352 Memory Module (RAM) Replacement: étape 3, image 1 de 1
      • Gently remove the battery from the rest of the device.

      Demander à FixBot

      Ajouter un commentaire

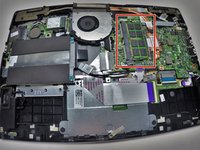
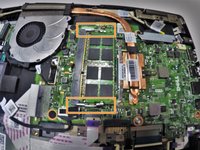
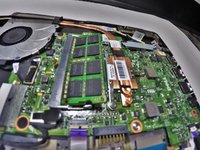
    1. Dell Inspiron 13-7352 Memory Module (RAM) Replacement, Memory Module (RAM): étape 4, image 1 de 3 Dell Inspiron 13-7352 Memory Module (RAM) Replacement, Memory Module (RAM): étape 4, image 2 de 3 Dell Inspiron 13-7352 Memory Module (RAM) Replacement, Memory Module (RAM): étape 4, image 3 de 3
      • Locate your memory module (RAM).

      • Release the clips from the Memory Module by gently pushing down. This should cause the Memory Module to pop up and separate from the device base.

      Demander à FixBot

      Ajouter un commentaire

    2. Dell Inspiron 13-7352 Memory Module (RAM) Replacement: étape 5, image 1 de 1
      • Pull the Memory Module from its slot by grasping each side with thumb and middle or index finger to pull from the rest of the device.

      Demander à FixBot

      Ajouter un commentaire

Conclusion

To reassemble your device, follow these instructions in reverse order.

Annulation : je n'ai pas terminé ce tutoriel.

4 autres ont terminé cette réparation.

Chase Sparkman

Membre depuis le 09/30/15

512 Réputation

2 tutoriels rédigés

Équipe

University of Tampa, Team 1-5, Whiteside Fall 2015 Membre de l'équipe University of Tampa, Team 1-5, Whiteside Fall 2015

UT-WHITESIDE-F15S1G5

3 membres

18 tutoriels rédigés

4 commentaires de tutoriel

Hello is the procedure same for 7353 ? can the ram be upgraded to 16GB. it currently has 8GB

Ali M - Réponse Partager

Hi! Same questions as Ali M: Is the procedure same for 7353 ? can the ram be upgraded to 16GB: It currently has 8GB and I'd like to upgrade it to 16 GB.

Roberto de Souza Santos - Réponse Partager

Did anyone ever get an answer if it can take 16 GB of RAM?

Robert Iversen - Réponse Partager

A 16GB RAM would work but it should be a single sodimm module like CT204864BF160B

Hochan Son - Réponse Partager

Ajouter un commentaire

Nombre de vues :

Dernières 24 heures : 0

7 derniers jours : 8

30 derniers jours : 30

Total : 3,705