Introduction
This guide has been updated by iFixit staff! Read the new, official guide here.
A guide on how to disassemble the bottom case assembly, including removing the LCD and buttons.
Ce dont vous avez besoin
-
Étape 1 Battery
Attention : les étapes 1 à 2 sont issues d'un tutoriel marqué comme étant en cours.
-
Loosen the two screws on the battery panel. Then lift the panel up to remove it.
 Demander à FixBot
-
-
-
L Button.
-
Top of the battery pack.
-
To remove the battery pack, place your fingernail or a spudger at the top of the battery near the L button. Gently lift the battery out.
-
-
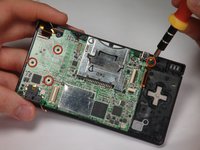
Étape 3 Motherboard
Attention : les étapes 3 à 4 sont issues d'un tutoriel marqué comme étant en cours.
-
Remove 4 Phillips screws from the board.
-
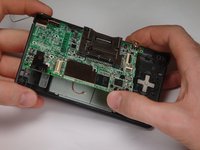
Lift the main board from the bottom end and flip it over to reveal the last connector.
-
-
-
-
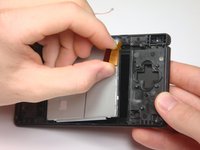
Disconnect the ribbon cable by gently using a plastic opening tool to flip up the black connector latch. The cable should easily slide out from the connector.
-
The motherboard should now be free from the rest of the device.
-
-
-
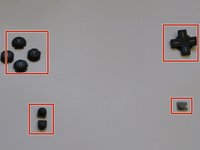
A/B/X/Y button assembly
-
Select/Start button assembly
-
D-pad
-
Power button
-
-
-
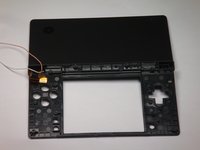
Flip the case open, and push the lower screen assembly out of the frame.
-


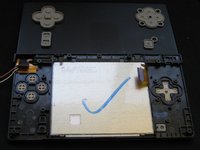


To reassemble your device, follow these instructions in reverse order.
Annulation : je n'ai pas terminé ce tutoriel.
Une autre personne a terminé cette réparation.
Équipe

Cal Poly, Team 6-1, Maness Fall 2009 Membre de l'équipe Cal Poly, Team 6-1, Maness Fall 2009
CPSU-MANESS-F09S6G1
5 membres
4 tutoriels rédigés