Aller au contenu principal
Pour réparer ensemble - Je crée un compte

Garmin Vivoactive Side Button Replacement

Ce dont vous avez besoin

  1. Garmin Vivoactive Side Button Replacement, Wristband: étape 1, image 1 de 1
    • Hold the the metal screwdriver, with a T5 Torx bit, in your dominant hand.

    • Hold the rubber screwdriver, with a Hex T6 Torx bit, in your other hand.

    • While holding the rubber screwdriver in place, simultaneously unscrew the pin (counterclockwise) with the metal screwdriver in your dominant hand.

    Demander à FixBot

    Ajouter un commentaire

  2. Garmin Vivoactive Side Button Replacement: étape 2, image 1 de 2 Garmin Vivoactive Side Button Replacement: étape 2, image 2 de 2
    • Once the 1mm screw is removed, reinsert the metal screwdriver in that same hole.

    • Gently push the strap's pin out. It will begin to protrude from the other end.

    • Use your fingers to grab the exposed pin and slide it free. The strap should now be disconnected from the device.

    Demander à FixBot

    Ajouter un commentaire

  3. Garmin Vivoactive Side Button Replacement, Display Unit: étape 3, image 1 de 1
    • Place a heated iOpener over the display to loosen the adhesive.

    • After about a minute, the iOpener may be removed.

    • For more in depth instructions on using the iOpener, refer to the iOpener guide.

    Demander à FixBot

    Ajouter un commentaire

  4. Garmin Vivoactive Side Button Replacement: étape 4, image 1 de 2 Garmin Vivoactive Side Button Replacement: étape 4, image 2 de 2
    • Place the blue plastic opening tool in-between the screen and plastic casing of the watch and slowly pry up one side of the screen.

    Demander à FixBot

    Ajouter un commentaire

  5. Garmin Vivoactive Side Button Replacement: étape 5, image 1 de 1
    • Once the first side has come free, wedge the blue pick in between the screen and watch unit on that side.

    • Complete one pass around the perimeter of the screen to break the adhesive bond on all four sides.

    • Insert it a minimal distance to avoid damaging internal components.

    Demander à FixBot

    Ajouter un commentaire

  6. Garmin Vivoactive Side Button Replacement: étape 6, image 1 de 1
    • Use the blue plastic opening tool to pry up the side of the glass. Raise it to a point where your fingernail can fit in the gap.

    • Do the same on the opposite side of the device until you have a good grip of the screen.

    Demander à FixBot

    Ajouter un commentaire

  7. Garmin Vivoactive Side Button Replacement: étape 7, image 1 de 1
    • Obtain a careful grip of the screen from two of its sides.

    • Slowly lift the screen off of the case. Separate it just enough so as not to damage the connection to the motherboard.

    Demander à FixBot

    Ajouter un commentaire

  8. Garmin Vivoactive Side Button Replacement: étape 8, image 1 de 1
    • Detach the orange tab that connects the screen to the motherboard with a gentle uplift using a plastic opening tool.

    • Upon completing this step, the screen should be free from the rest of the device.

    Demander à FixBot

    Ajouter un commentaire

  9. Garmin Vivoactive Side Button Replacement, Battery: étape 9, image 1 de 2 Garmin Vivoactive Side Button Replacement, Battery: étape 9, image 2 de 2
    • Follow previous guides until you've exposed the battery as shown.

    • Begin by removing the battery connector tab.

    • Be sure not to use a metal implement or your fingers to remove this tab. Doing so may cause personal harm or damage to the electrical components.

    Demander à FixBot

    Ajouter un commentaire

  10. Garmin Vivoactive Side Button Replacement: étape 10, image 1 de 2 Garmin Vivoactive Side Button Replacement: étape 10, image 2 de 2
    • Use a plastic opening pick to gently pry out the battery as shown.

    • The battery is Lithium Polymer, follow safe handling procedures and DO NOT deform it upon removal.

    Demander à FixBot

    Ajouter un commentaire

  11. Garmin Vivoactive Side Button Replacement: étape 11, image 1 de 3 Garmin Vivoactive Side Button Replacement: étape 11, image 2 de 3 Garmin Vivoactive Side Button Replacement: étape 11, image 3 de 3
    • With the battery loose from the case, rotate it to expose the attached tab

    • Gently pry up the attached tab with a fingernail.

    • Keep the vibrator, circled in red, as you may need to solder it to the new battery upon re-installation later.

    Demander à FixBot

    Ajouter un commentaire

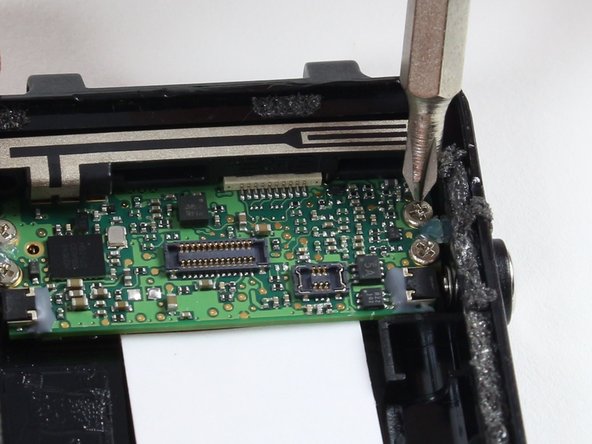
  12. Garmin Vivoactive Side Button Replacement, Motherboard: étape 12, image 1 de 2 Garmin Vivoactive Side Button Replacement, Motherboard: étape 12, image 2 de 2
    • Remove the four 2.4 mm screws with a PH00 Phillips head screwdriver.

    • Make an effort not to damage any nearby components of the motherboard with the screwdriver.

    Demander à FixBot

    Ajouter un commentaire

  13. Garmin Vivoactive Side Button Replacement: étape 13, image 1 de 2 Garmin Vivoactive Side Button Replacement: étape 13, image 2 de 2
    • Use the spudger to pry up the board from the case.

    • Insert the spudger a minimum distance beneath the board as there are components below.

    • Wiggle the exposed side of the board from each end until it comes free.

    • Use proper electrostatic discharge safety when removing and handling the board.

    Demander à FixBot

    Ajouter un commentaire

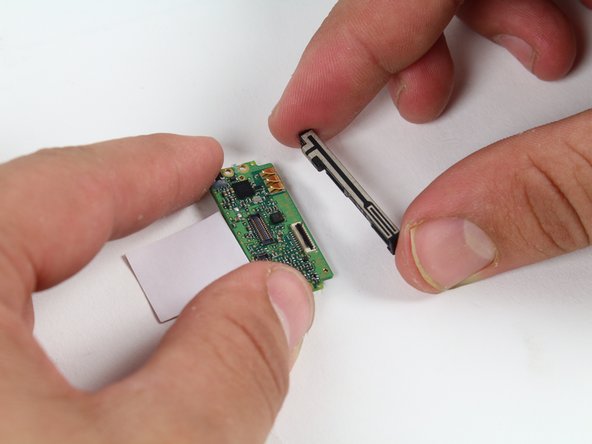
  14. Garmin Vivoactive Side Button Replacement: étape 14, image 1 de 2 Garmin Vivoactive Side Button Replacement: étape 14, image 2 de 2
    • Remove the GPS antenna by sliding it away from the board.

    • Keep track of the antenna and add it to the new board upon replacement.

    Demander à FixBot

    Ajouter un commentaire

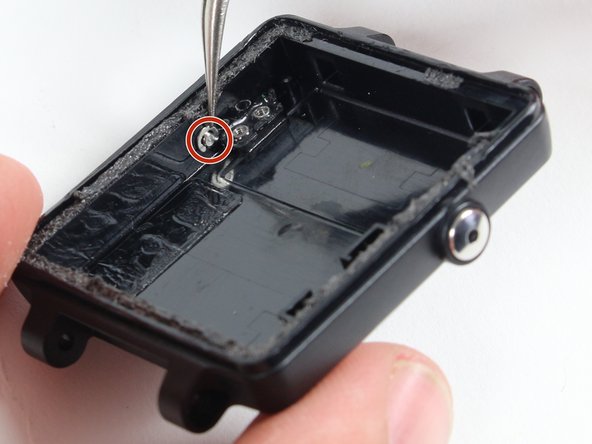
  15. Garmin Vivoactive Side Button Replacement, Side Button: étape 15, image 1 de 3 Garmin Vivoactive Side Button Replacement, Side Button: étape 15, image 2 de 3 Garmin Vivoactive Side Button Replacement, Side Button: étape 15, image 3 de 3
    Outil utilisé dans cette étape :
    Tweezers
    $4.99
    • Orient the crescent shaped retaining clip so the open section faces the bottom of the device.

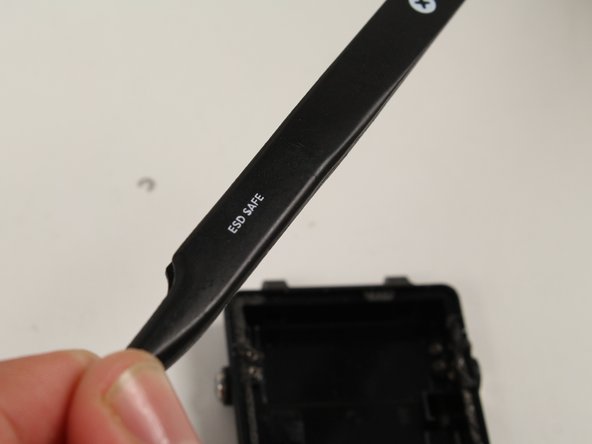
    • Remove the retaining clip by pulling up away from the device with the precision tweezers.

    • Be careful, the tweezers are quite sharp!

    Demander à FixBot

    Ajouter un commentaire

  16. Garmin Vivoactive Side Button Replacement: étape 16, image 1 de 2 Garmin Vivoactive Side Button Replacement: étape 16, image 2 de 2
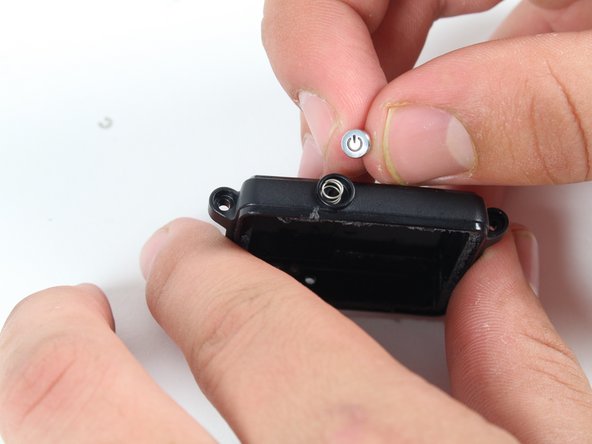
    • After the retaining clip is removed, the spring and button will pop out.

    • With these very small components free from your device, take care not to lose them.

    • The spring is slightly compressed, so the button may pop out once the clip is removed.

    Demander à FixBot

    Ajouter un commentaire

Conclusion

To reassemble your device, follow these instructions in reverse order.

Annulation : je n'ai pas terminé ce tutoriel.

Tessa Gunnin

Membre depuis le 10/01/15

466 Réputation

2 tutoriels rédigés

Équipe

Cal Poly, Team 1-21, Maness Fall 2015 Membre de l'équipe Cal Poly, Team 1-21, Maness Fall 2015

CPSU-MANESS-F15S1G21

4 membres

17 tutoriels rédigés

1 commentaire de tutoriel

But where can I get a replacement button?????

Steven Bentley - Réponse Partager

Ajouter un commentaire

Nombre de vues :

Dernières 24 heures : 0

7 derniers jours : 2

30 derniers jours : 32

Total : 6,070